King_Norb
Sewing/Crocheting/Photography
Free Crochet Patterns
Kuromi Bonnet Pattern
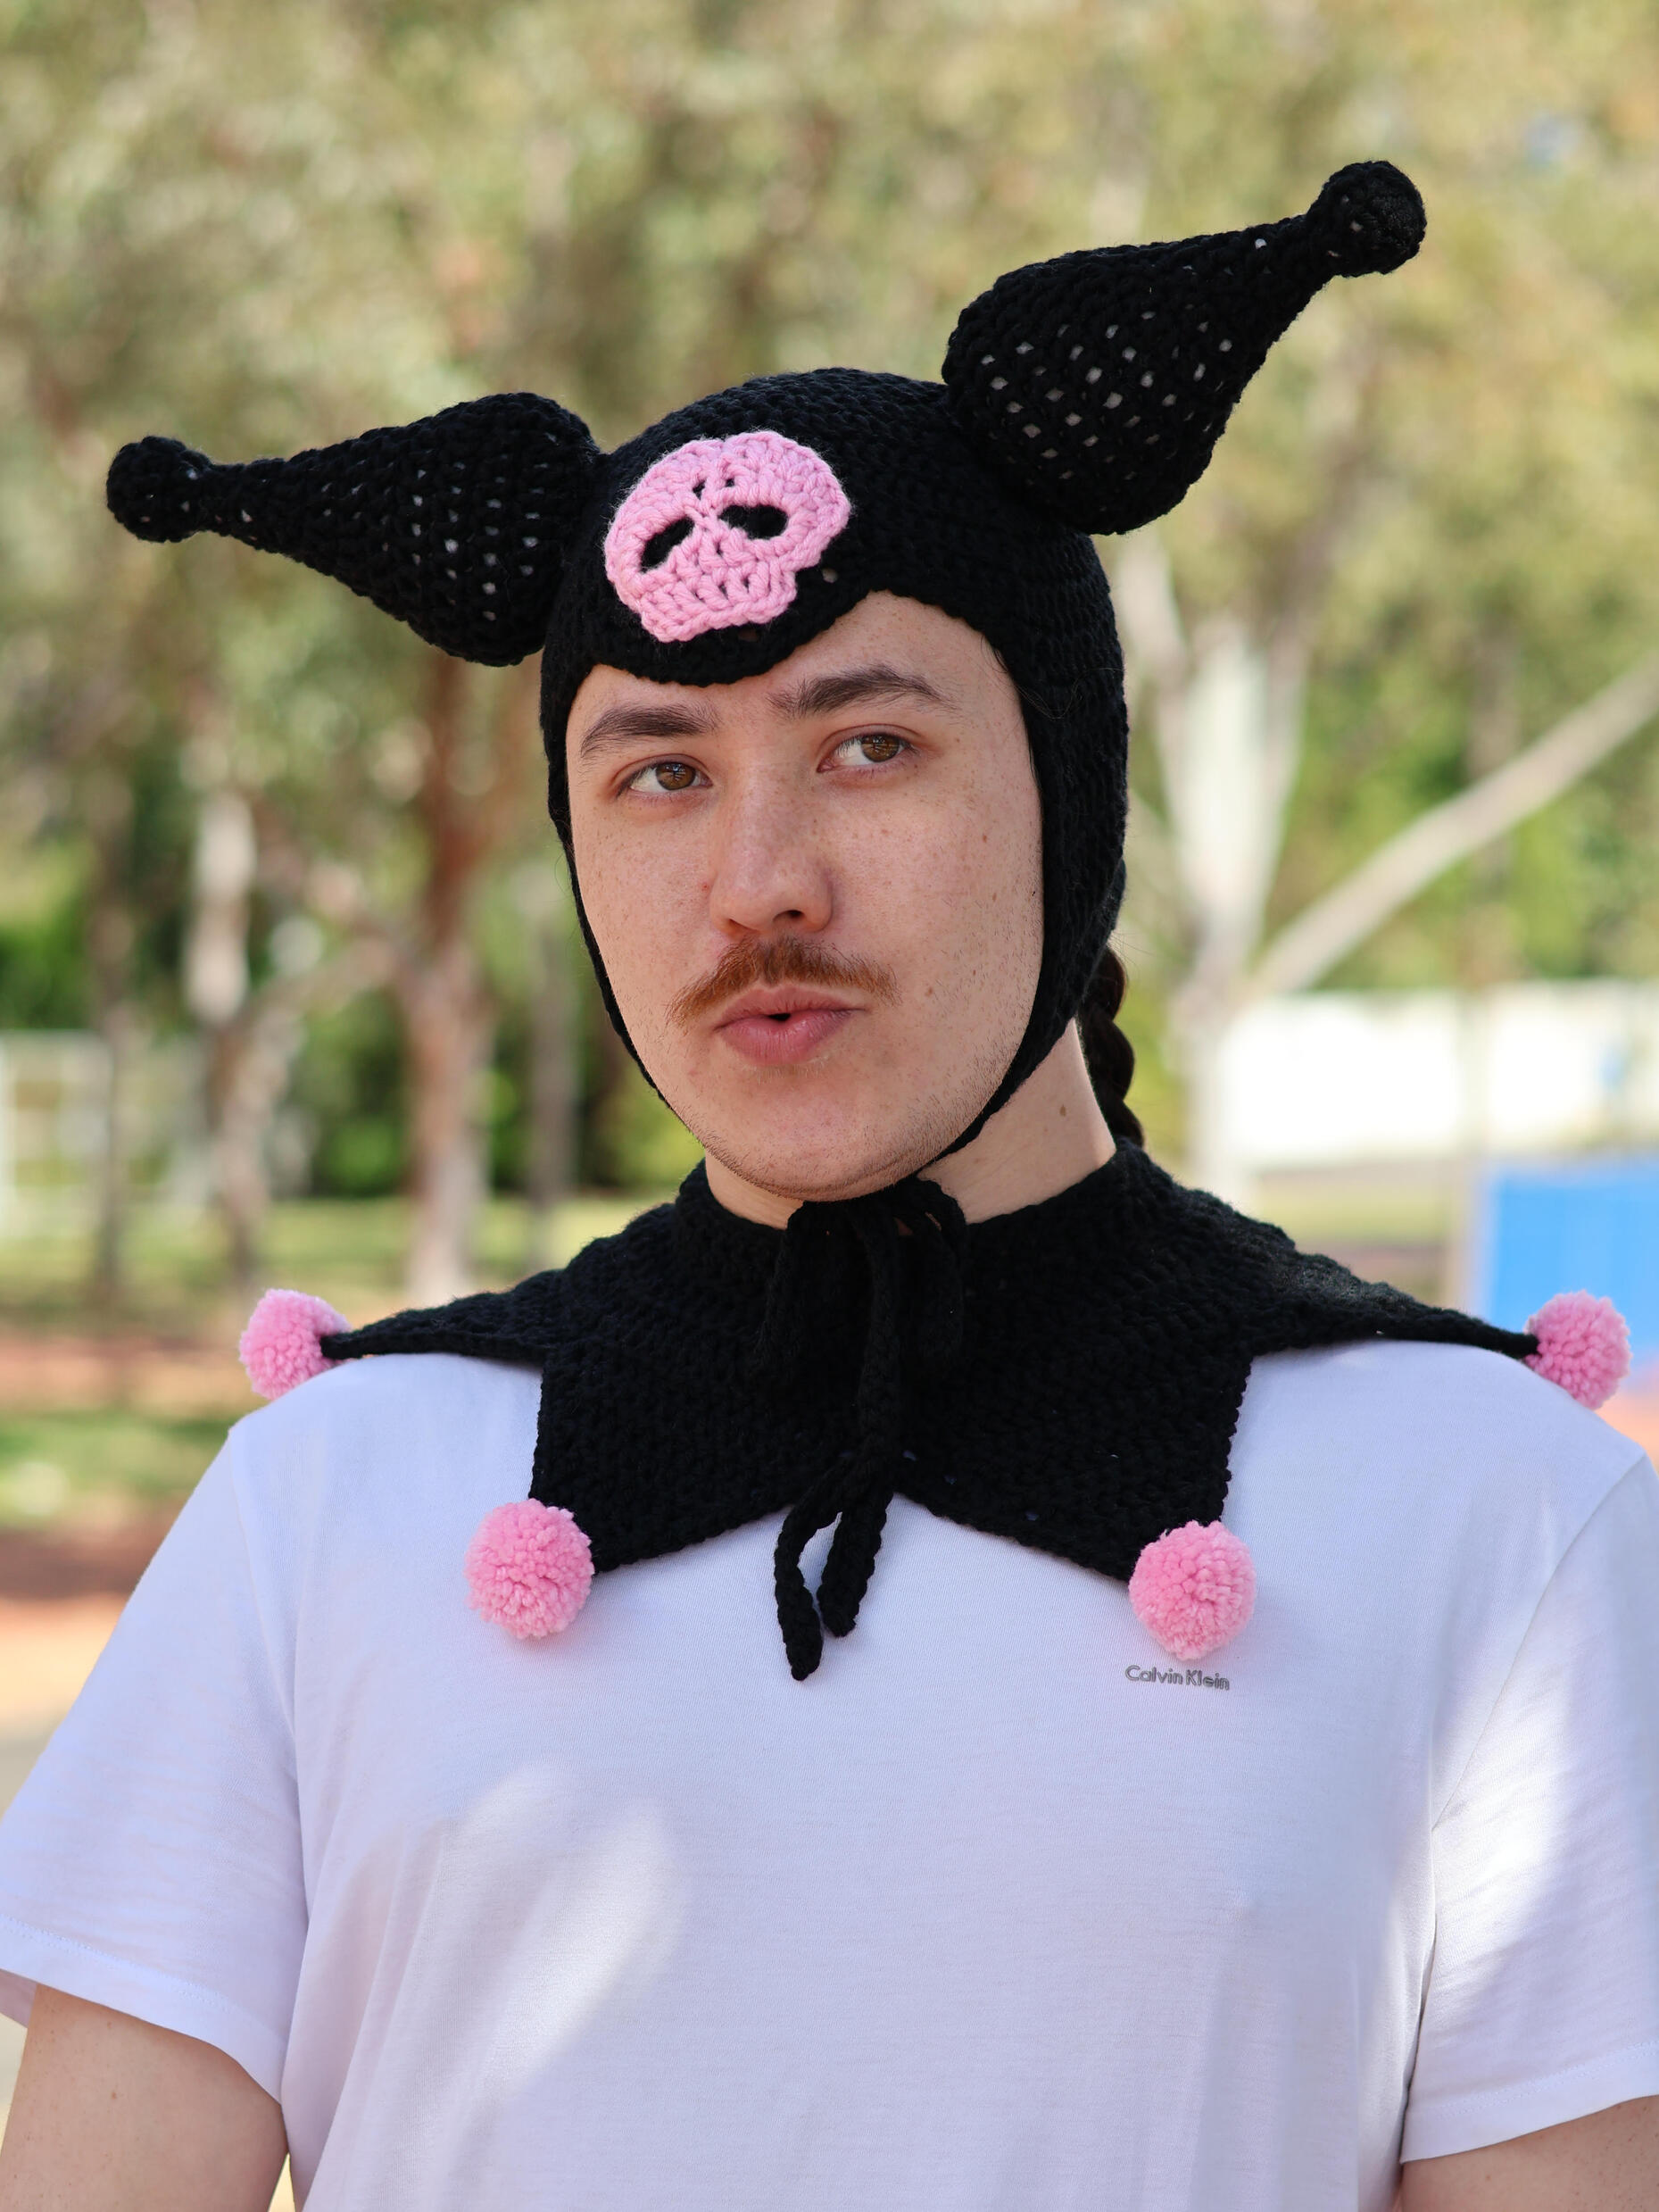
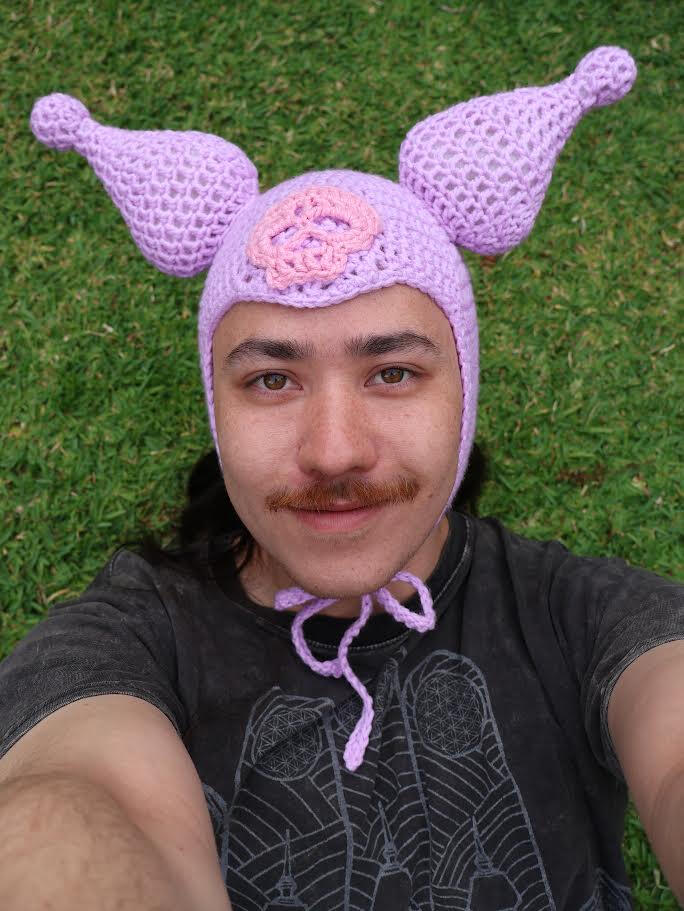
Items I used
Crochet hook – 6.00mm
Yarn needle – I got mine from Daiso
Black Yarn - 4 Seasons Spotsaver 10PLY 100% acrylic 200g
Pink Yarn - - 4 Seasons Spotsaver 10PLY 100% acrylic 200g
Stuffing for Ears - Destroyed squish mellow (Or like normal stuffing)Stitches
CH - Chain
SC - Single Crochet
HDC- Half Double Crochet
DC – Double crochet
INC- Increase
Decrease - Decrease
ST - Stitch
SL ST – Slip stitchSorry for lack of photos, for some reason i didnt take many progress photos
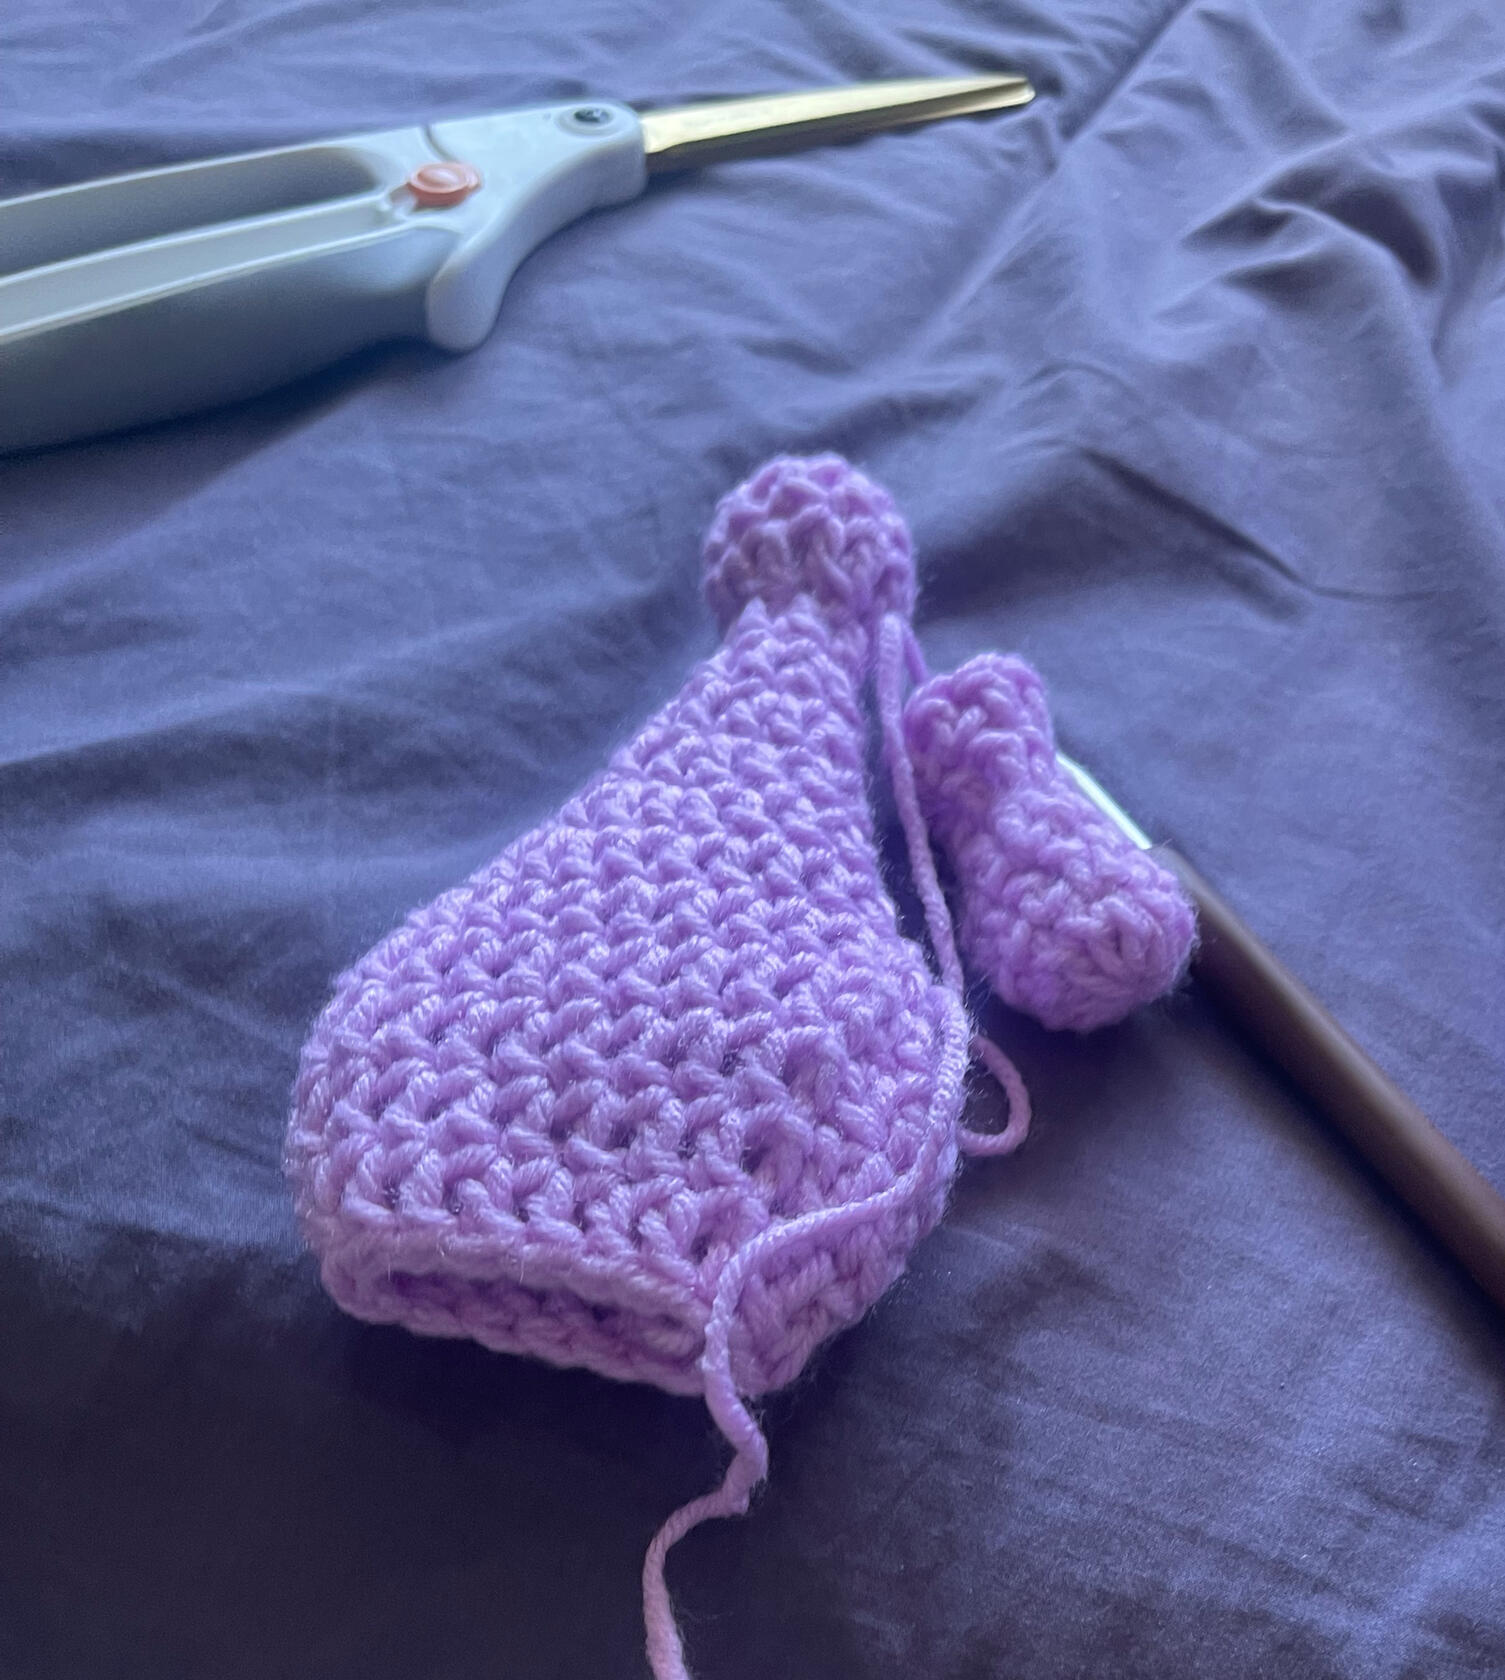
EarsStarting with the Bulb on the top of the ear
Magic circle, Chain 2
DC 10, SC. (total 10 stitches)
DC in every stitch. (total 10 stitches)
Decrease every stitch (total 5 stitches)Now Increase the ear size
Chain 2, 2 DC in the first stitch, 1 DC in every stitchChain 2, 2 DC in the first stitch, 1 dc in the next 2 stitch, 2 DC in the next stitch, 1 DC in the next 2 stitch.Chain 2, 2 DC in the first stitch, 1 dc in the next 3 stitch, 2 DC in the next stitch, 1 DC in the next 3 stitch.Chain 2, 2 DC in the first stitch, 1 dc in the next 4 stitch, 2 DC in the next stitch, 1 DC in the next 4 stitch.Chain 2, 2 DC in the first 2 stitches, 1 DC in the next 4 stitches, 2 DC in the next 2 stitches, 1 DC in the next 4 stitchesChain 2, 2 DC in the first 2 stitches, 1 DC in the next 6 stitches, 2 DC in the next 2 stitches, 1 DC in the next 6 stitchesChain 2, 2 DC in the first 2 stitches, 1 DC in the next 8 stitches, 2 DC in the next 2 stitches, 1 DC in the next 8 stitchesChain 2, 2 DC in the first 2 stitches, 1 DC in the next 10 stitches, 2 DC in the next 2 stitches, 1 DC in the next 10 stitchesChain 1, 2 decreases, 1 DC in the next 10 stitches, 2 Decrease, 1 DC in the next 10 stitches.Chain 1, 2 decreases, 1 DC in the next 8 stitches, 2 Decrease, 1 DC in the next 8 stitches.Chain 1, 2 Decreases, single crochet into the next 6, 2 Decreases, single crochet into the next 6.Leave a Long Tail to Weave in
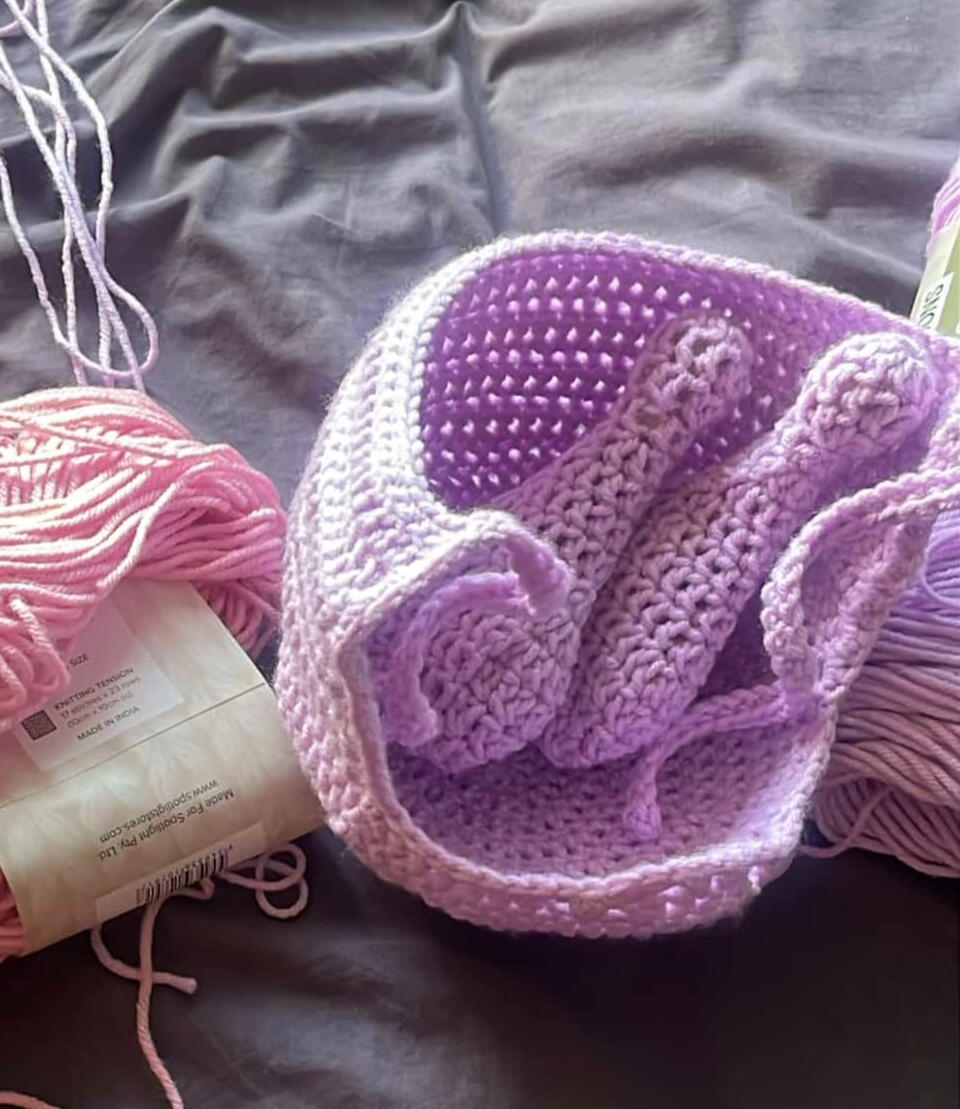
Bonnet
Round 1: Make a magic ring, ch 2, 10 dc into the magic ring, sl st (10)
Round 2: ch 2, dc inc in each st around, sl st (20)
Round 3: ch 2, repeat [dc in the first st, inc in the next] around, sl st (30)
Round 4: ch 2, repeat [dc in the next 2 st, inc in the next] Around, Sl St (40)
Round 5: ch 2, repeat [dc in the next 3 st, inc in the next] Around, Sl St (50)
Round 6: ch 2, repeat [dc in the next 4 st, inc in the next] Around, Sl St (60)
Round 7: ch 2, repeat [dc in the next 5 st, inc in the next] Around, Sl St (70)
Round 8: DC into every stitch (70)
Round 9: DC into every stitch (70)
Round 10: DC into every stitch (70)
Round 11: DC into 48 stitches. Chain 2, Turn work (48) This leaves 22 stitches Not touched, This will be the face hole.
Round 12: Chain 2, Turn work, DC into 48 stitches. (48)
Round 13: Chain 2, Turn work, DC into 48 stitches. (48)
Round 14: Chain 2, Turn work, DC into 48 stitches. (48)
Round 15: Chain 2, Turn work, DC into 48 stitches. (48)
Round 16: Chain 2, Turn work, DC into 48 stitches. (48)
Round 17: Chain 2, Turn work, DC into 48 stitches. (48)
Round 18: Chain 2, Turn work, DC into 48 stitches. (48)DO NOT CUT YARNAt this stage we have finished the length of the Bonnet However we need to add the triangle but on the forehead Before we Add the straps/Edging. DO NOT CUT YARN , Leaving the yarn attached, Find the 2nd end of your ball of yarn and cut around 2 Meters of yarn off. We will use this to add to Triangle.Front Triangle
Find the 10 middle stitches. Slip knot and attach to the first stitch.
Round 1: DC 10 in the middle.
Round 2: Chain 1, Decrease 2 stitches, 1 Dc into the next 2 stitches. Decrease 2 stitches.
Round 3: Chain 1, Decrease 3 stitches. Tie off end.Now we can go back Where we finished at round 18.
Chain 41, Single Crochet into every chain. Slip Stitch into the to top of the stitch.
Turn work and single Crochet 48 stitches across the bottom of the bonnet.
Chain 41, Single Crochet into every chain. Slip Stitch into the to top of the stitch.
Now for around the face, for each double crochet stitch (8 Total Stitches), you will put 2 single crochets in (16 Single crochet)
Then Single Crochet 6 to bring yourself to the triangle we made with the extra yarn. for each double crochet stitch (3 total) you will put 2 single crochets in (6 single crochet) This brings you to the point of the triangle.
Single Crochet into the middle stitch.
for each double crochet stitch (3 total) you will put 2 single crochets in (6 single crochet)
Then Single Crochet 6 to bring yourself to the corner, Now for around the face, for each double crochet stitch (8 Total Stitches), you will put 2 single crochets in (16 Single crochet).
Then SLip stitch into the starting chain of the 40 Chain.
Weave in ends.
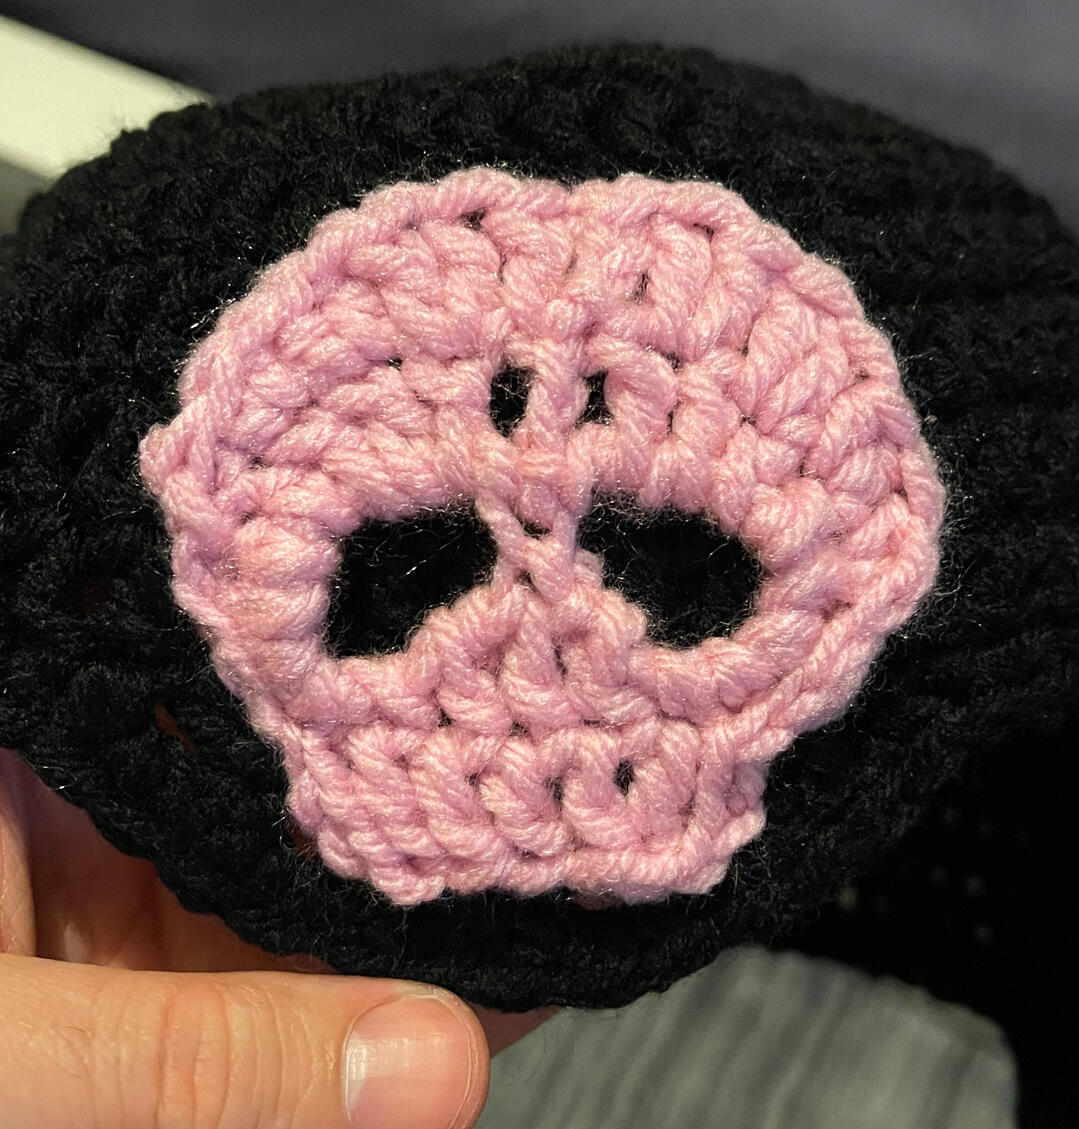
Skull
Slip knot, Chain 8, SL ST into the first Chain.
Chain 8, SL ST into the first chain of this chain 8
Chain 3, Into the Chain space, 3 DC, 2 HDC, 4 Single Crochet.
Chain 3, Into the next Chain space, 4 Single Crochet, 2 HDC, 3 DC, Sl St Into the 3rd Chain from the beginning of the round.
Chain 3, 1 DC into the same stitch, 2 DC into the next stitch, 2 HDC into the next stitch, 2 Single Crochet into the next stitch. 1 Single crochet into the next stitch. 1 Sl ST into the next 5 stitches.
Chain 3, 1 DC into the next stitch. Into the Chain Space, 2 DC. 1 DC into the next stitch. Chain 3 and Slip stitch into the bottom of the last DC.
1 Sl St in the next 4 stitches. 2 single crochet in the next stitch, 2 dHC in the next stitch, 2 DC into the last 2 stitches. Sl St Into the 3rd Chain from the beginning of the round.Leave a Long Tail to Weave in
Attaching Parts
Now you need to attached the skull into the middle of the forehead/Triangle.
For the Ears, The best way to figureout placement is to fold in half. Count 3 rows from the middle of the bonnet and Mark Between rows 3/4. Then Allow 4 rows for ear attachment. This means the ear will be attached on rows 4/5/6/7.Steam, and its CompleteAlso, if you do make this, please let me see it tag me on Instagram @king_Norb. I would love to see if it works for others.
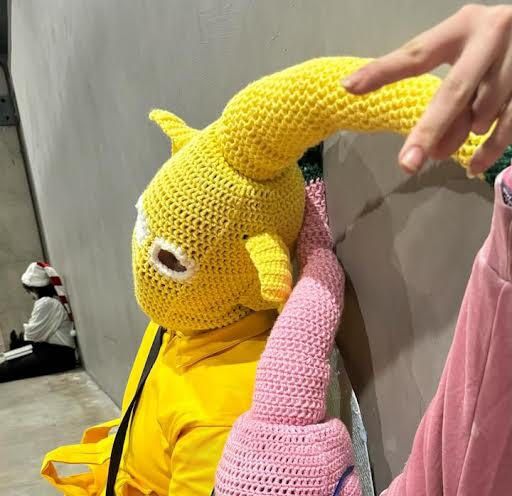
Pikmin Pattern (Yellow)
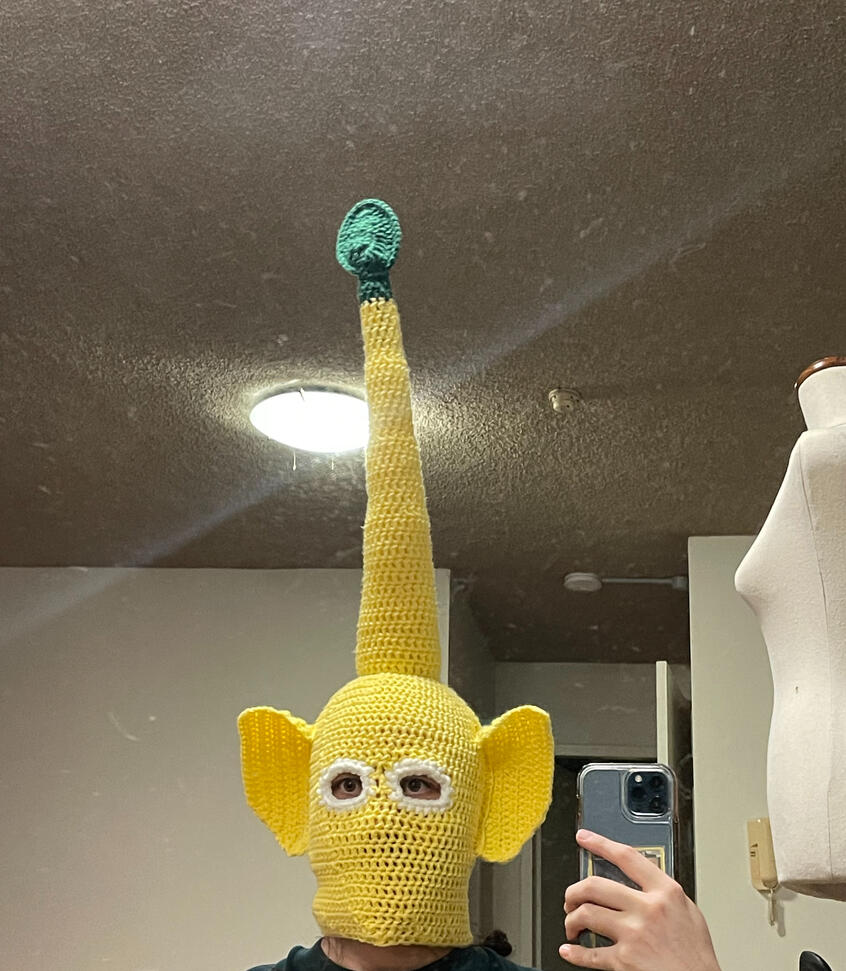
Items I used
Crochet hook – 6.00mm
Yarn needle – I got mine from Daiso
Yellow Yarn – 4 seasons spotsaver 10PLY 100% acrylic 200g ART-80389140 Dyelot 04
Green Yarn - 4 seasons spotsaver 10PLY 100% acrylic 200g ART -80427718 Dyelot 05
White yarn – This was cheap from ‘the reject shop’ (Australia thing) Super chunky yarn acrylic.
Stuffing for stem/cone – Destroyed squish mellow (Or like normal stuffing)Stitches
CH - Chain
DC – double crochet
INC- Increase
ST - stitch
SL ST – Slip stitch.
(NUMBER) – amount of stitches in that round
Leaf uses triple crochet and half double crochet as well but i wrote the leaf part out.
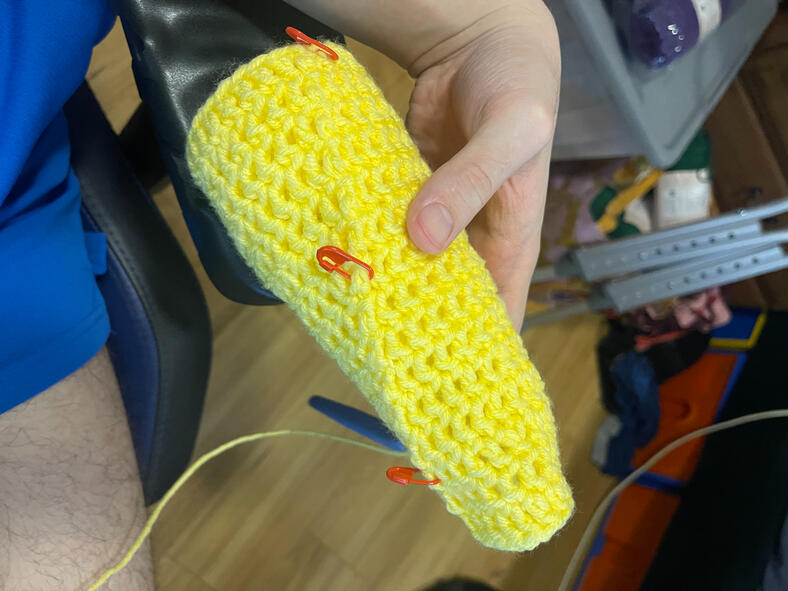
Starting with the Cone part. i will be using images form when i first created this one.Starting – YELLOW YARN
Round 1: Make a magic ring, ch 2, 10 dc into the magic ring, sl st (10)
Round 2: ch 2, dc inc in each st around, sl st (20)
Round 3: ch 2, repeat [dc in the first st, inc in the next] around, sl st (30)Round 4: Ch 2, Into the back post for all stitches DC, sl st (30)
This creates a small bowlish type of shape. We will come back to the front post to create the face mask part.Rounds 5,6,7,8,9: Ch 2, Into all stitches DC, sl st (30)
Round 10: Ch 2, Repeat [dc,dc,dc, decrease] until you finish row, ending sl st (24)
Rounds 11, 12, 13, 14, 15: Ch 2, Into all stitches DC, sl st (24)
Round 16: Ch 2, Repeat [dc,dc,dc,dc, Decrease] until you finish row, ending sl st (20)Rounds 17, 18, 19, 20, 21: Ch 2, Into all stitches DC, sl st (20)
Round 22: Ch 2 Repeat [dc,dc,dc, decrease] until you finish row, ending sl st (16)
Rounds 23, 24, 25, 26, 27: Ch 2, Into all stitches DC, sl st (16)
Round 28: Ch 2 [dc,dc, decrease] until you finish row, ending sl st (12)
Rounds 29, 30, 31,32: Ch 2, Into all stitches DC, sl st (12)
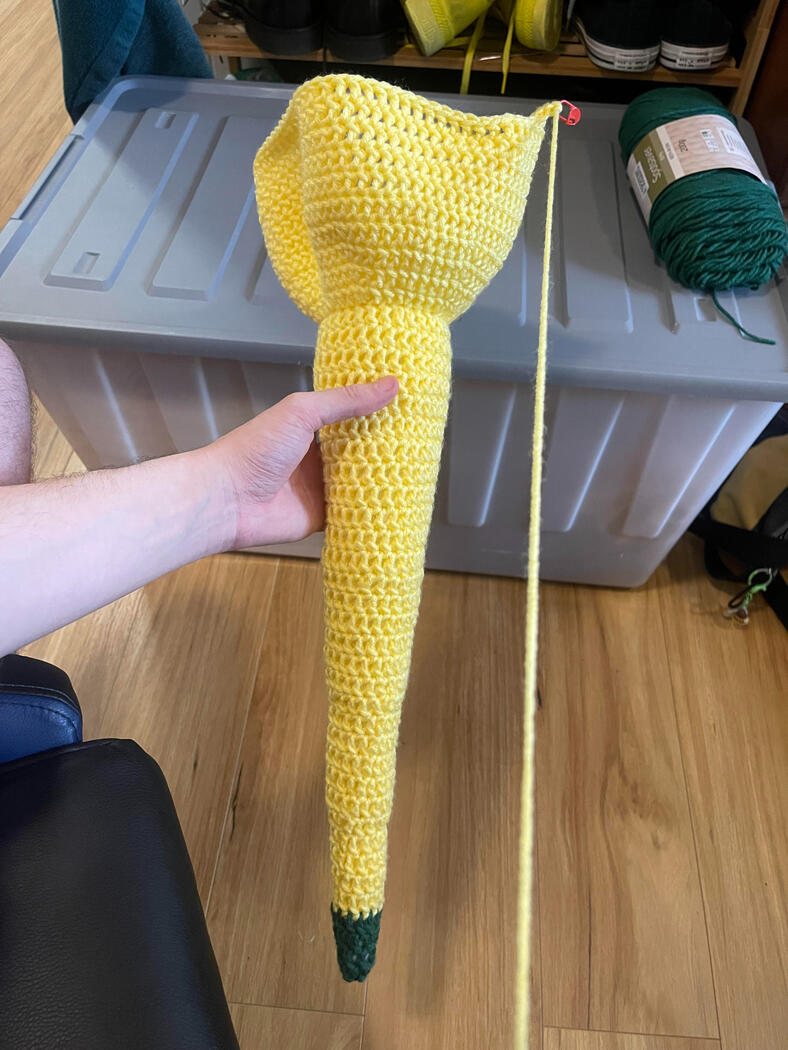
Starting on the green tip - Green Yarn
In photo above you can see the tip where you swap to green. At this stage you should only have the cone part (Like the photo on page 1 However bigger as you can see). This picture also shows me starting the facekini part as well. This photo is the only one i had hahaha. Now Stuff the cone with your destroyed stuff toy (or like normal filling hahah)Round 32: Change of color, How I did this, was make a loop, and then used that loop to do a DC into 1 stitch. This counts as your CH 2 just like how you started all new rounds prior. Then Into all stitches DC, sl st (12)
Round 33: Ch 2, Repeat [Dc, Decrease] until you finish row, ending sl st (8)
Rounds 34, 35: Ch 2, Into all stitches DC, sl st (8).Chain 1, pull tight and leave a long tail as we are going to close off the end of the green tip now. Stuff the cone until sturdy (it depends on what you stuffed it with). Take the tail and a Yarn needle and weave the tail through both front and back post stitches (I hope this makes sense). Pull tight and then make a knot and pull tail though the middle of the cone/stuffing. This finishes the cone part.Starting on mask part – Yellow yarn
Starting from the bottom of the cone which is ‘Round 3’ on page 1.Round 1: In the front post stitch, Into all stitches DC, sl st. How I Started joining this part was the same as the color change, was make a loop, and then used that loop to do a DC into 1 stitch. This counts as your CH 2 just like how you started all new rounds prior. (40)
Round 2: ch 2, repeat [dc in the first 3 st, inc in the next] around, sl st (50)
Round 3: ch 2, repeat [dc in the first 4 st, inc in the next] around, sl st (60)
Round 4: ch 2, repeat [dc in the first 5 st, inc in the next] around, sl st (70)
Rounds 5, 6, 7, 8, 9, 10: Into all stitches DC, sl st (70)
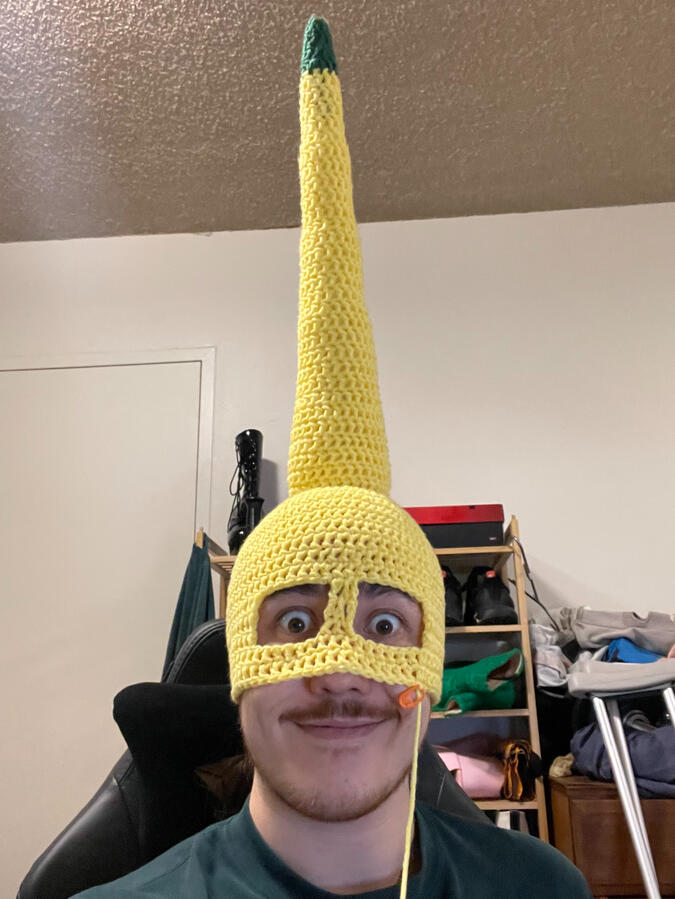
For this part, I counted how many spaces were needed for my eyes to show. This was 15 stitches. Which was 6 stitches per eye and 3 stitches in the middle to make sure there is yellow between the eyes.
Round 11: Ch 2, into the next 55 stitches DC. To make sure that the next rounds are going to sit flat, crochet 1, cut and pull and weave in end. (55)
Round 12, 13: on the left side of the unfinished row. How I Started joining this part was the same as the color change, was make a loop, and then used that loop to do a DC into 1 stitch. This counts as your CH 2 just like how you started all new rounds prior. into the next 55 stitches DC. To make sure that the next rounds are going to sit flat, crochet 1, cut and pull and weave in end. (55)
Nose connection: In the middle of the hole where your eyes are. In the middle 3 stitches DC, Ch 2, turn work, DC into the next 3 stitches, Turn work, Ch 2, DC into the next 3 stitches. Chain 1, pull tight and then weave in ends. This should give you a strip in the middle of your nose, 3 stitches wide and 3 rows long.
Round 14: on the left side of the unfinished row. How I Started joining this part was the same as the color change, was make a loop, and then used that loop to do a DC into 1 stitch. This counts as your CH 2 just like how you started all new rounds prior. into the next 55 stitches DC. Ch 6, Connect chain to nose bridge with single crochet into all 3 stitches. Ch 6, Sl st to connect row. (70)
Rounds 15, 16, 17, 18, 19, 20, 21, 22: Ch 2, Into all stitches DC, sl st (70)
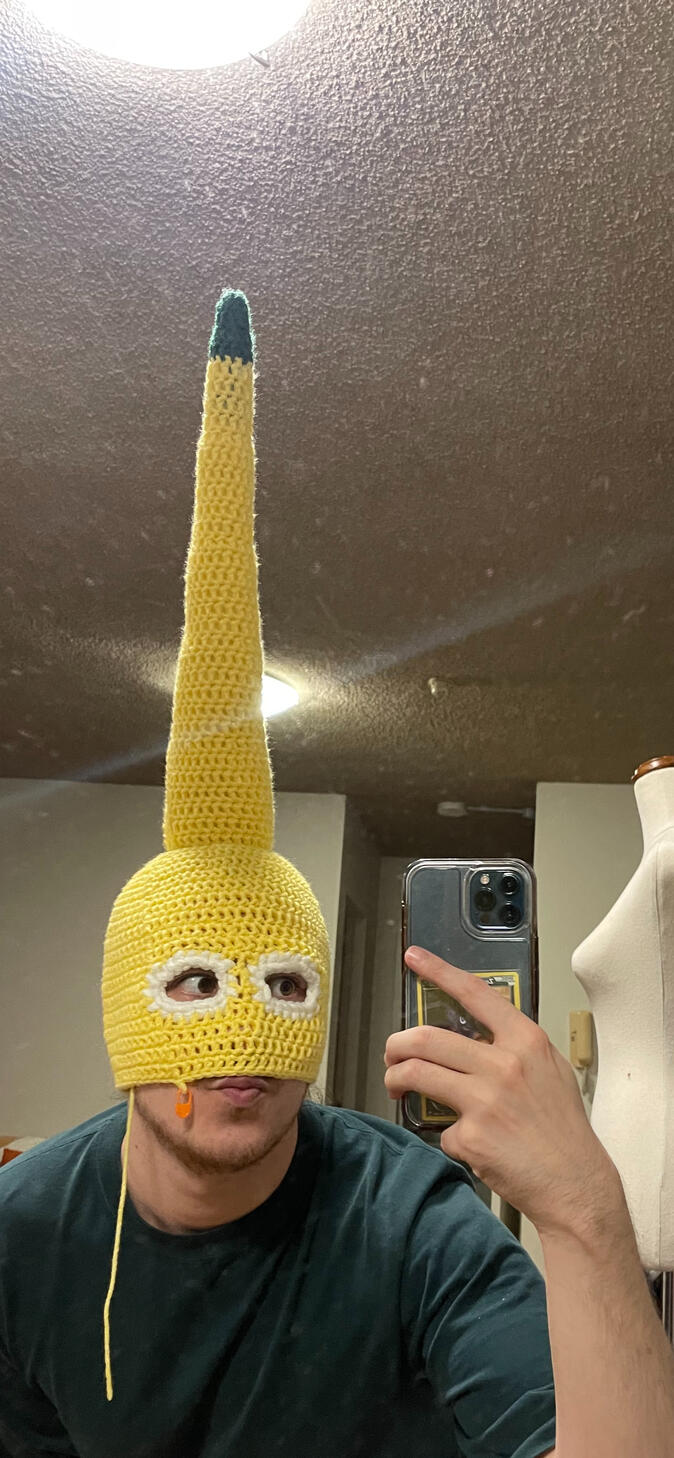
Then once you get to the bottom of you chin, you bring the mask in so you can tailor it to your neckRound 23: Ch 2, repeat [DC into the next 5 stitches, Decrease] around, Sl st (60)
Round 24: Ch 2 , repeat [DC into the next 4 stitches, Decrease] around, Sl st (50)
Round 25: Ch 2 , repeat [DC into the next 3 stitches, Decrease] around, Sl st (40)EYES - White yarn
I took the chunky white yarn and single crochet into the spaces between each stitch in a circle, and Sl st and knotted to finish.This will complete the face mask and stem
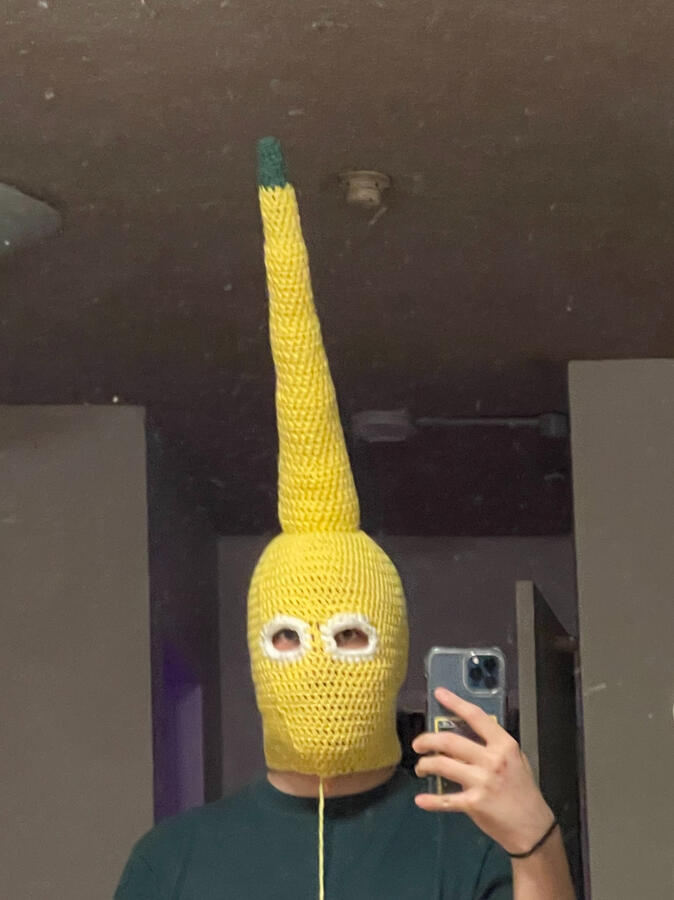
Leaf – green
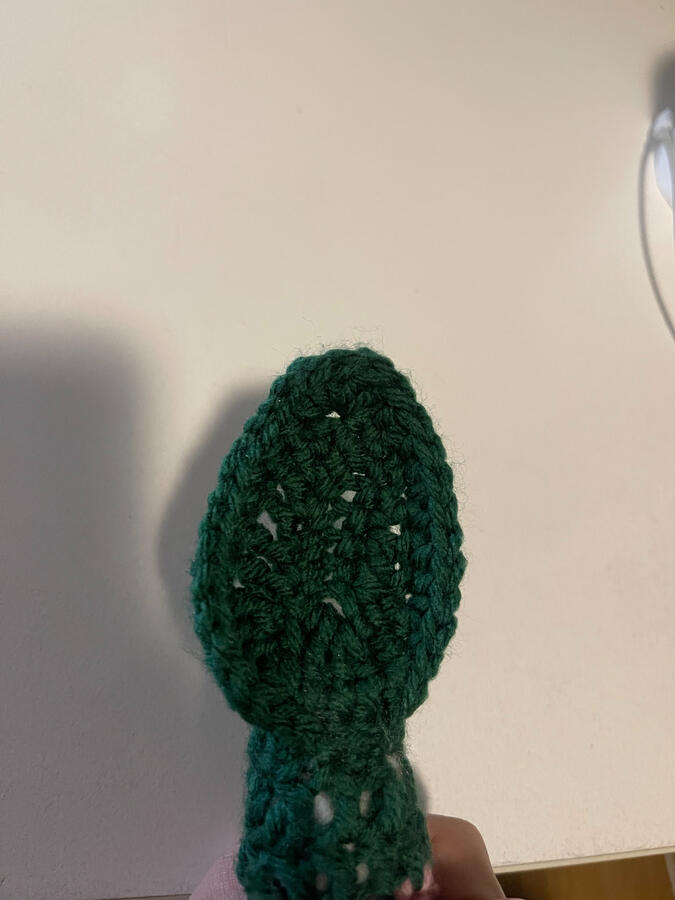
Uses triple crochet, double crochet, Half double crochet and single crochet. We also work in a circle, but its more like an oval hahaha.
Chain 6 (place a stitch marker or yarn if you want because we will come back to this stitch) Ch 2 more.
In the 2nd chain from the hook, increase with 2 single crochet. Then single crochet into the next 6.Chain 1, rotate work and single crochet 7 up along the other side of the work.
In the end stitch, Increase with 4 Triple crochet, then triple crochet into the next 2 stitches, then double crochet into the next 2, Half double crochet into the next stitch. Single crochet into the next 2 stitches.
Chain 1 and rotate work again, skip the next stitch, and single crochet into the next 2 stitches. Half double crochet into the next stitch. double crochet into the next 2 stitches, triple crochet into the next 2 stitches. Increase in the next stitch with 4 triple crochets.
Chain 1 and rotate work again, half double crochet in the next 2 stitches. then increase with 2 half double crochets. half double crochets into the next stitch. Then increase with 2 half double crochets. half double crochets into the next 2 stitches. then increase with 2 half double crochets. Half double crochets into the next 2 stitches. Increase in the next stitch with 5 double crochet. Rotate work again.
half double crochets into the next 2 stitches. increase with 2 half double crochets. half double crochets into the next 2 stitches. increase with 2 half double crochets. half double crochets into the next stitch. Increase with 2 half double crochets. half double crochets into the next stitch. And then 2 single crochets into the next 2 stitches. this will finish the leaf. Chain 1 and then leave a long, long tail to weave and sew the leaf on. How I did this was sew 3 stitches to 1 side, weaved it back and sewed 3 stitches on the other side so the bottom of the leaf sits flat on the front of the stem . Then I pulled the yarn through the middle of the leaf from the underside, then back into the top of the stem and tired it down to make it study and stand up straight.
EARS - Yellow Yarn (You need 2 of these)
Round 1: Ch 25, (place a stitch marker or yarn if you want because we will come back to this stitch) Ch 2 more. Then DC into the marked stitch. DC in the next 25 stitches. (25)
Round 2: Ch 2, Decrease, Dc into the next 23 (24)
Round 3: Ch2, Dc into the next 22, decrease (23)
Round 4: Ch2, Decrease, Dc into the next 21 (22)
Round 5: Ch2, Dc into the next 20, Decrease (21)
Round 6: Ch2, decrease, Dc into the next 19 (20)
Round 7: Ch2, Dc into the next 18, decrease (19)
Round 8: Ch2, decrease, Dc into the next 17 (18)
Round 9: Ch2, Dc into the next 16, decrease (17). Single crochet and pull tight and cut and leave a long tail to weave in.
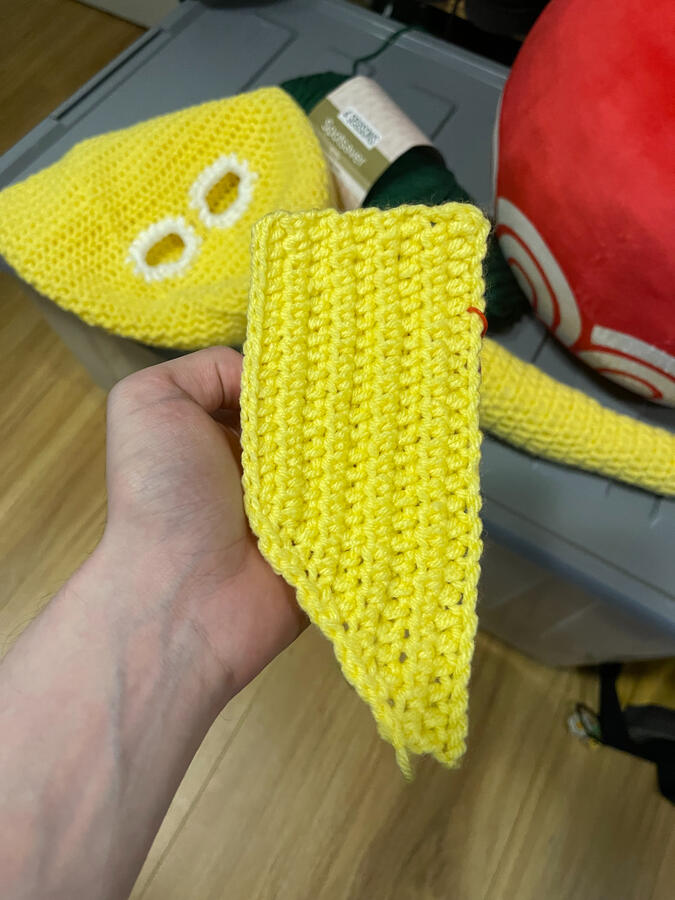
To Finish off the ear single crochet around the edges EXCEPT where you started the 25 chains as we will use this to attach the ear.
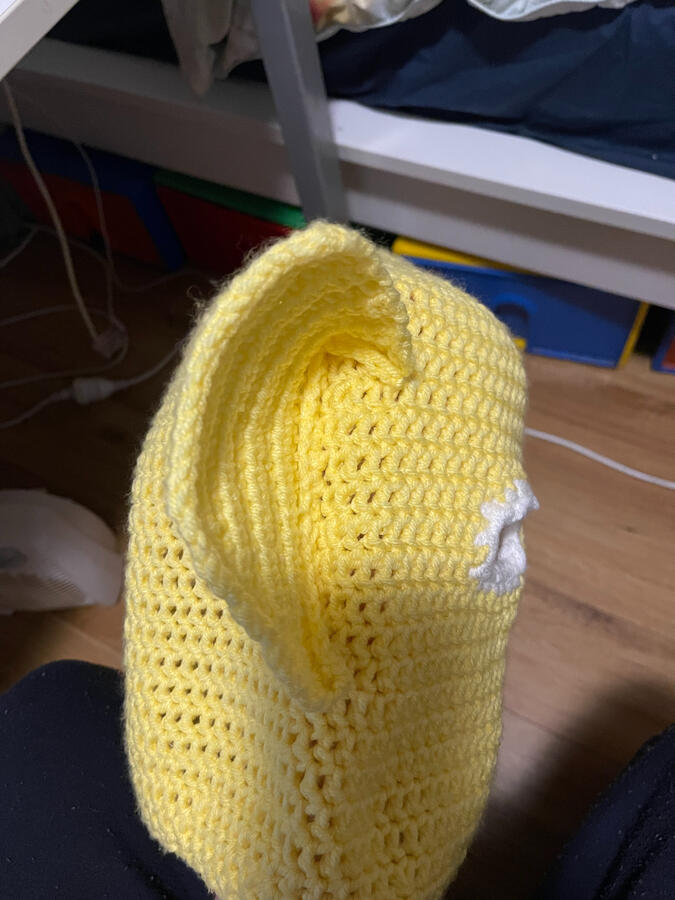
To attach the ear I marked 5 stitches down from the top of the ear (as seen in the 1st photo on page 4). The top 5 stitches will be the curve of the ear. (Curve as seen in the 2nd photo on page 4). Then on the front side I single crocheted the ear onto the mask around where my real ear is. Do this twice and then you have 2 ears attached.
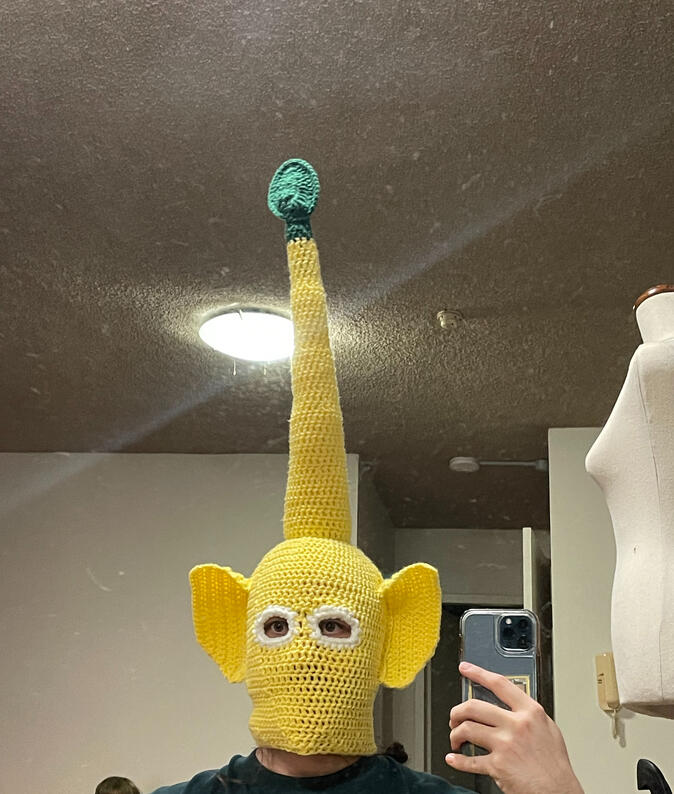
Then you should be finished :DThis is my first pattern im ever making and I used photo from when I made this yellow one for the first time. I hope this is readable. The sizes will vary depending one everyone’s head size. Any feedback would be helpful for me.Also, if you do make this, please let me see it tag me on Instagram @king_Norb. I would love to see if it works for others.
Ripped Gown (Red) Pattern
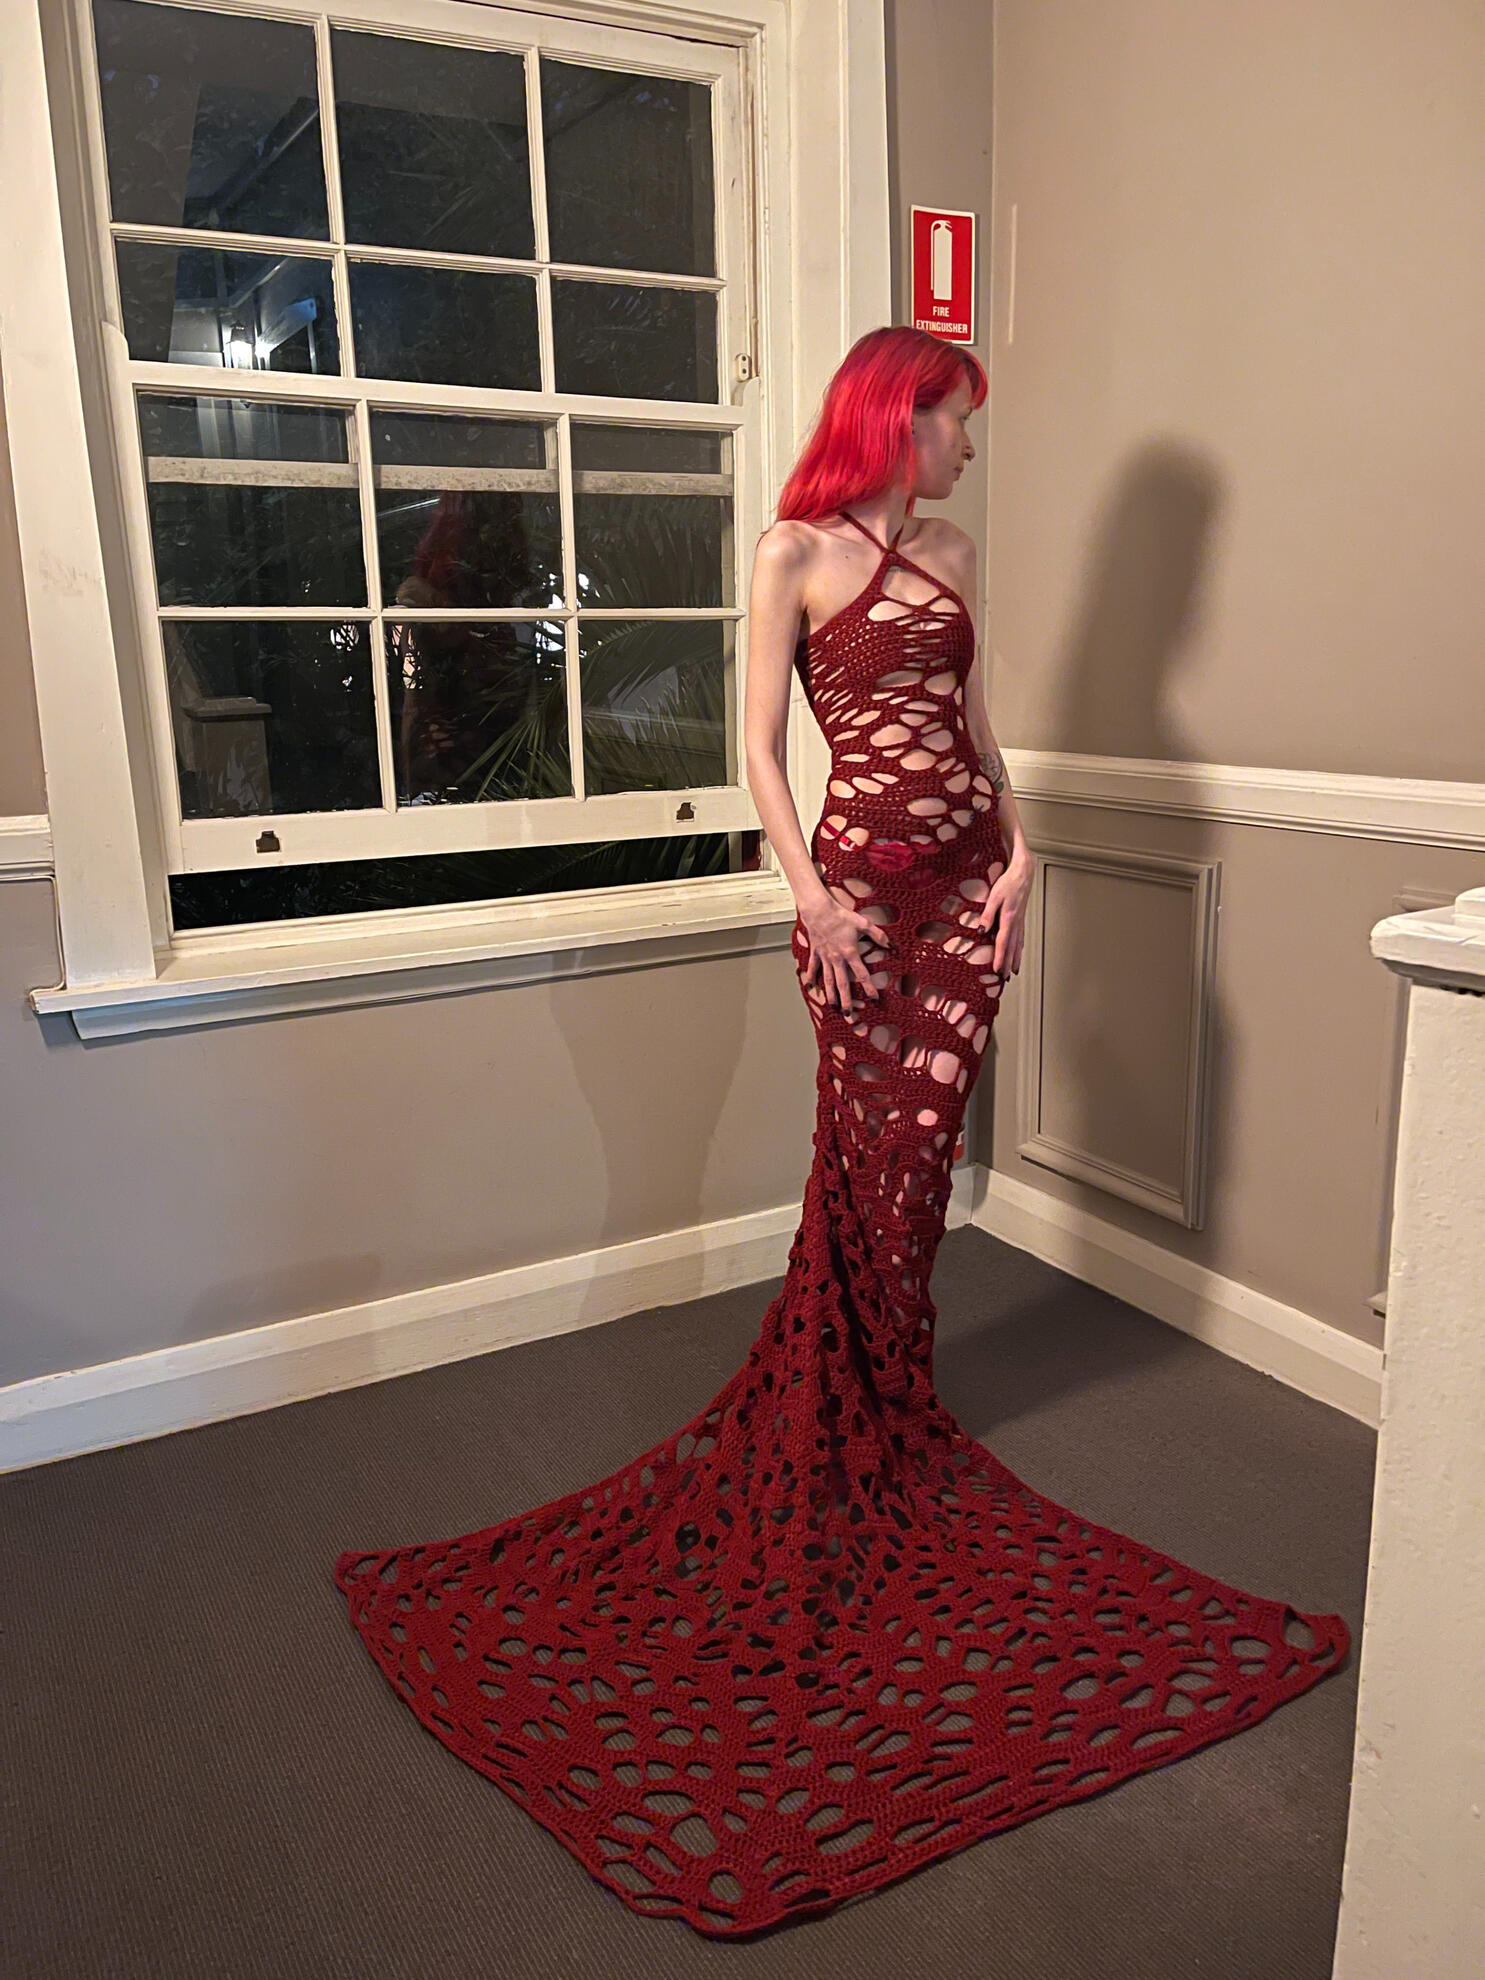
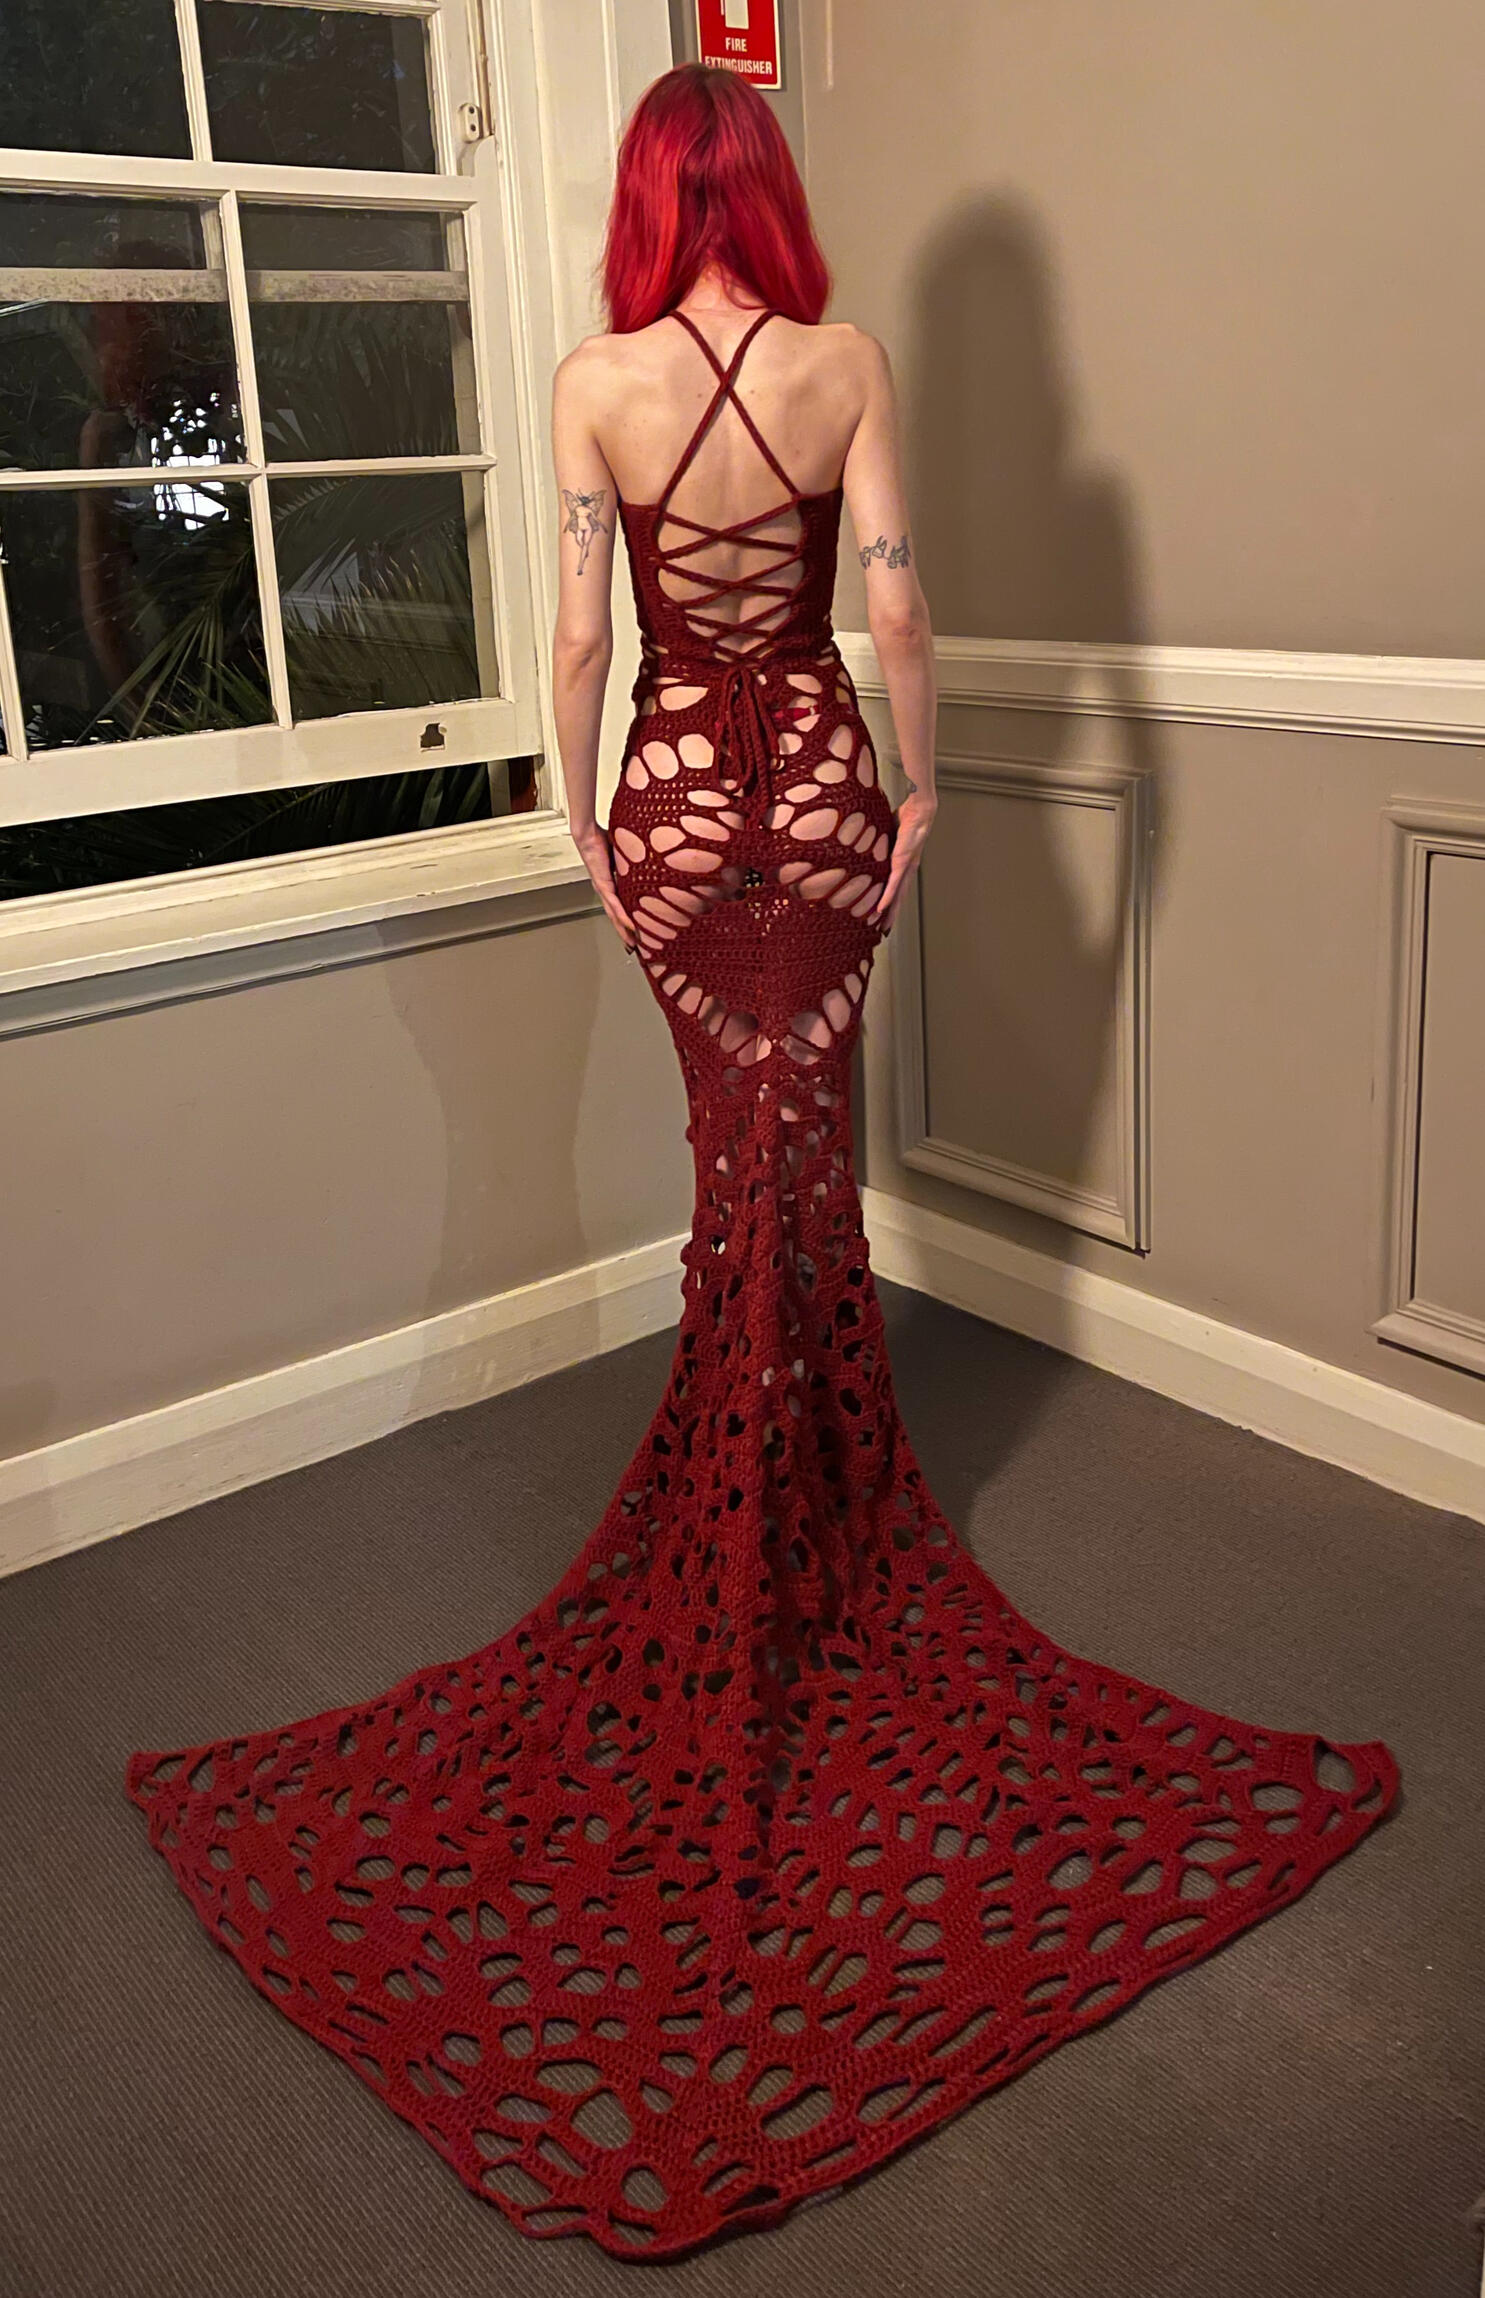
Items Used
Hook - Size 6.0mm and 2.5mm
Yarn (4 Balls) - 4 Seasons Spotsaver 10PLY 100% Acrylic 200g.
Elastic Thread Pref Red (I'm using black)Stitches (US Terminology)
Double crochet Chain (Foundation DC)
Chain - Chain
SC - Single Crochet
DC - Double crochet
INC - Increase
Decrease - Decrease
ST - Stitch or stitches
SL ST - Slip Stitch
Slip Knot
INFORMATION
About holes, sizing, pattern difficulty and coverage rowsWe will use 6mm Hook for almost everything, i will tell you when you change to 2.5mm hook in a very small section for elastic.I'm starting from top down, During this stage i am going to mark out each hole in First 10 Rows.
After ill mention that the holes can either be random (The options I'm using) or you can spiral pattern them.
Ill also mention in places where increases might appear in the pattern if you need a bigger size.The starting 10 Rows will be covering the Bust area. (The size of the bust you want covered is up to you and you can increase rows for a deeper bust, This is for a small bust)If following the pattern exactly, you will be making an adjustable sample size gown with measurements. The measurements of the Mannequin are
Bust- 82cm
Waist- 65cm
Hips- 81cm
Butt- 87cm
However, due to stretchy elastic we crochet in, it can stretch up to 1 or 2 sizes bigger than the mannequinPattern Difficulty - Hard
Actual Crocheting - Easy
Due to the fact that this is my 3rd pattern even. I'm unsure how hard the pattern is to read. As personally I've only been able to read 1 other persons pattern.If anyone needs help please DM me on InstagramBelow I have added a google Doc's Verson so you can download it as a PDF if you would like
Starting
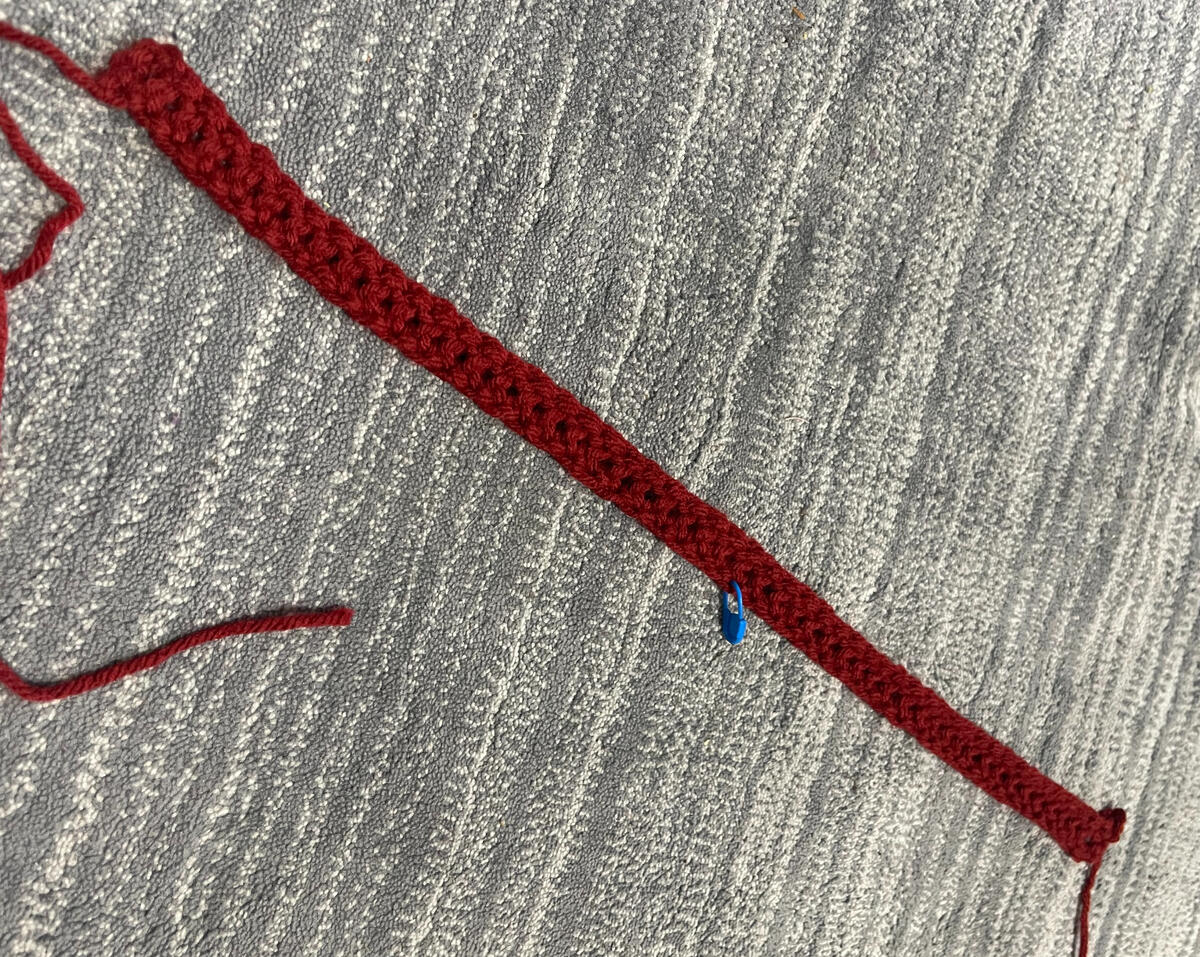
ROW 1 - For the starting row, We are going to be making a Double crochet Chain of 51. (This can be increase if you want a Wider bust cover, just ensure when you wrap the Double crochet Chain around the mannequin or bust it has 20cm of allowance for the Lace up in the back, Please scroll down to see lase up in the back) If you are increasing the size. Please remember to keep odd number of stitches, as it need a center stitch.
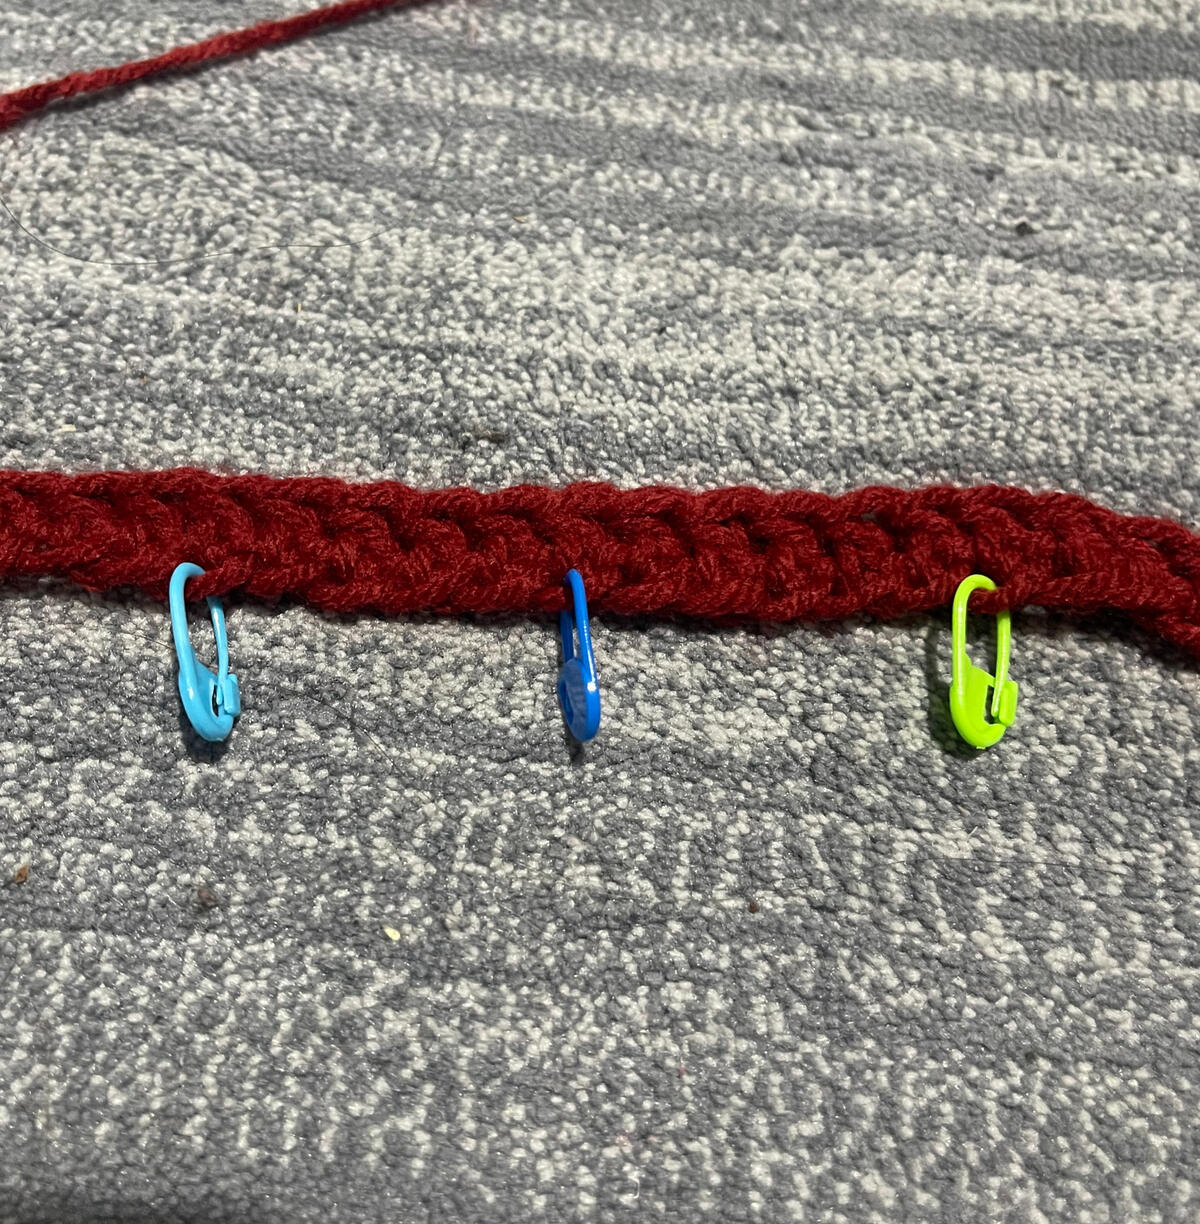
Mark the middle stitch (stitch 26). This will mark the middle of your neck and where the 2 lace ups will go later. Now on each side of this market, mark the 5th stitch (So between the markers, there is 11 total stitches.)Now from each side, mark the 12th stitch, This will help when placing holes in the garment to ensure it covers the Bust to avoid Censorship hahah. Or could wear pasties if mistakes are made hahah.
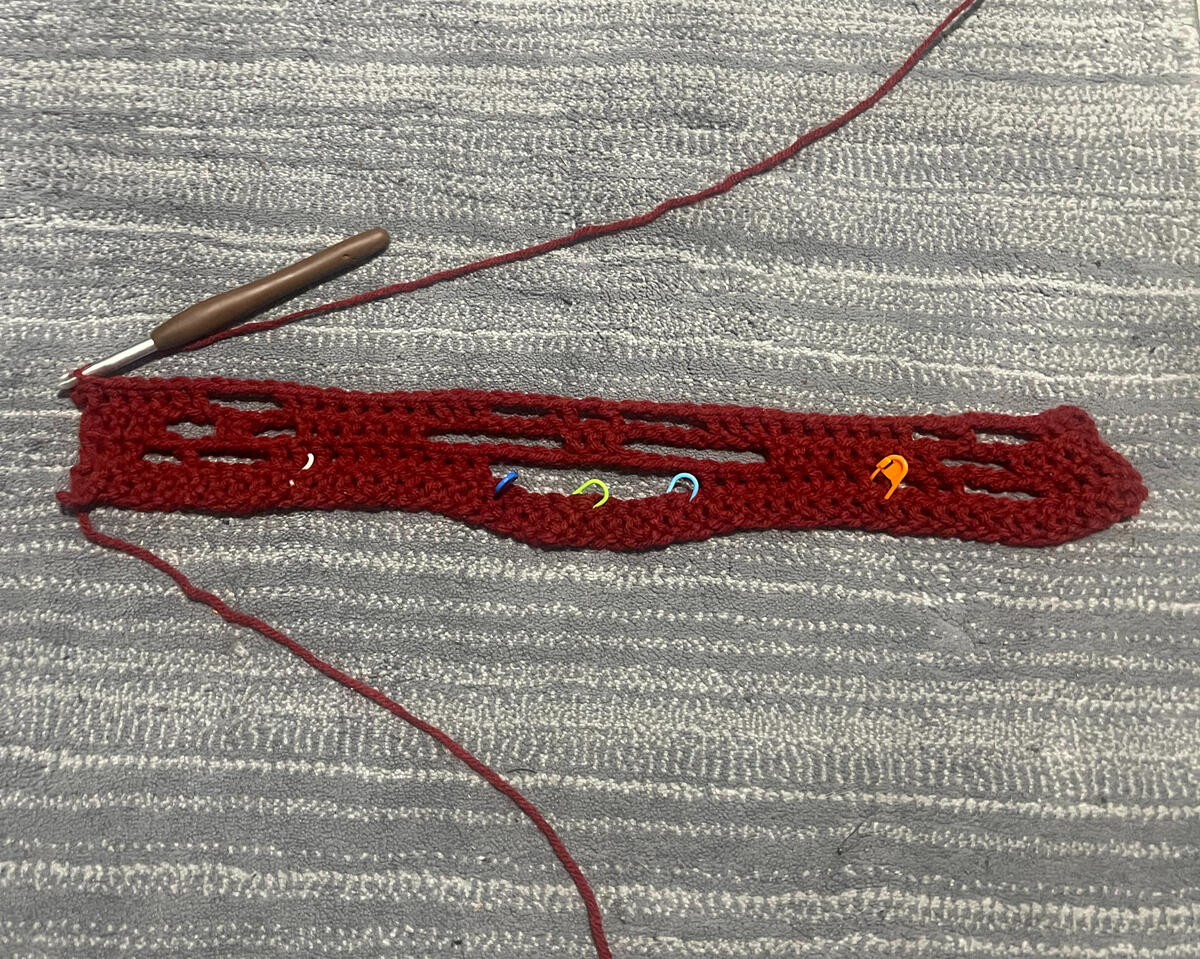
ROW 2 - Turn work, Chain 1 then DC into the same ST. DC into 3 more ST. Chain 4, skip 4 ST and DC into the 5th ST. DC 1, Chain 1, skip 1, ST and DC into the 2nd ST. DC into 8 ST. Chain 11, Skip 11, DC into the 12th ST. Dc into 9 ST. Chain 4, Skip 4 and DC into the 5th ST. Chain 2, skip 2 DC into the 3rd stitch. DC into the last 2 STROW 3 - Turn work, Chain 1 then DC into the same ST. DC into 3 ST. Chain 3, skip 3, DC into the 4th ST. DC into 1 ST. Chain 2, Skip 2, DC into the 3rd ST. DC into 5 ST. Chain 7, Skip 7, DC into the 8th ST. DC into 2 ST. Chain 7, Skip 7, DC into the 8th ST. DC into 7 ST. Chain 4, Skip 4, DC into the 5th ST. DC into the last 4 ST.ROW 4 - Turn work, Chain 1 then DC into the same ST. DC into 2 ST. Chain 4, skip 4, DC into the 5th ST. Chain 2, Skip 2, DC into the 3rd ST. DC into 9 ST. Chain 4, Skip 4, DC into the 5th ST. Chain 1, Skip 1, DC into the 2nd ST. Chain 4, Skip 4, DC into the 5th stitch. DC into 9 ST. Chain 4, Skip 4, DC into the 5th stitch. DC into the last 5 ST.
ROW 5 - Turn work, Chain 1 then DC into the same ST. DC into 1 ST. Chain 4, Skip 4, DC into the 5th ST. DC into 15 ST. Chain 7 , Skip 7, DC into the 8th ST. DC into 12 ST. Chain 4, Skip 4, DC into the 5th ST. DC into the last 4 ST.ROW 6 - Turn work, Chain 1 then DC into the same ST. DC into 1 ST. Chain 3, skip 3, DC into the 4th ST. Dc into 15 ST. Chain 3, skip 3, DC into the 4th ST .Dc into 15 ST. Chain 5, Skip 5, DC into the 6th ST. DC into last 5 ST.ROW 7 - Turn work, Chain 1 then DC into the same ST. DC into 1 ST. Chain 4, Skip 4, DC into the 5th ST. dc into 1 ST. Chain 4, Skip 4, DC into the 5th ST. DC into 10 ST. Chain 4, Skip 4, DC into the 5th ST. DC 1, Chain 1, skip 1, ST and DC into the 2nd ST. DC into 9 ST. Chain 5, Skip 5, DC into the 6th ST. DC into the last 6 ST.ROW 8 - Turn work, Chain 1 then DC into the same ST. DC into 1 ST. Chain 4, Skip 4, DC into the 5th ST. DC into 2 ST. Chain 3, skip 3, DC into the 4th ST. DC into 8 ST. Chain 4, Skip 4, DC into the 5th ST. DC into 15 ST. Chain 4, Skip 4, DC into the 5th ST. DC into the last 5 ST.ROW 9 - Turn work, Chain 1 then DC into the same ST. DC into 3 ST. Chain 4, Skip 4, DC into the 5th ST. DC into 15 ST. Chain 4, Skip 4, DC into the 5th ST. DC into 13 ST. Chain 4, Skip 4, DC into the 5th ST. DC into the last 4 ST.ROW 10 - Turn work, Chain 1 then DC into the same ST. DC into 6 ST. Chain 4, Skip 4, DC into the 5th ST. DC into 8 ST. Chain 4, Skip 4, DC into the 5th ST. Chain 3, skip 3, DC into the 4th ST. DC into 10 ST. Chain 4, Skip 4, DC into the 5th ST. DC into 6 ST.
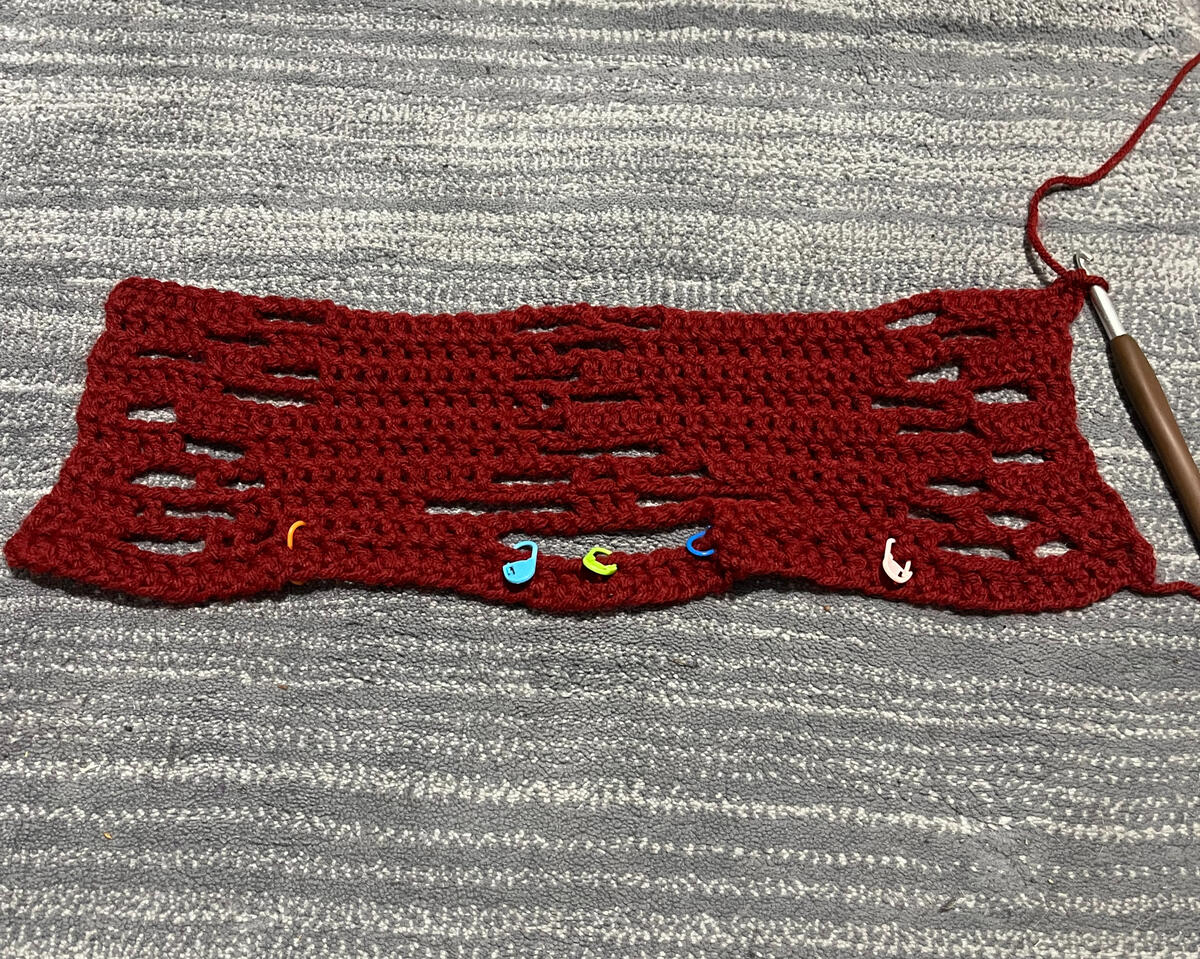
ROWS 11 to 20 - Theses rows is where we can either choose between having random holes or spiraling the pattern.
For random holes I recommend hole sizes between 3 Chains Minimum to 10 Chains Maximum. And switch between holes randomly and attaching holes together for different cut outs. (I'm following this pattern)
For Spiraling i recommend holes around 6 Chains every hole between theses rows. best way to start is 3 evenly spaced holes, and then attaching the holes in the middle of the change 6. for instance, you're going back on a row, and you DC over a chain 6. you would DC into 3 of the chains then chain 6 and skip the remainder 3 of that hole and skip 3 after that hole and DC in the 7th ST.
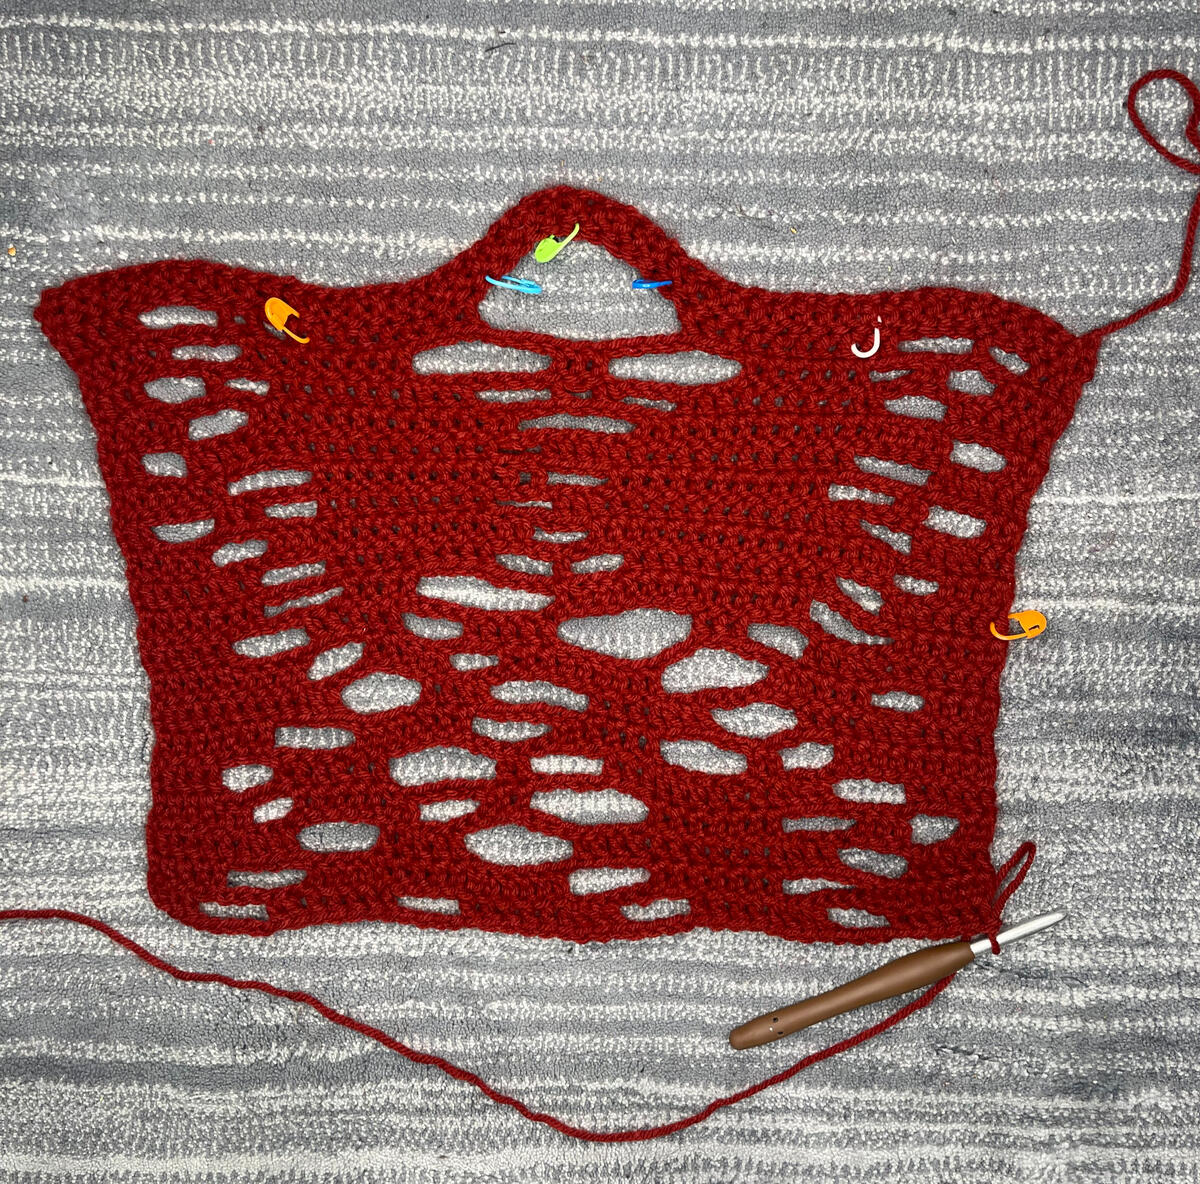
Now we will add the Corset back to the top before we continue with the gown.
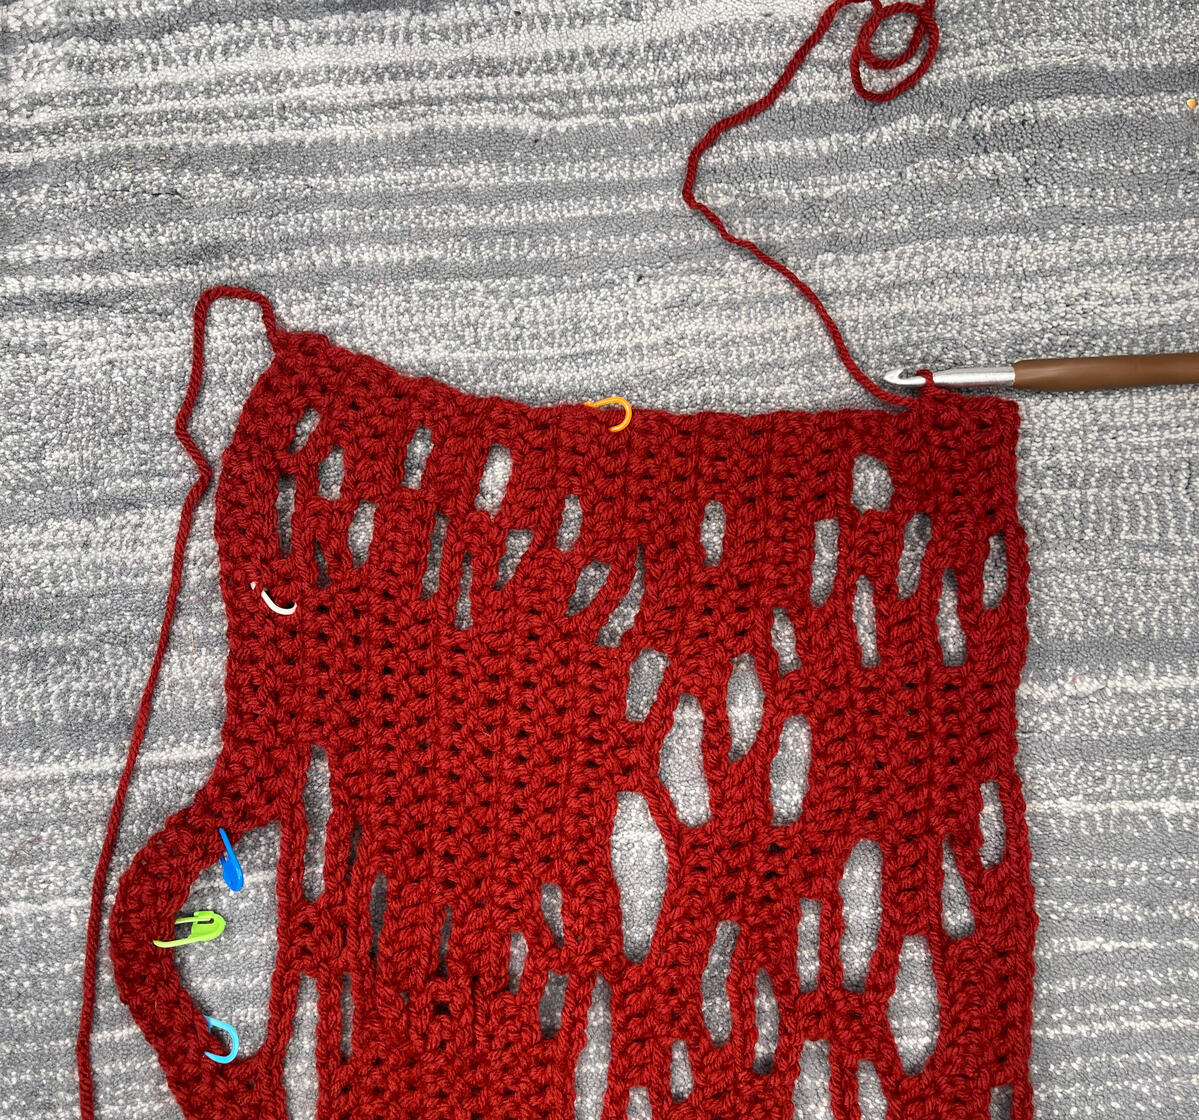
ROW 1 - Fully read this row before start, Chain 1 and Turn your work or the side, so instead of Crocheting into the top of the ST like normal. You'll be crocheting down the side of the ST. Adding 2 SC into each ST. you will have a total of 40 SC down the side. Near the end if you would like you can SC over the top of the Starting end to weave it in quicker.ROW 2 - Turn work, Chain 1 then DC into the same ST. DC into 39 ST.ROW 3 - Turn work, Chain 1 then DC into the same ST. Chain 1, Skip 1, DC into the 2nd ST. DC into 7 ST. Chain 1, Skip 1, DC into the 2nd ST. DC into 7 ST.Chain 1, Skip 2, DC into the 2nd ST. DC into 7 ST.Chain 1, Skip 1, DC into the 2nd ST. DC into 7 ST. Chain 1 then DC into the same ST. Chain 1, Skip 1, DC into the last ST. Chain 1, Cut the yarn at 20/30cm, pull through and leave the tail to weave in later.
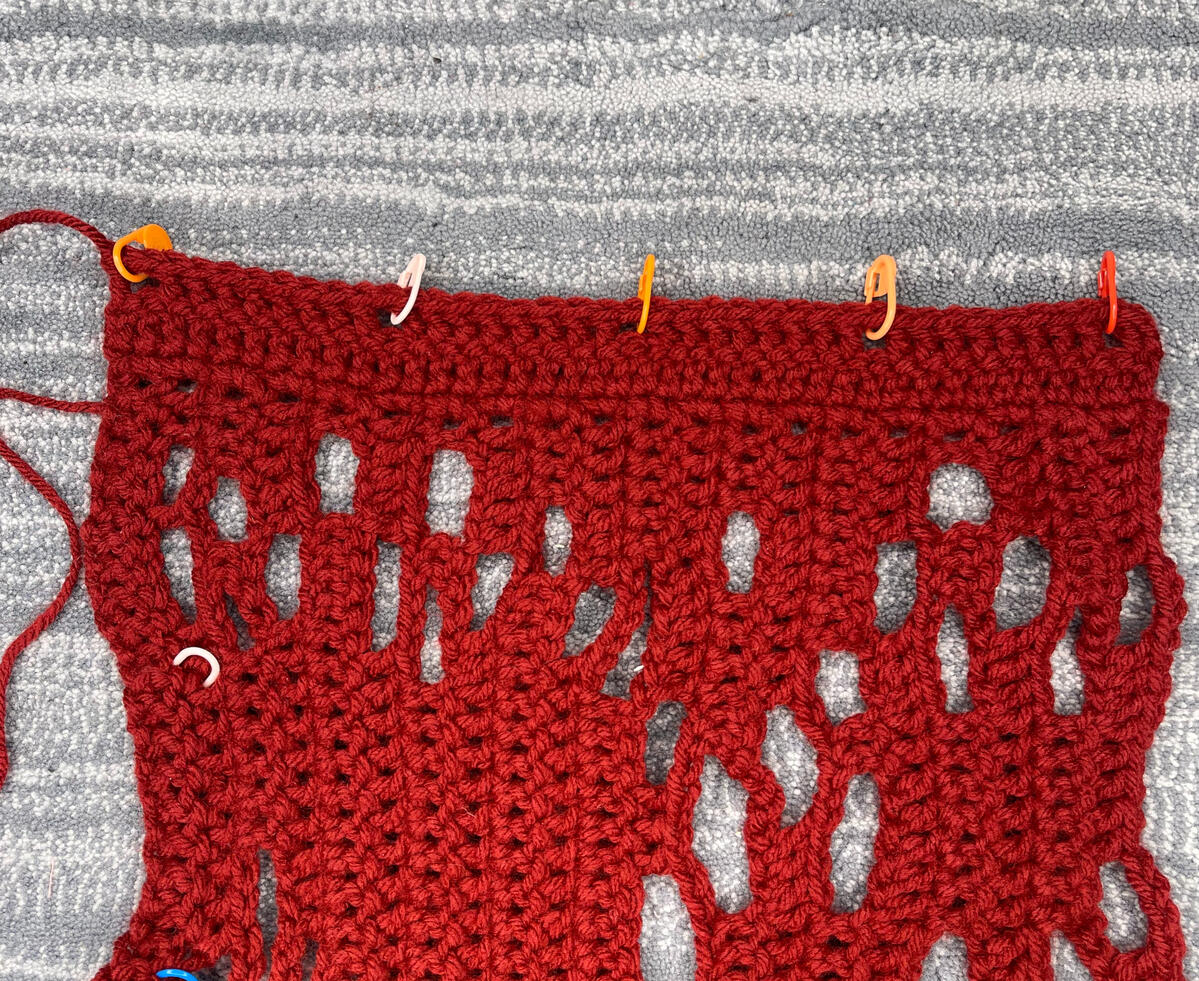
Now We will do the next side, to make sure that the sides look the same in the front, we will start the Join on the top side of the top
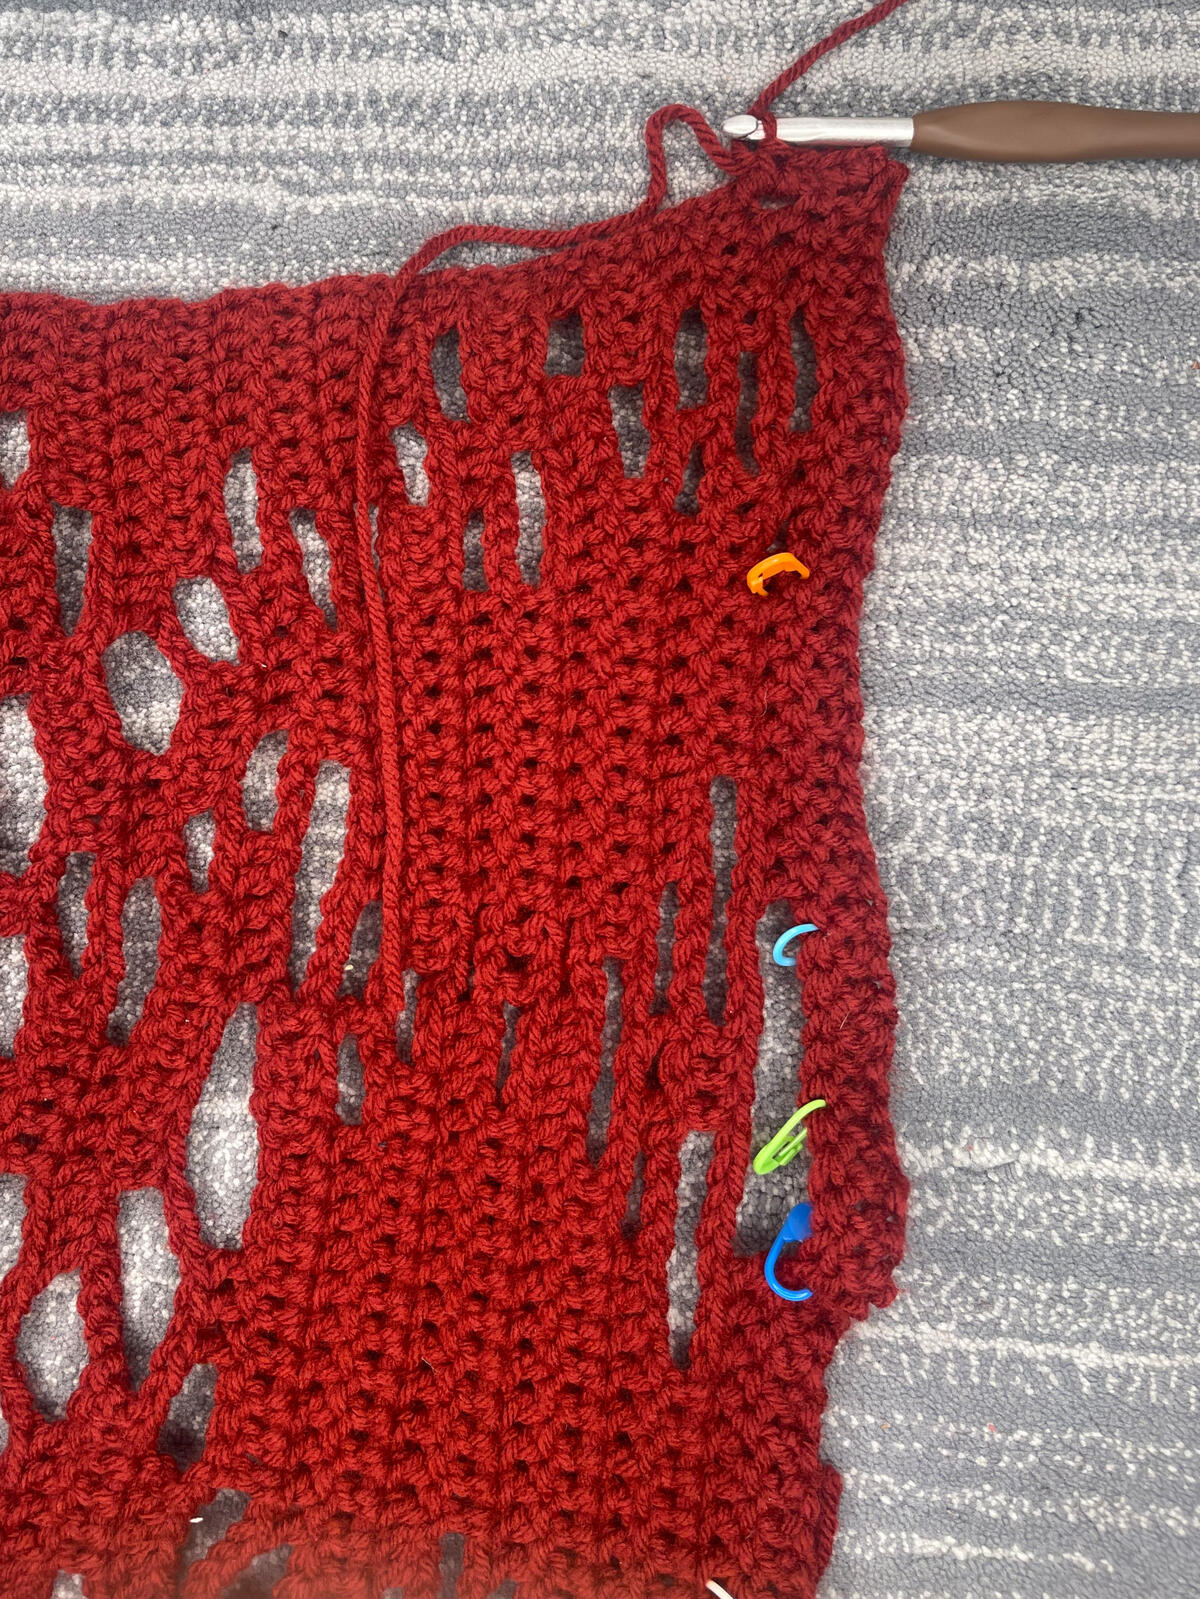
Row 1 - Fully read this row before start, After attaching a loop to the side, Chain 1 and then DC Crochet 2 in every ST down the side. So in total again 40 SC. Near the end if you would like you can SC over the top of the Starting end to weave it in quicker.ROW 2 - Turn work, Chain 1 then DC into the same ST. DC into 39 ST.ROW 3 - Turn work, Chain 1 then DC into the same ST. Chain 1, Skip 1, DC into the 2nd ST. DC into 7 ST. Chain 1, Skip 1, DC into the 2nd ST. DC into 7 ST. Chain 1, Skip 2, DC into the 2nd ST. DC into 7 ST. Chain 1, Skip 1, DC into the 2nd ST. DC into 7 ST. Chain 1 then DC into the same ST. Chain 1, Skip 1, DC into the last ST. Chain 1, Cut the yarn at 20/30cm, pull through and leave the tail to weave in later.Now only sew in the 2 ends that you covered in round 1 of each side.
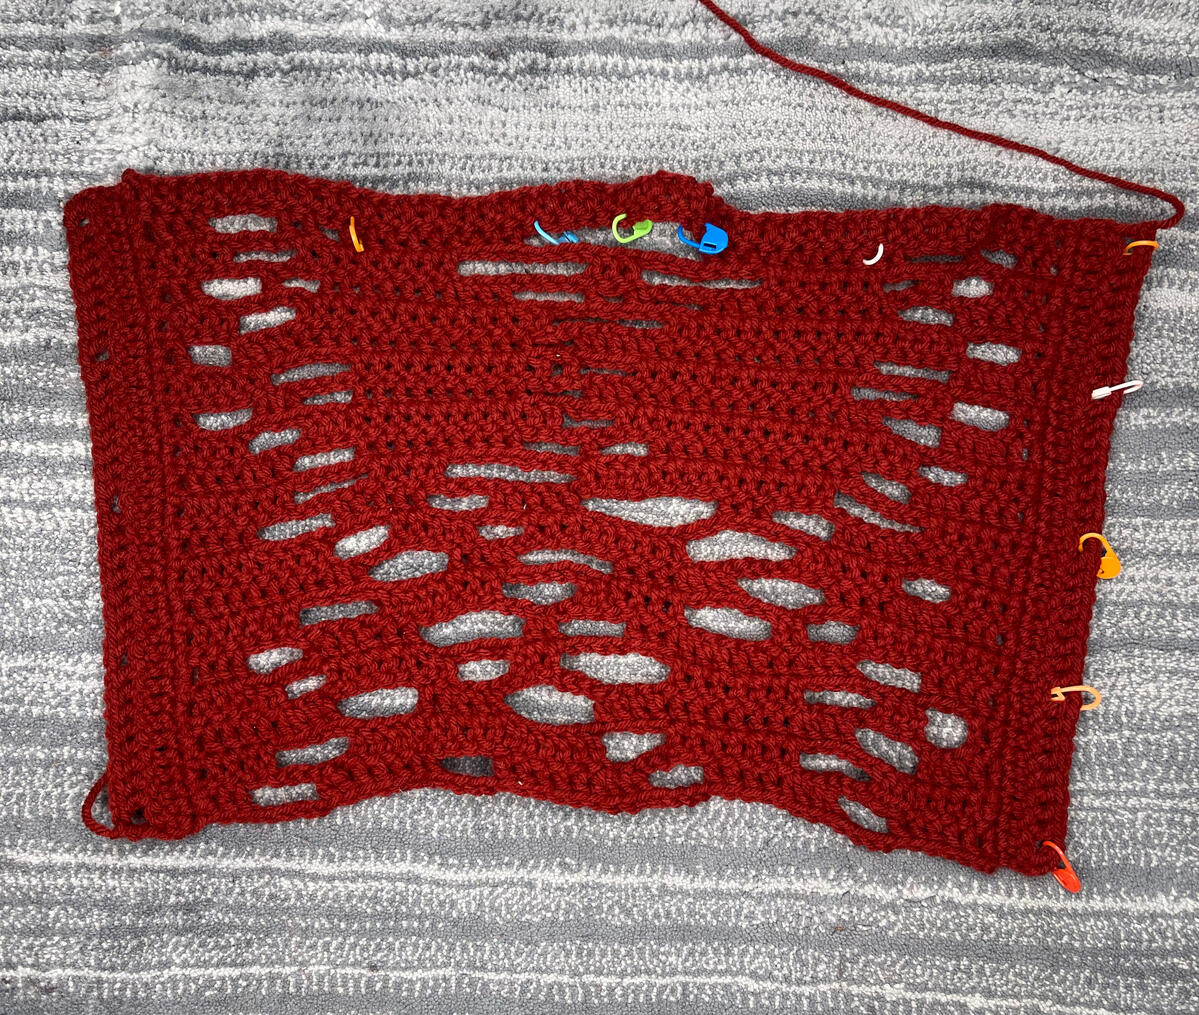
INFORMATIONNext we will be joining around the back to make it turn into a Tube around the bottom of the piece we just made. If you're following my size exactly, move to ROW 1To start you need to measure the bottom of your piece, also measure the largest part around your Bottom As it needs to be able to fit over the largest part of your lower body When put on. Now the Difference in measurements needs to be Halved. And then we will start the next round with a Double crochet chain of that measurement +1 more DC in that chain as this will be the middle point of the back. And we will end with the same measurement we started with in that Double crochet chain.We are going back to 'Row 1' But its technically 'ROW 21'Row 1: Double Crochet Chain of 13, Then Connect the double crochet chain to the bottom front side of the piece. Continue the DC random rows OR Spiral row until you get to the end of the row, then add a 11 Double crochet Chain. then add 1 more ST to the Double crochet chain and connect in the back. this should be able to fit over the largest part of your lower body.
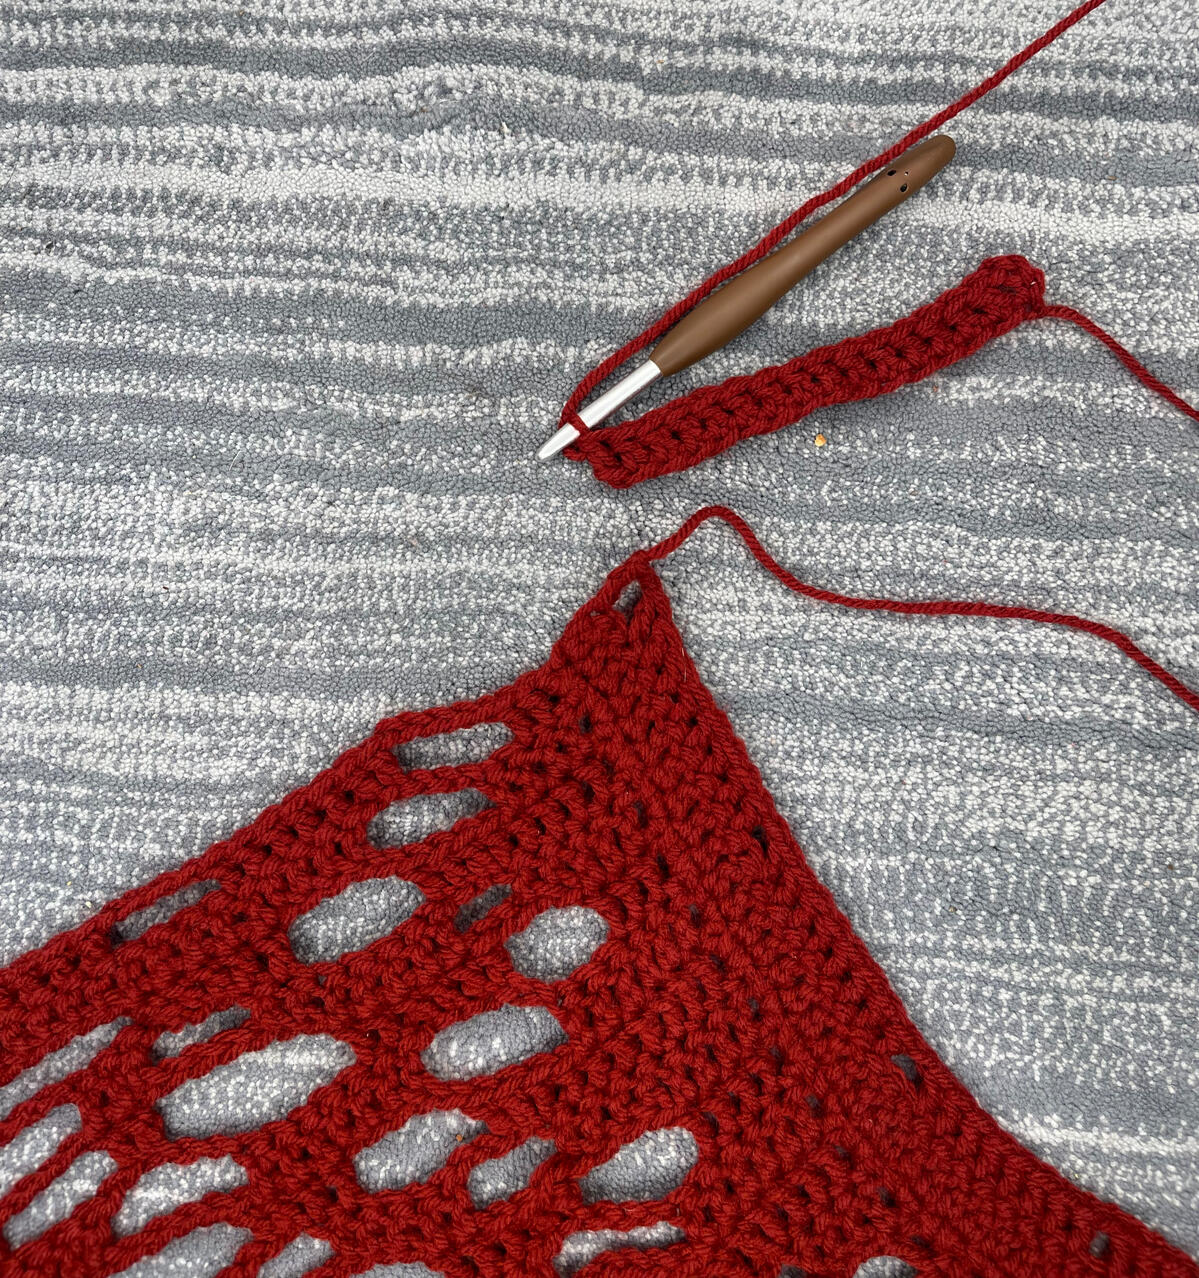
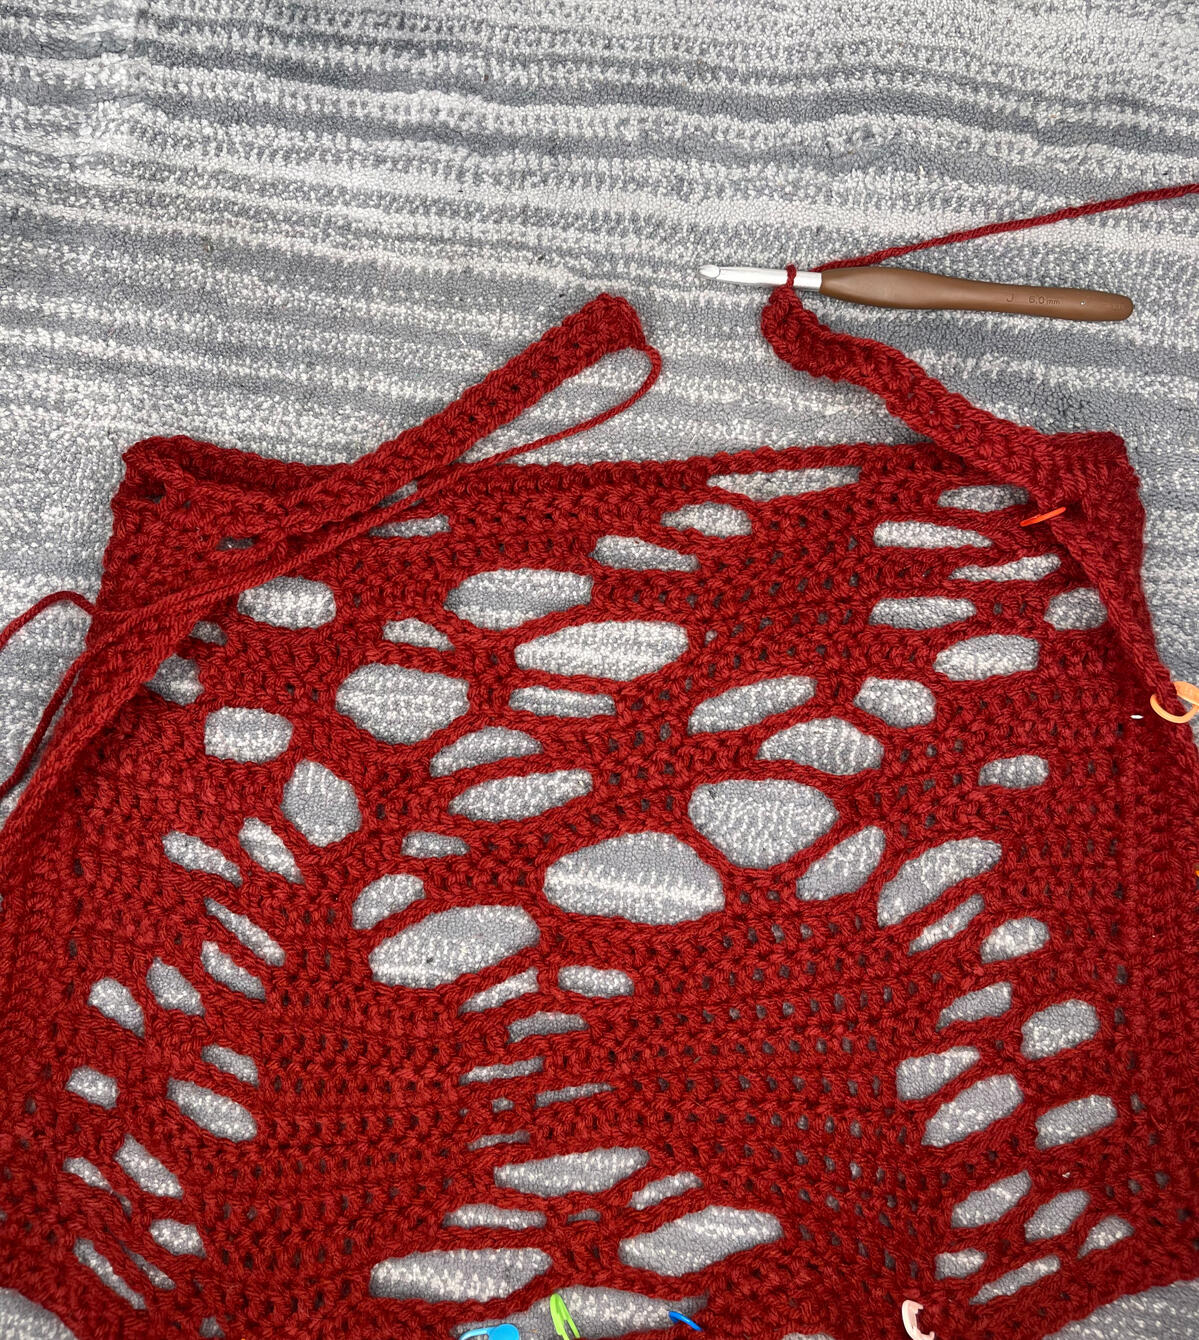
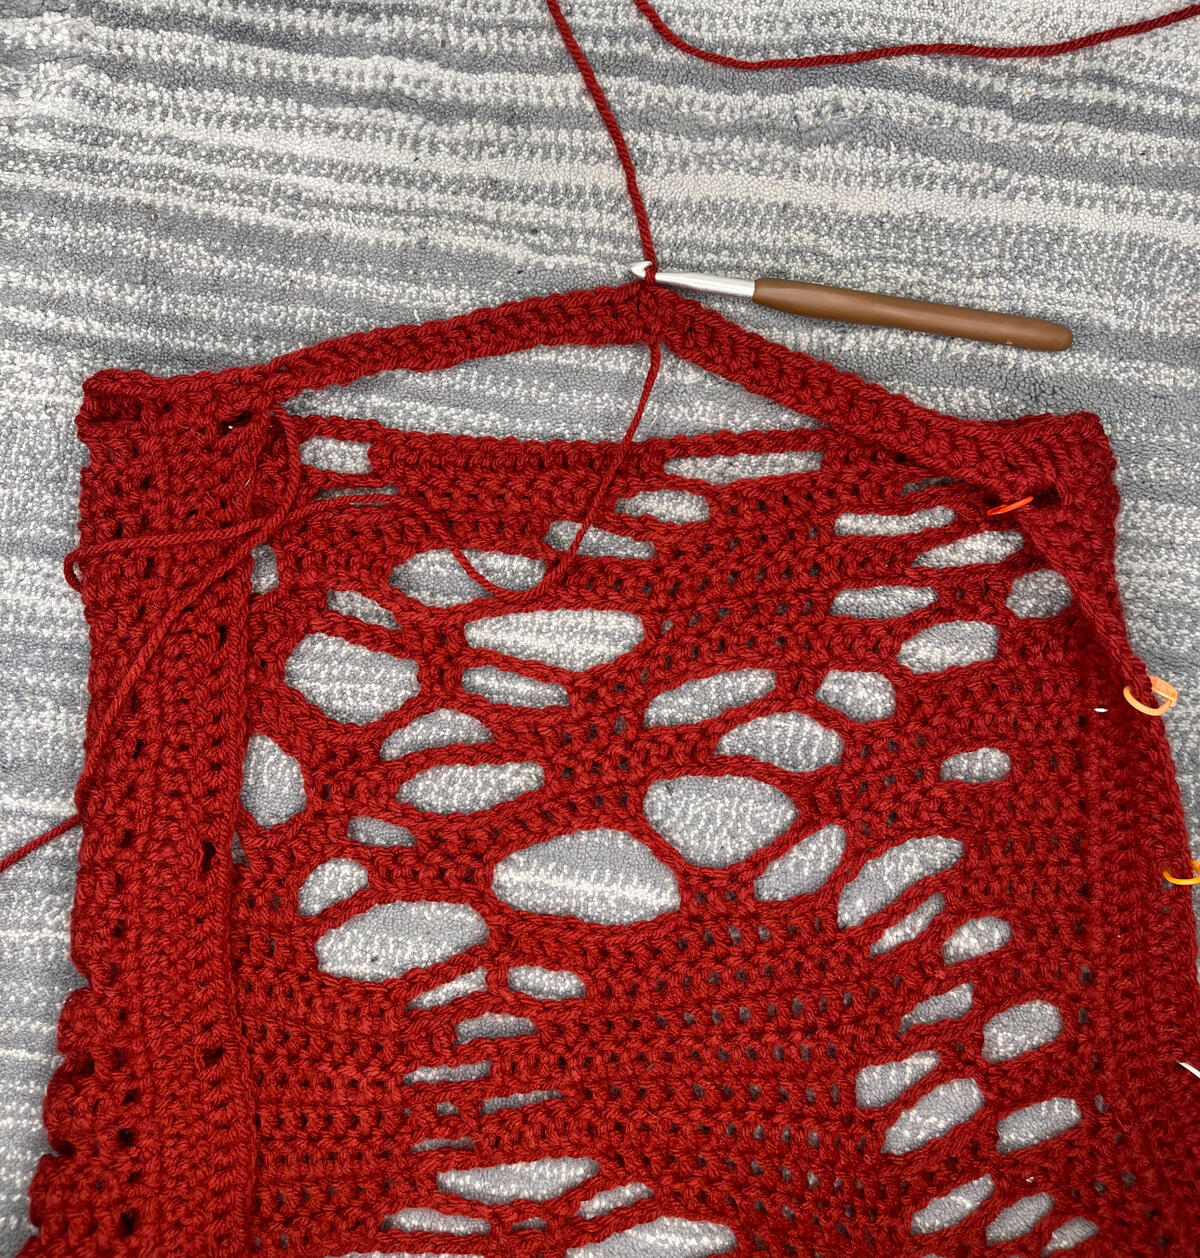
Row 2-12: Chain 2 turn your work and DC into the same ST, Continue the Random hole placement Or Spiral Rows until you reach the end of the row. ST into the first DC.DO NOT CUT THE BALL OF YARN, We will come back to this Starting at Row 13 .
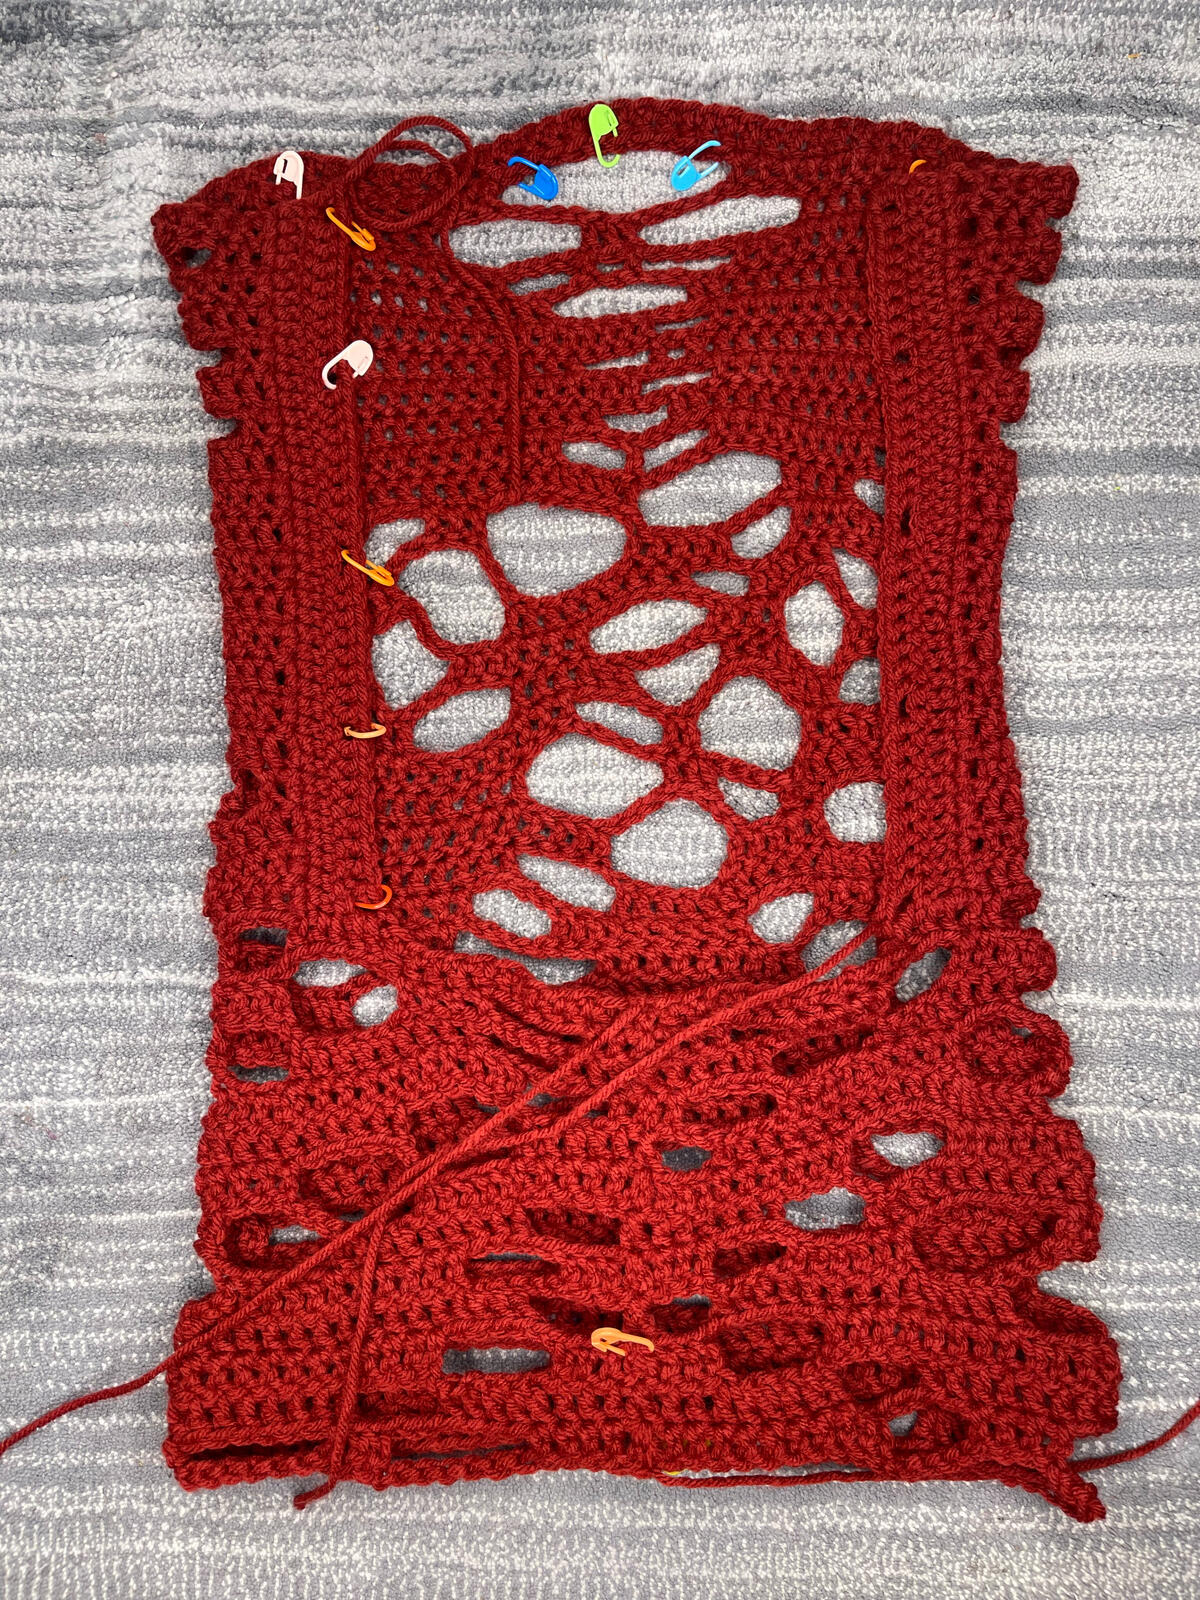
We will now be adding the straps/Edging onto the back of the garment.
Starting somewhere on the back Corset side of the garment, we will Grab a new ball of yarn and slip stitch into one of the Double crochet stitches on the side.
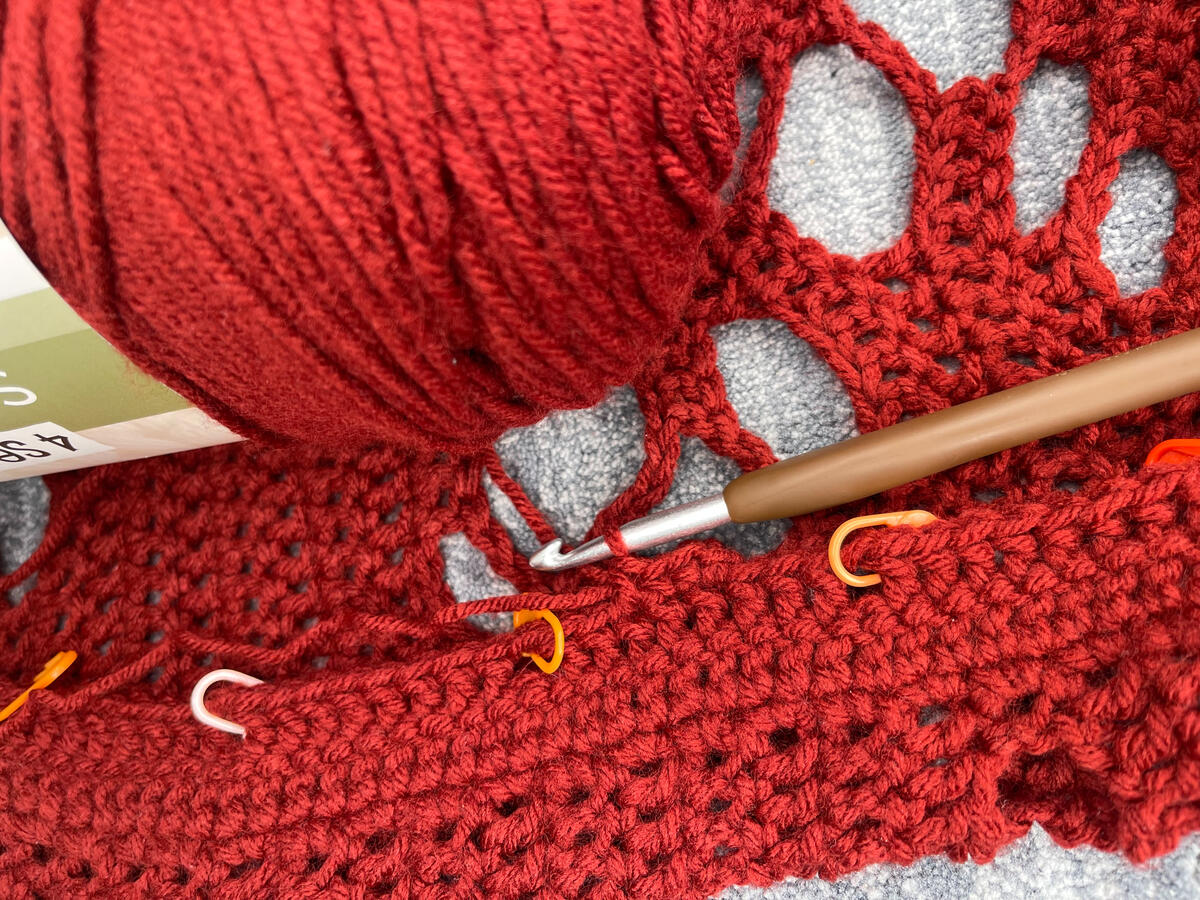
We will then SC around the edge of the back and around the front until you reach the marker in the middle of the front where we marked at the very beginning.
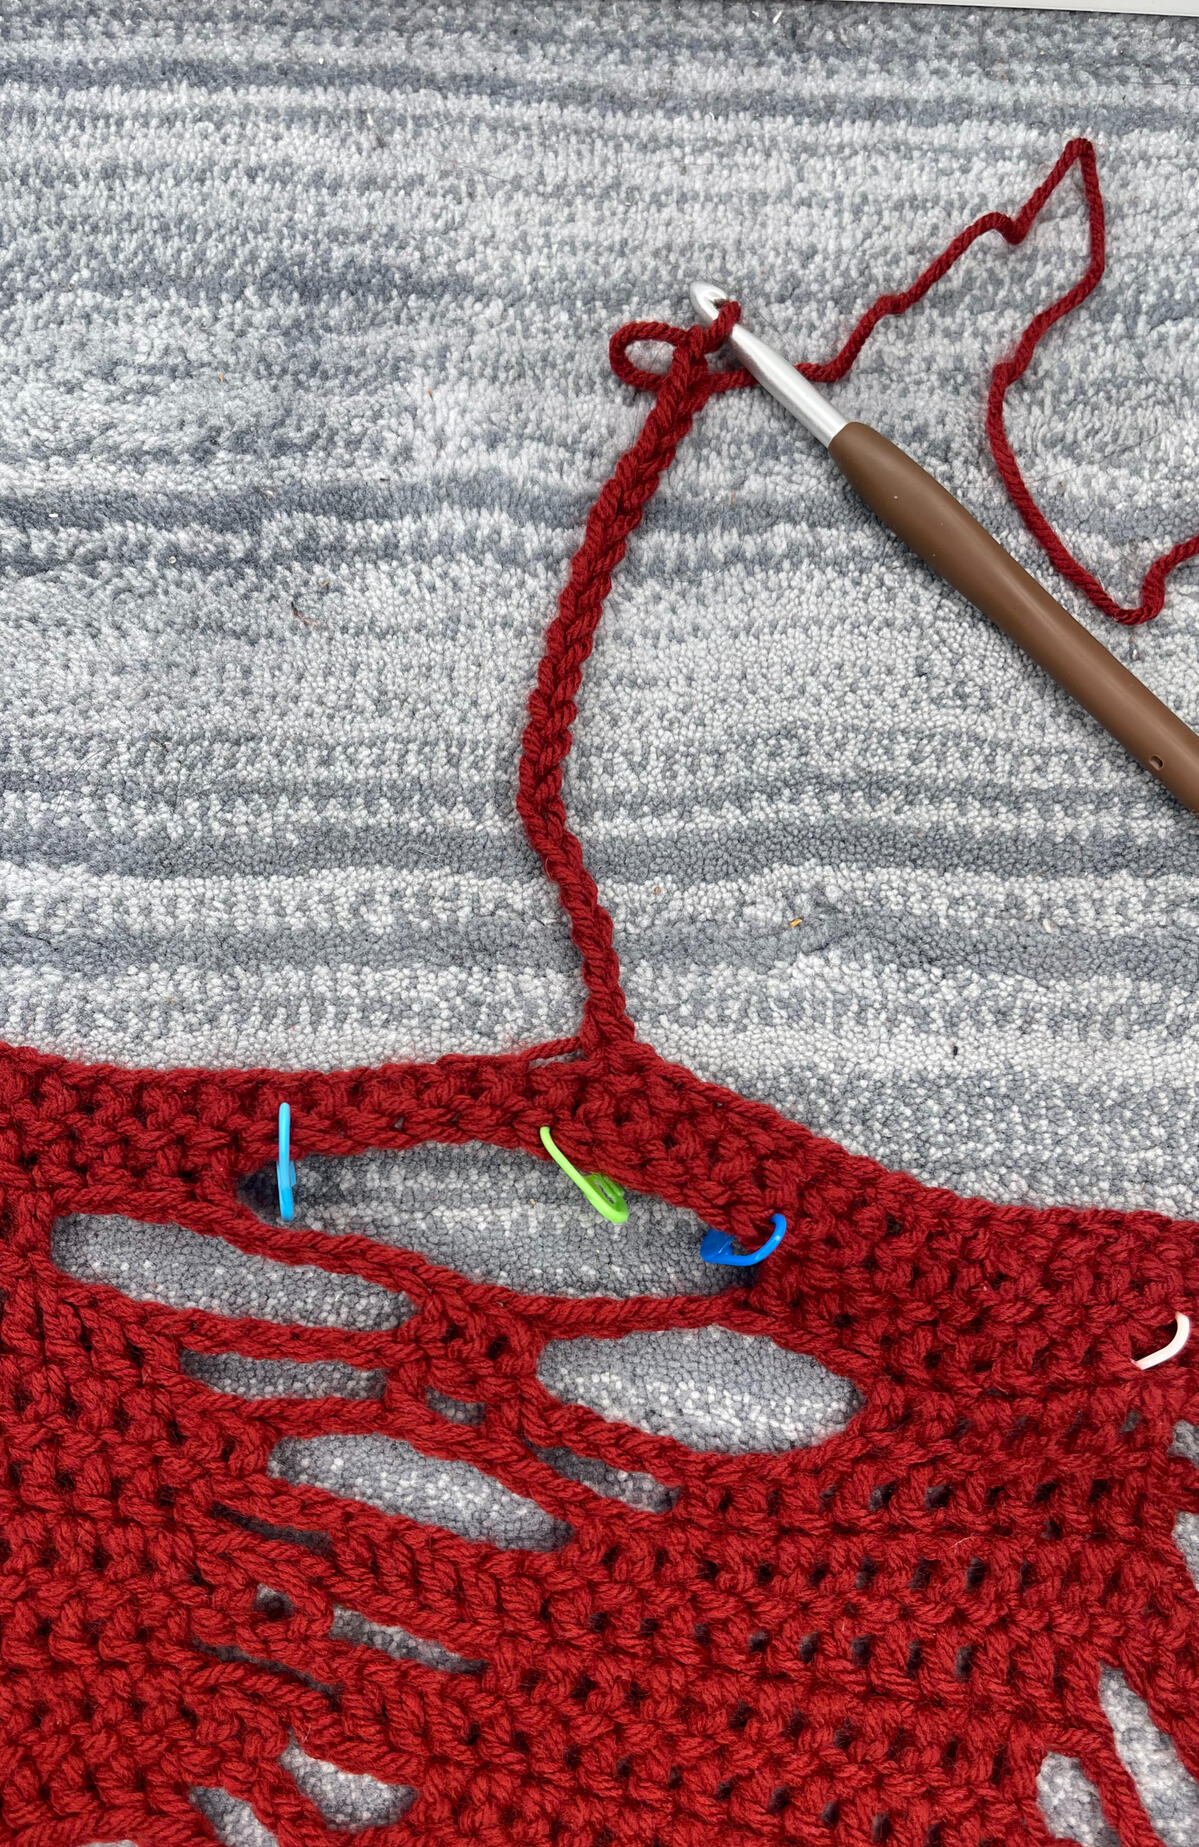
From here you will Chain 150. Then SC back into the 150 Chains. Once back at the start of the chains, Slip stitch into the SC.
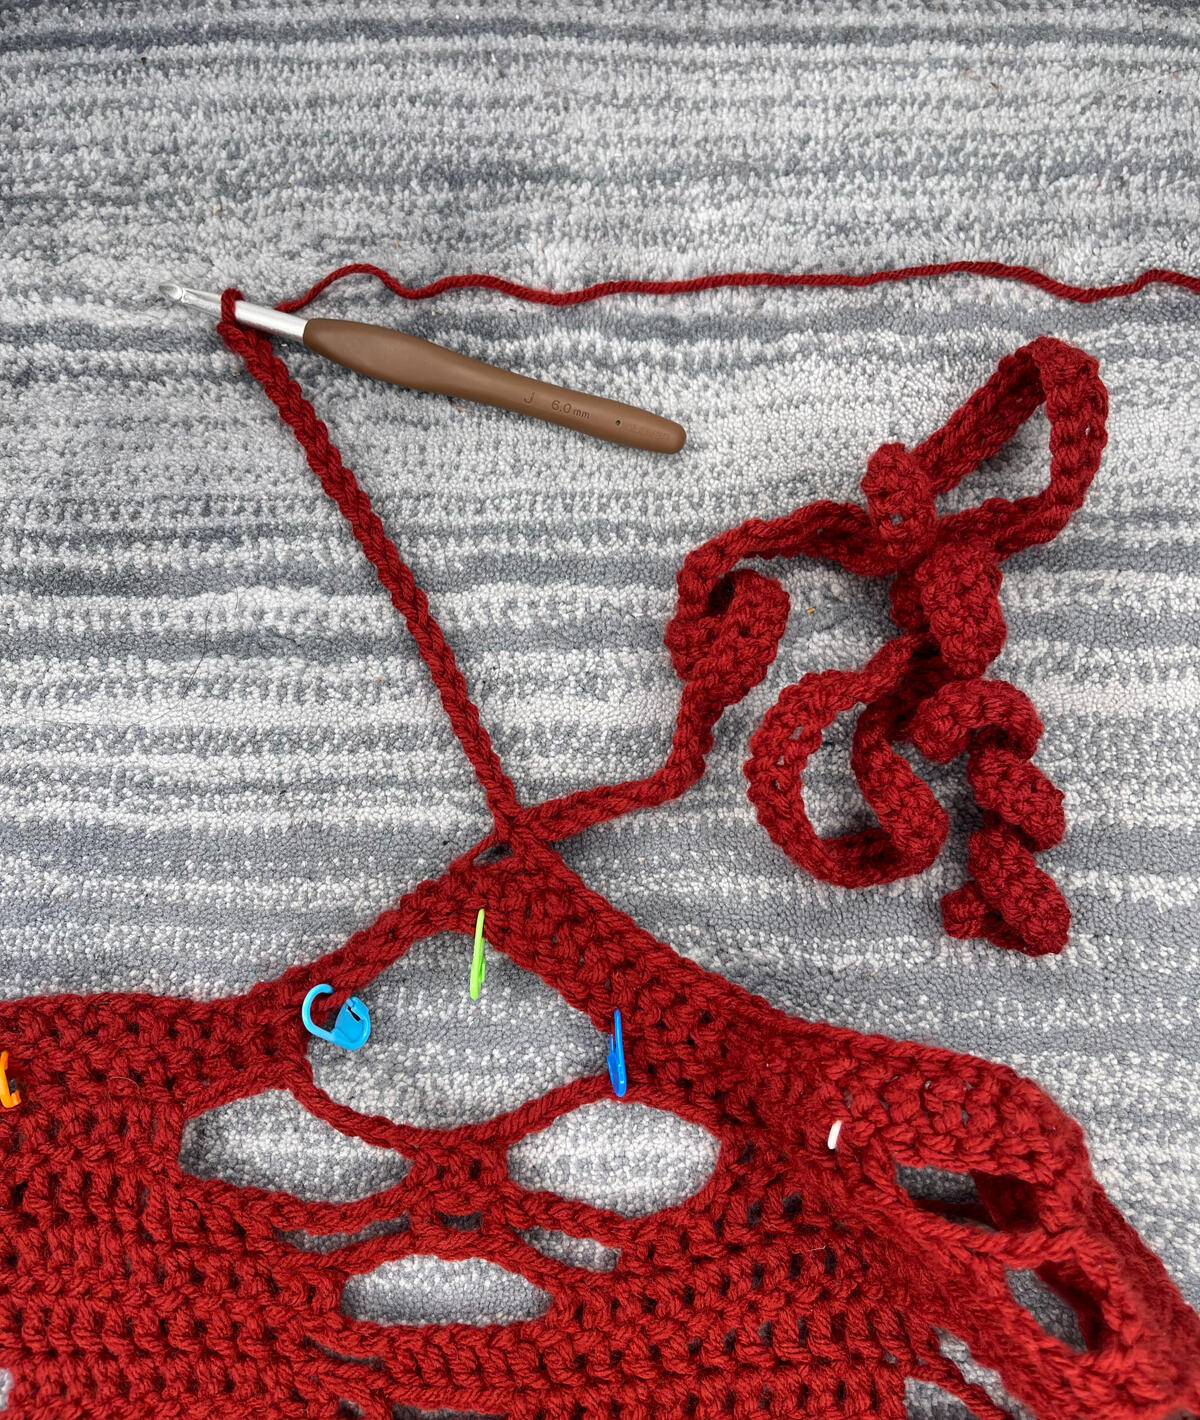
then put another single crochet in the same stitch, and chain 150 again. Then SC back into the 150 Chains. Once back at the start of the chains, Slip stitch into the SC. Continue to SC until you get back to the start.
Then SL ST into to first Single crochet. Chain 1, cut 20cm-30cm so you're able to sew in the end. (When you get to a corner, just 1 single crochet into the top of the stitch, then 2 into the size of the stitch.)
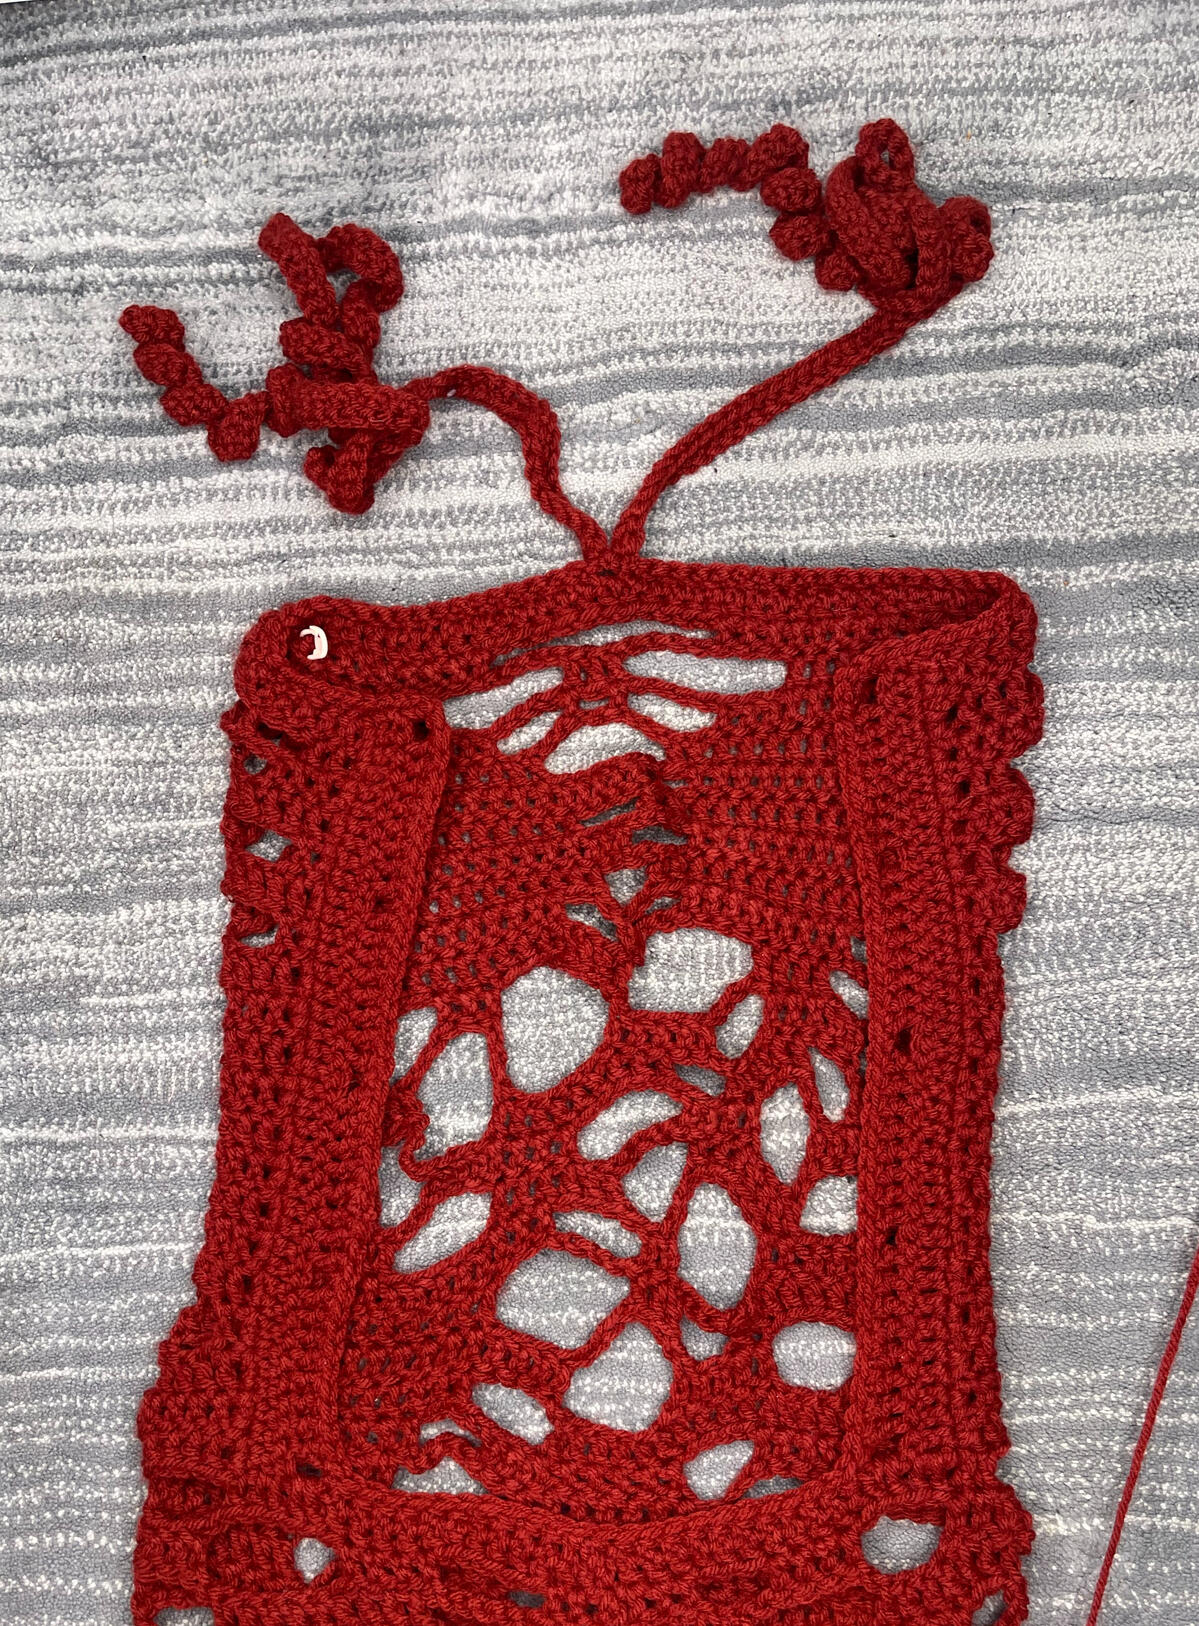
now tie in all the loose ends. and set aside the ball of yarn you just cut off, we will use it way later.
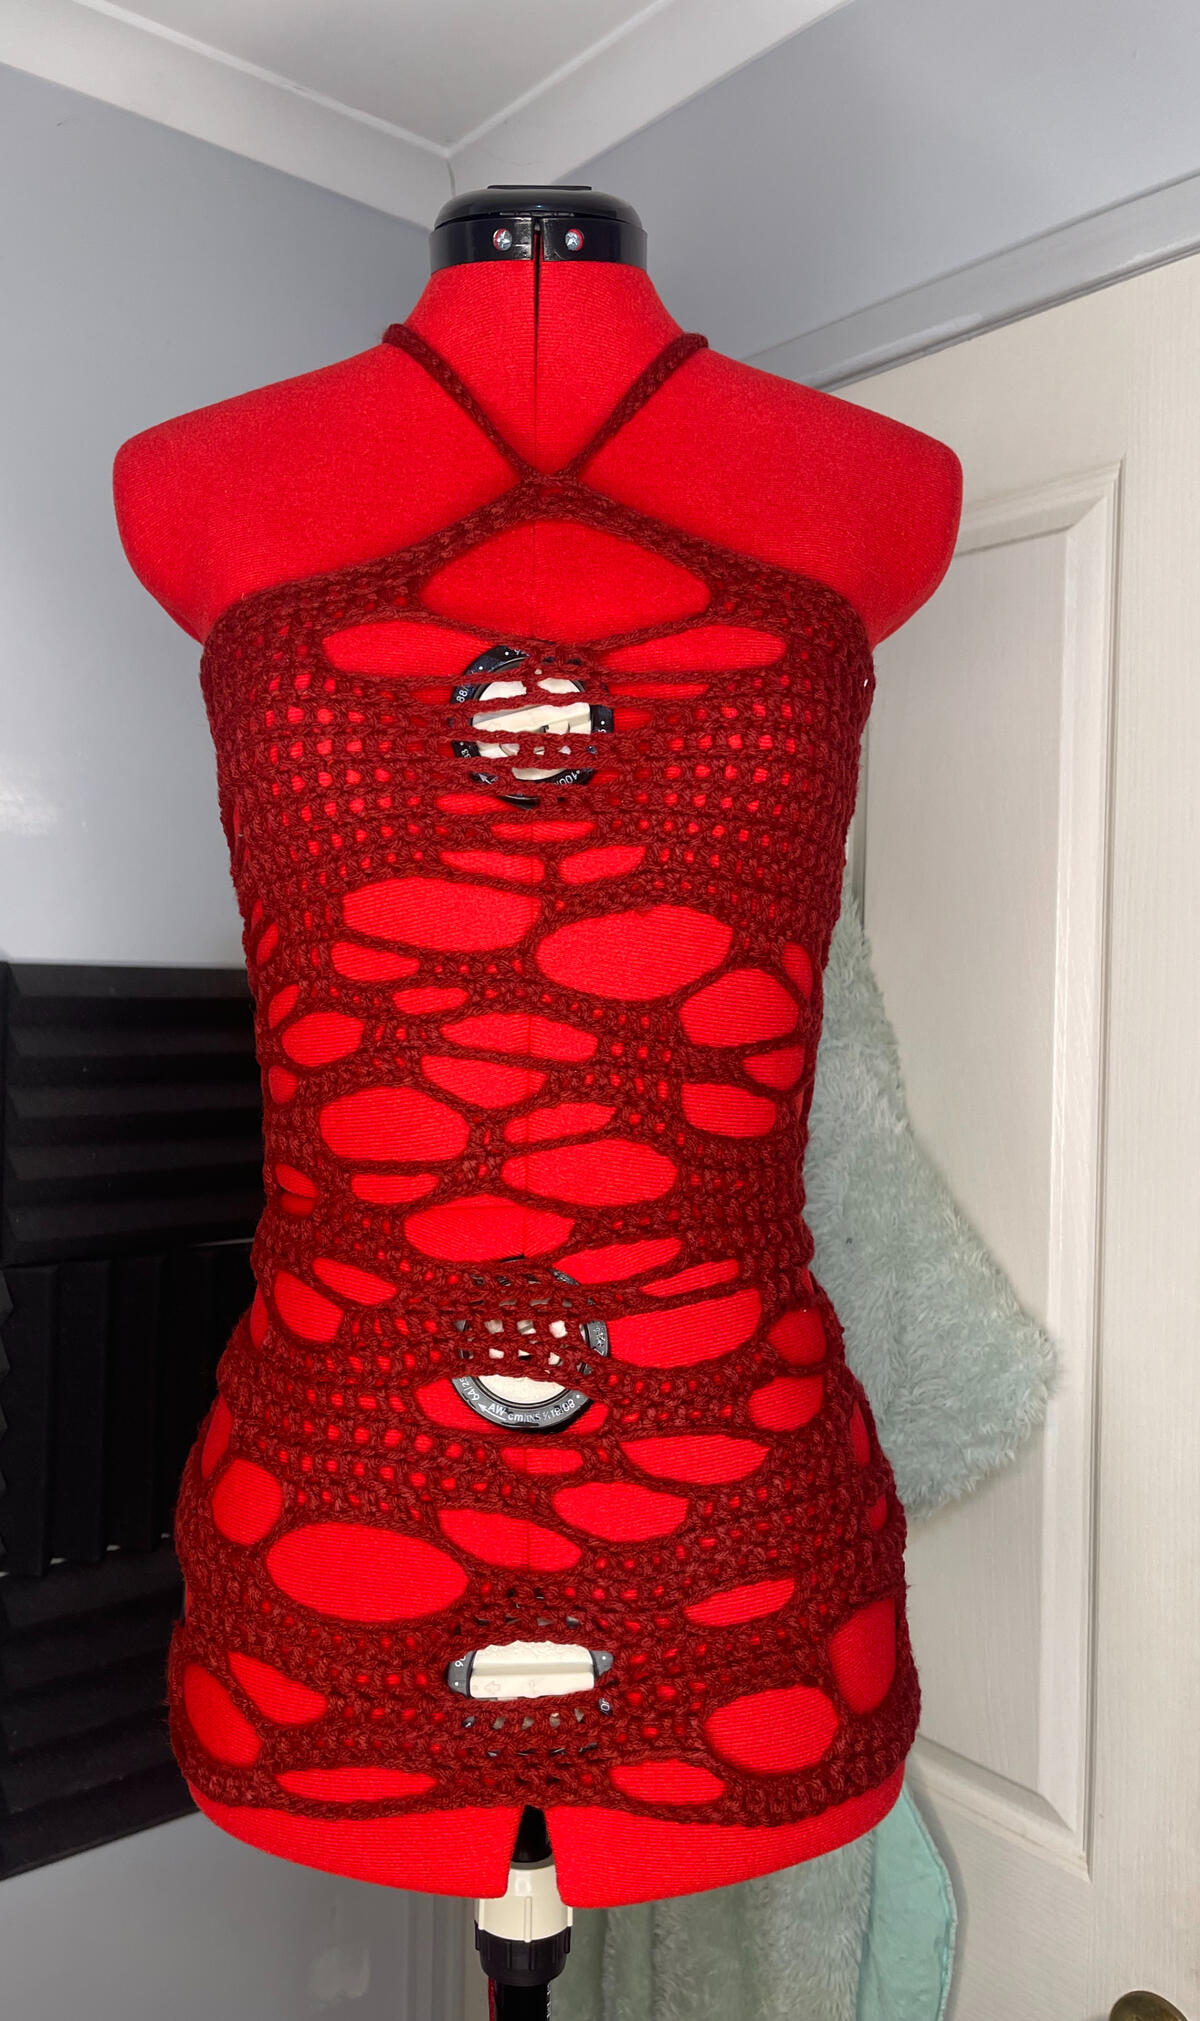
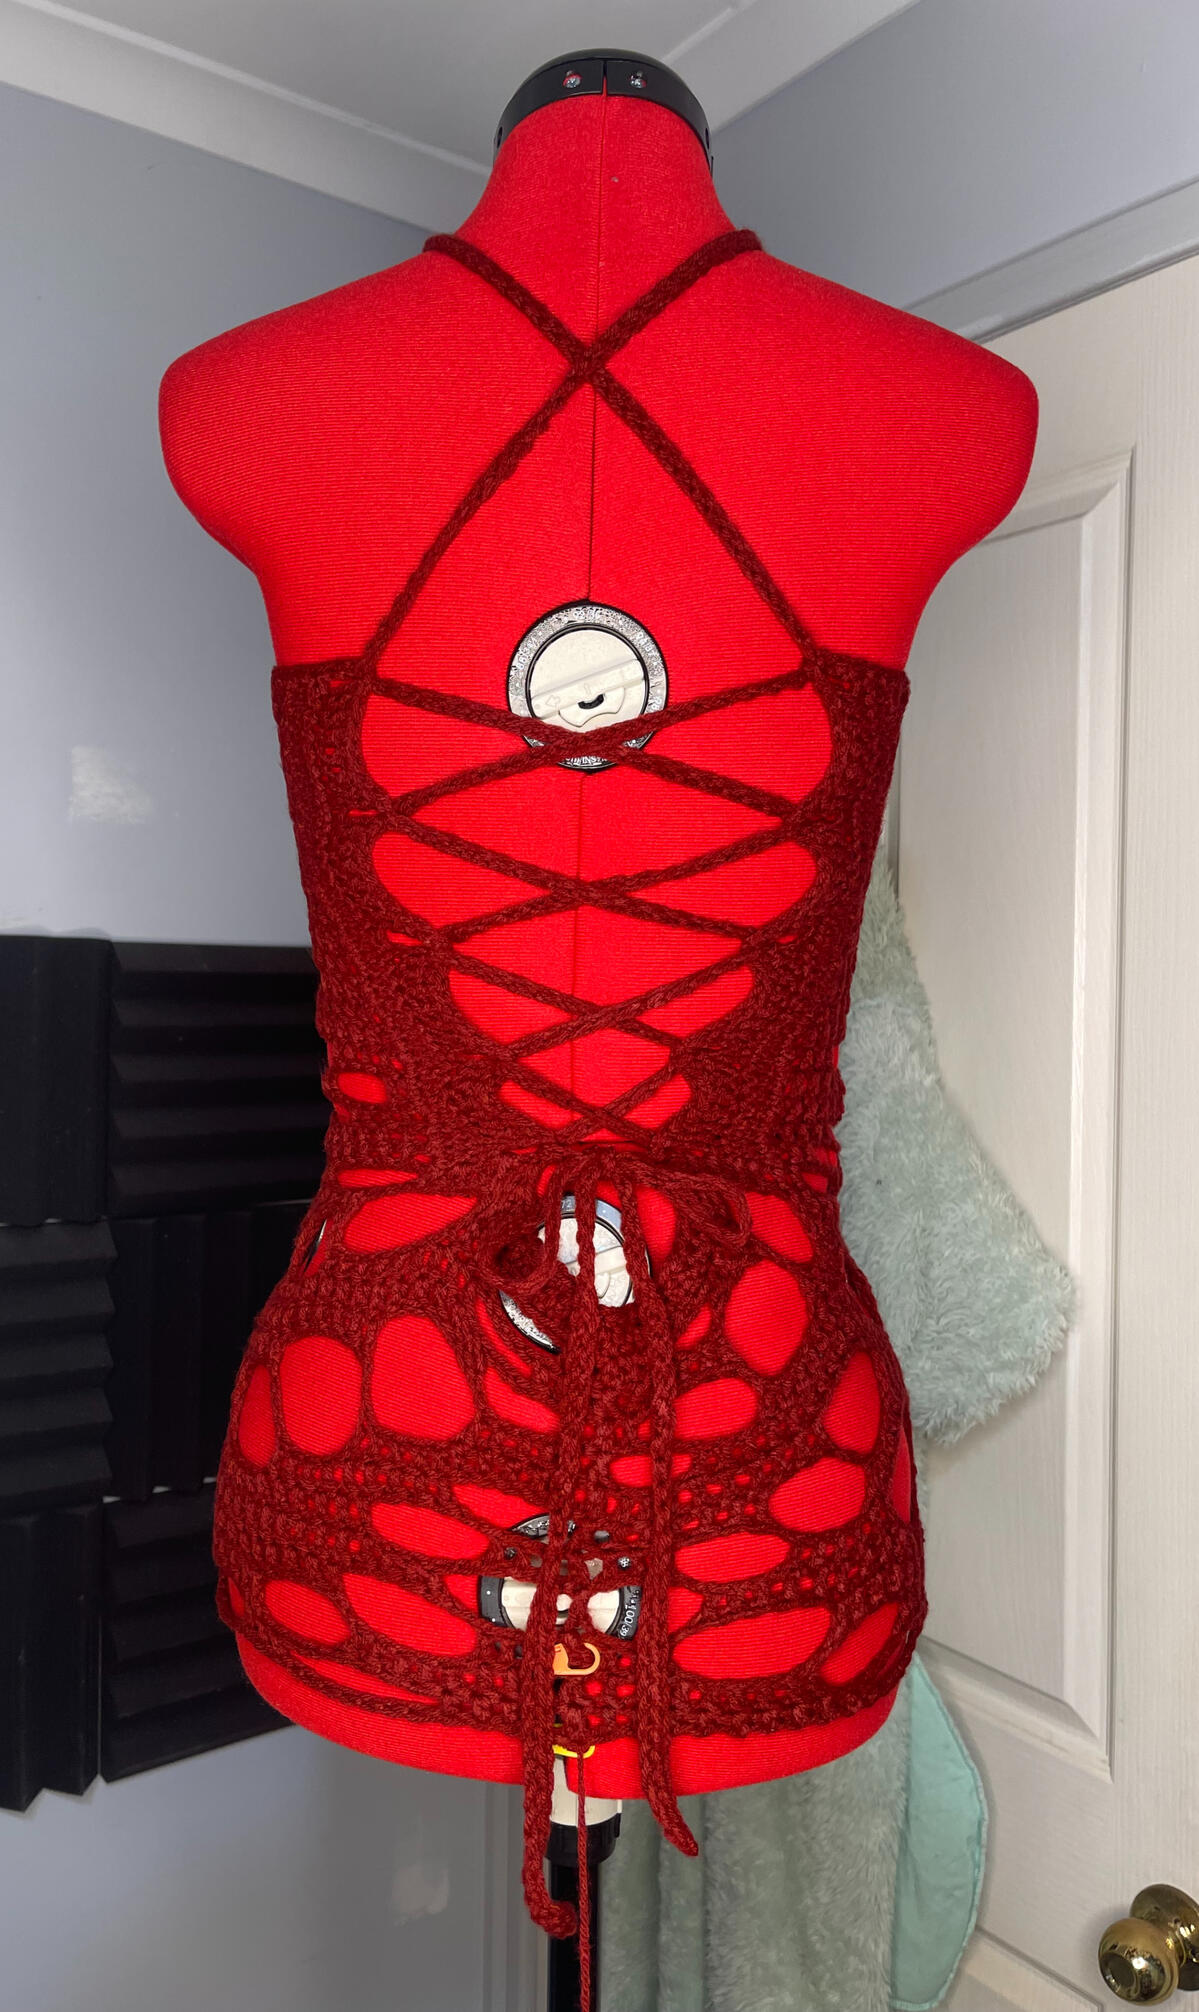
You will now change to the 2.5mm and we will be using the Elastic thread.
on the inside starting from the right side, at the bottom of the last corset hole, attack the elastic string with a Slip knot, then SC across the back until you get to the other side's Bottom Corset hole. SL ST And tie in ends.
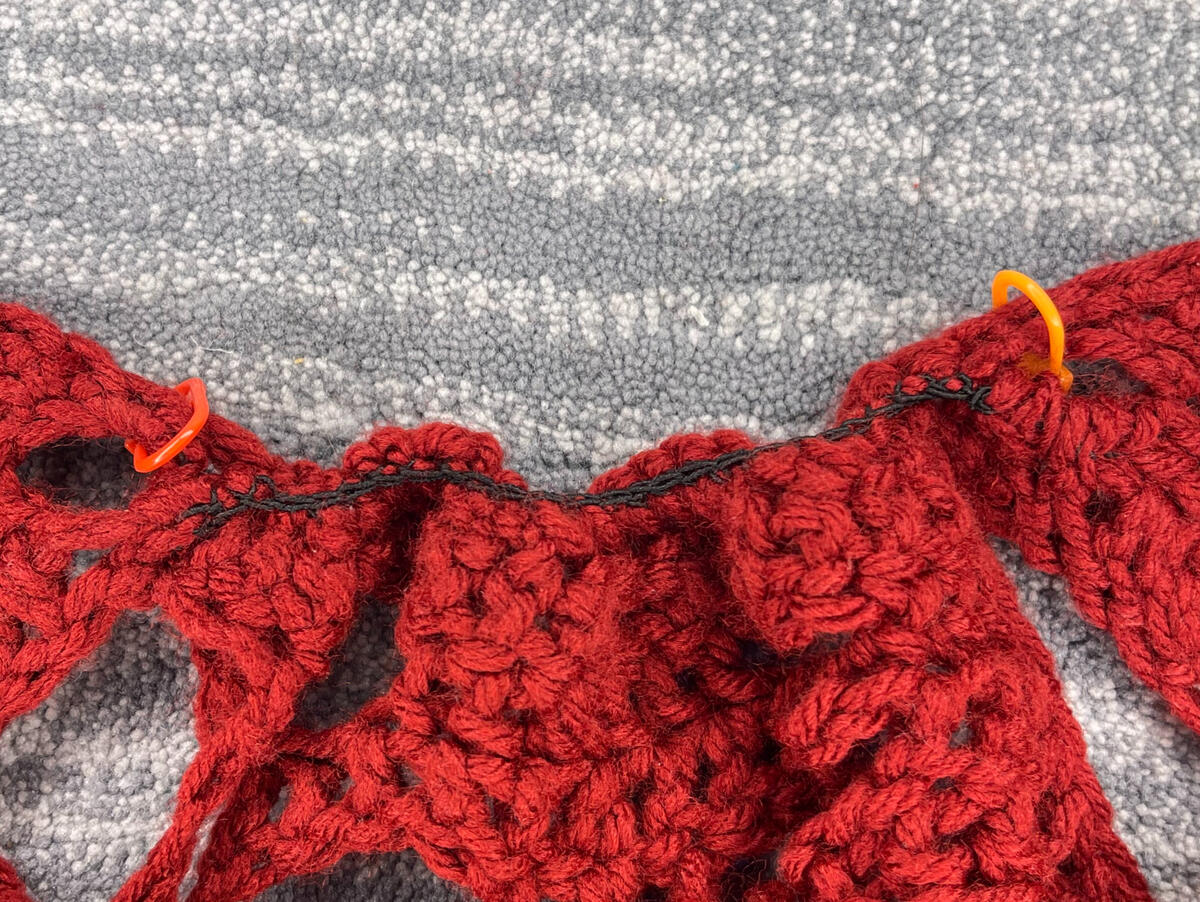
Its time to jump back to ROW 13 of the First ball of yarn (the bottom of the dress) This is where we start the Framing of the Butt.
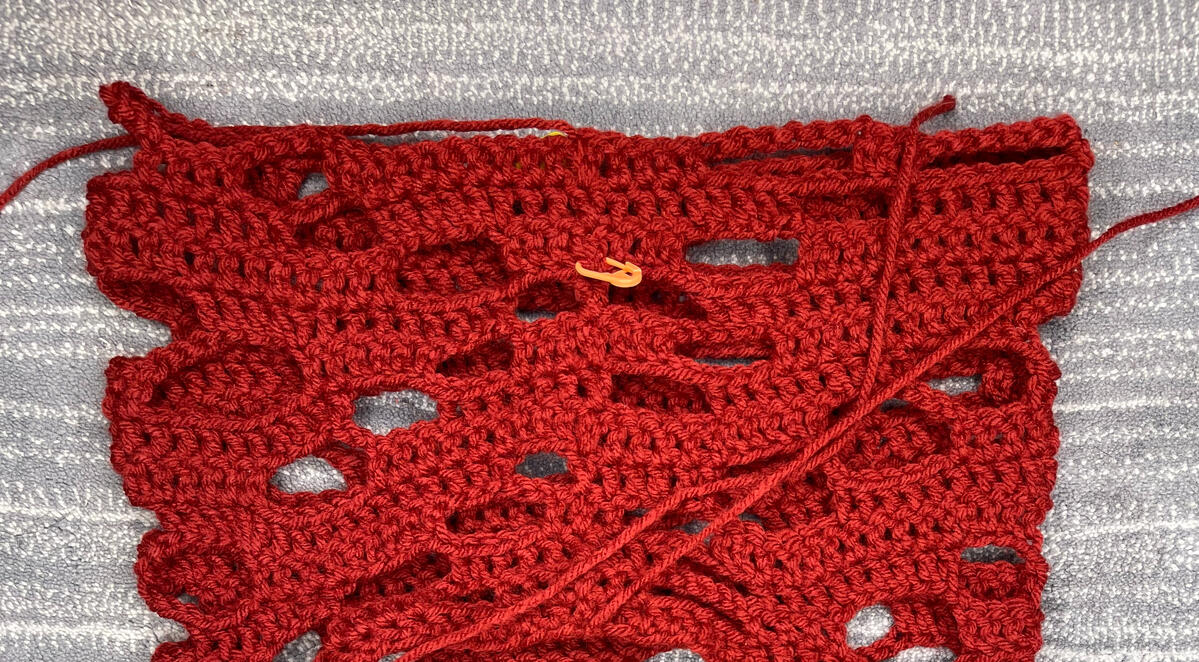
ROW 13 - Chain 2 turn your work and DC into the same ST, Chain 5, Skip 5, DC into the 6th Stitch. Then DC into the next 7 ST. Continue the Random Holes or Spiral pattern until you get to 12 away from the end, DC into 7 ST then Chain 5, Skip 5 and SL ST into the First DC.Row 14 - Chain 2 turn your work and DC into the same ST. DC into 2 ST. Chain 7, Skip 7, DC into the 8Th Stitch. Then DC into the next 7 ST. Continue the Random Holes or Spiral pattern until you get the last 16 ST. DC into 7 Stitches. Chain 7, Skip 7, DC into the 8Th Stitch. DC into the last ST and SL ST into the first DC.Row 15 - Chain 2 turn your work and DC into the same ST. DC into 6 ST. Chain 7, Skip 7, DC into the 8Th Stitch. Then DC into the next 7 ST. Continue the Random Holes or Spiral pattern until you get the last 20 ST. DC into 7 Stitches. Chain 7, Skip 7, DC into the 8Th Stitch. DC into the last 5 ST and SL ST into the first DC.Row 16 - Chain 2 turn your work and DC into the same ST. DC into 9 ST. Chain 7, Skip 7, DC into the 8Th Stitch. Then DC into the next 7 ST. Continue the Random Holes or Spiral pattern until you get the last 23 ST. DC into 7 Stitches. Chain 7, Skip 7, DC into the 8Th Stitch. DC into the last 8 ST and SL ST into the first DC.Row 17 - Chain 2 turn your work and DC into the same ST. DC into 11 ST. Chain 7, Skip 7, DC into the 8Th Stitch. Then DC into the next 7 ST. Continue the Random Holes or Spiral pattern until you get the last 25 ST DC into 7 Stitches. Chain 7, Skip 7, DC into the 8Th Stitch. DC into the last 10 ST and SL ST into the first DC.ROW 18 - Chain 2 turn your work and DC into the same ST. DC into 13 ST. Chain 7, Skip 7, DC into the 8Th Stitch. Then DC into the next 7 ST. Continue the Random Holes or Spiral pattern until you get the last 27 ST DC into 7 Stitches. Chain 7, Skip 7, DC into the 8Th Stitch. DC into the last 12 ST and SL ST into the first DC.ROW 19 - Chain 2 turn your work and DC into the same ST. DC into 15 ST. Chain 7, Skip 7, DC into the 8Th Stitch. Then DC into the next 7 ST. Continue the Random Holes or Spiral pattern until you get the last 29 ST DC into 7 Stitches. Chain 7, Skip 7, DC into the 8Th Stitch. DC into the last 14 ST and SL ST into the first DC.Now we Just pretty must go in reverse repeating from row 18 - 14 Again.ROW 20 - Chain 2 turn your work and DC into the same ST. DC into 13 ST. Chain 7, Skip 7, DC into the 8Th Stitch. Then DC into the next 7 ST. Continue the Random Holes or Spiral pattern until you get the last 27 ST DC into 7 Stitches. Chain 7, Skip 7, DC into the 8Th Stitch. DC into the last 12 ST and SL ST into the first DC.ROW 21 - Chain 2 turn your work and DC into the same ST. DC into 11 ST. Chain 7, Skip 7, DC into the 8Th Stitch. Then DC into the next 7 ST. Continue the Random Holes or Spiral pattern until you get the last 25 ST DC into 7 Stitches. Chain 7, Skip 7, DC into the 8Th Stitch. DC into the last 10 ST and SL ST into the first DC.ROW 22 - Chain 2 turn your work and DC into the same ST. DC into 9 ST. Chain 7, Skip 7, DC into the 8Th Stitch. Then DC into the next 7 ST. Continue the Random Holes or Spiral pattern until you get the last 23 ST. DC into 7 Stitches. Chain 7, Skip 7, DC into the 8Th Stitch. DC into the last 8 ST and SL ST into the first DC.ROW 23 - Chain 2 turn your work and DC into the same ST. DC into 6 ST. Chain 7, Skip 7, DC into the 8Th Stitch. Then DC into the next 7 ST. Continue the Random Holes or Spiral pattern until you get the last 20 ST. DC into 7 Stitches. Chain 7, Skip 7, DC into the 8Th Stitch. DC into the last 5 ST and SL ST into the first DC.ROW 24 - Chain 2 turn your work and DC into the same ST. DC into 2 ST. Chain 7, Skip 7, DC into the 8Th Stitch. Then DC into the next 7 ST. Continue the Random Holes or Spiral pattern until you get the last 16 ST. DC into 7 Stitches. Chain 7, Skip 7, DC into the 8Th Stitch. DC into the last ST and SL ST into the first DC.Now Mark the 10th Stitch from each side of the middle. This Will Be where we start the increases with Starting stitch as well.
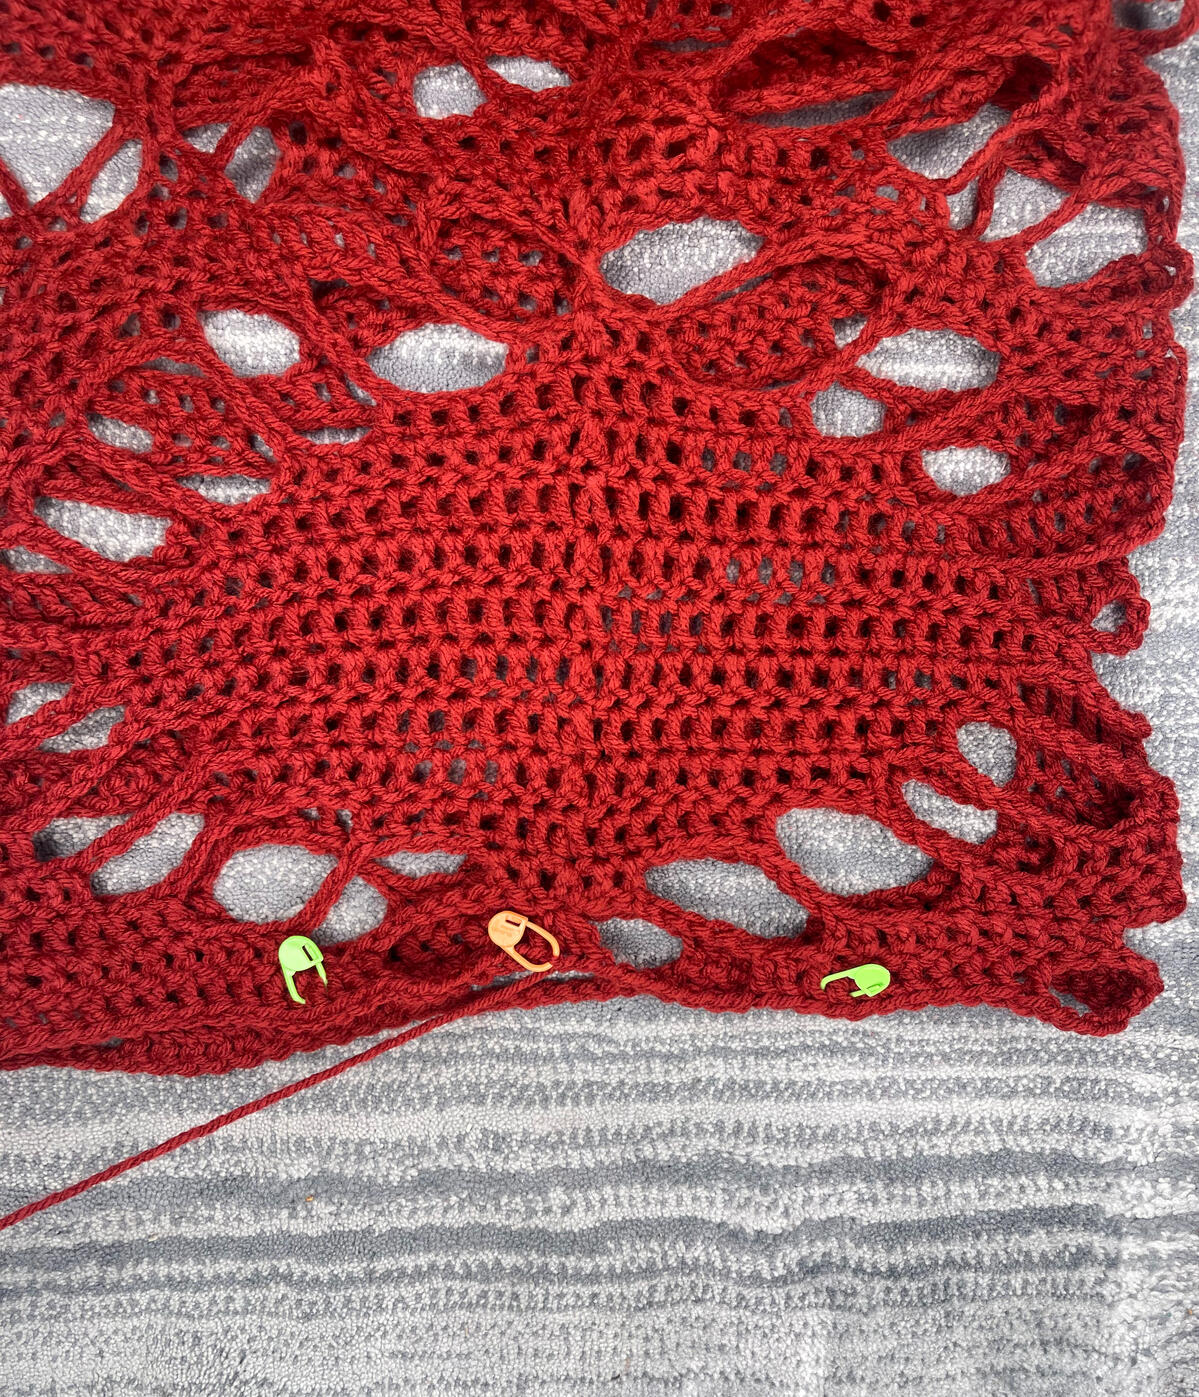
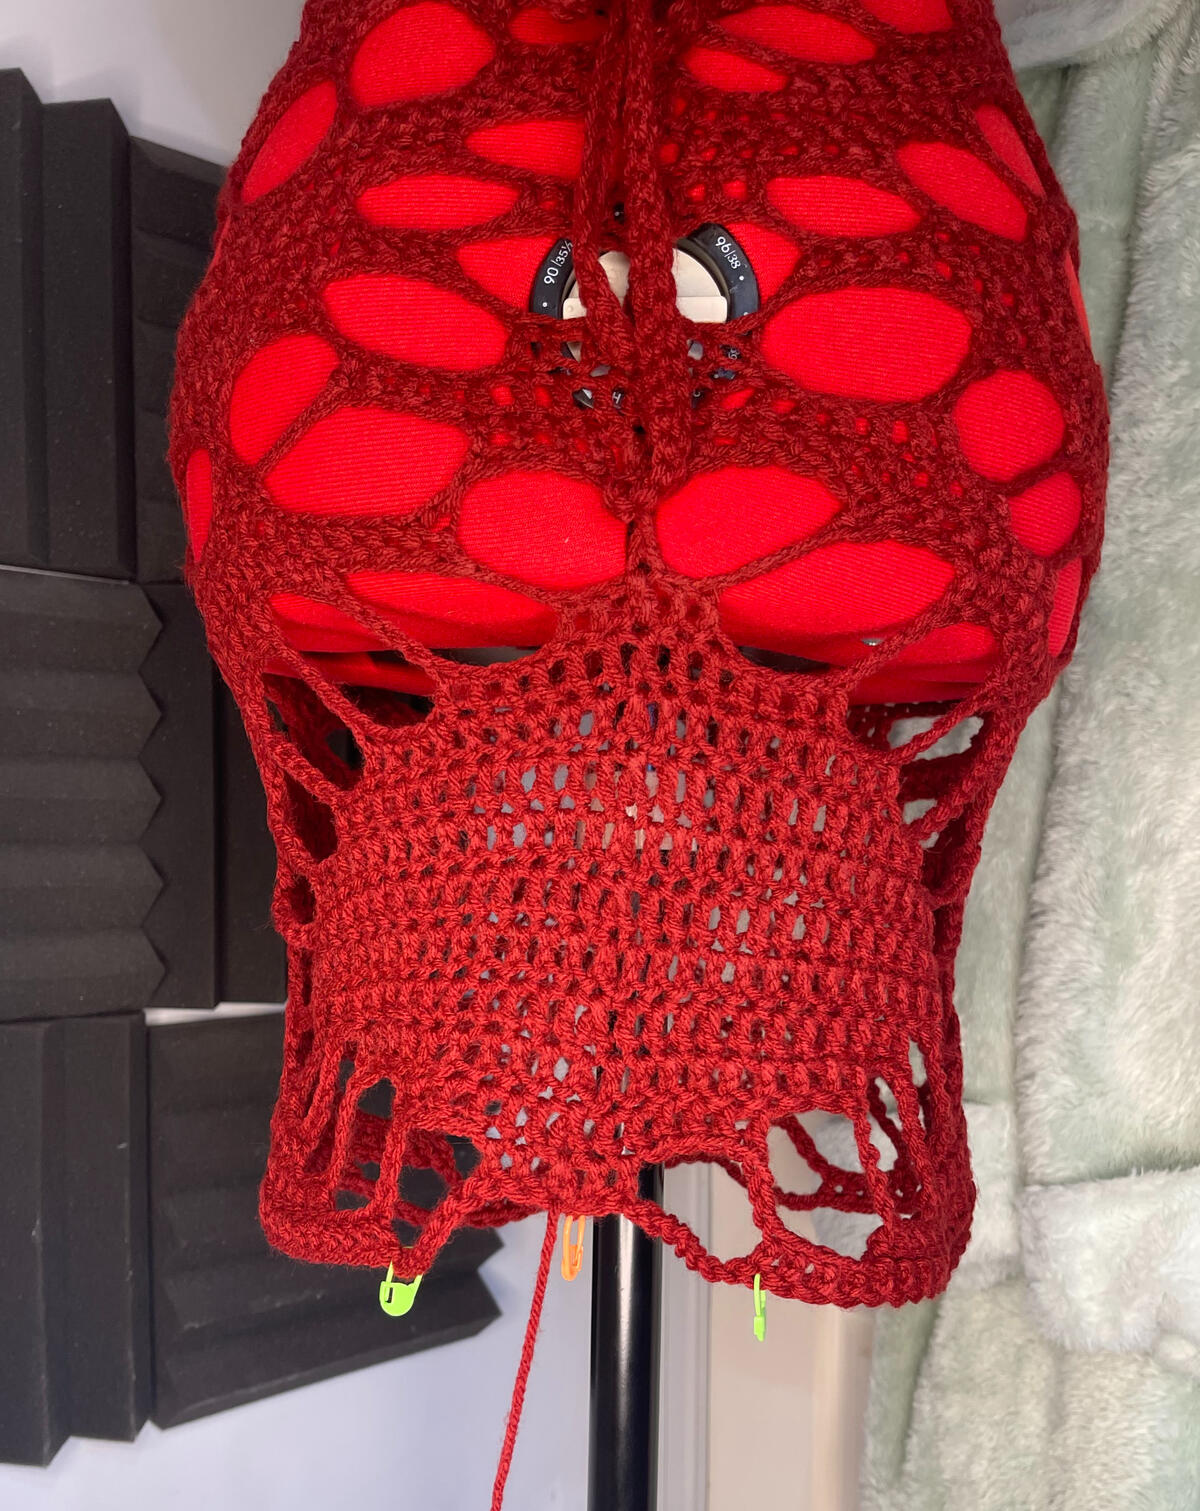
ROW 25 - Chain 2 turn your work and DC 2 into the same ST. (This Counts as 2 DC increase, However at the end of the row you will DC into the stitch again for a 3 DC Increase.) DC into 9 ST. 3DC Increase into the 10th Stitch. Continue the Random Holes or Spiral pattern until you get the last 10 Stitches. 3DC Increase into the 10th Last stitch. Then DC into the remainder 9 Stitches. DC into the Starting ST again making it a 3DC Increase. SL ST into the starting DC.I suggest Marking the Middle of each 3DC Increase As it makes it easier.Rows - 26-58 Starting each row Chain 2 turn your work and DC 2 into the same ST. This Counts as 2 DC increase. Then you will be Increasing 3DC in the middle of each 3DC ST.When you get to Row 58's End, you will Chain 1, Cut and pull through and tie in the end.
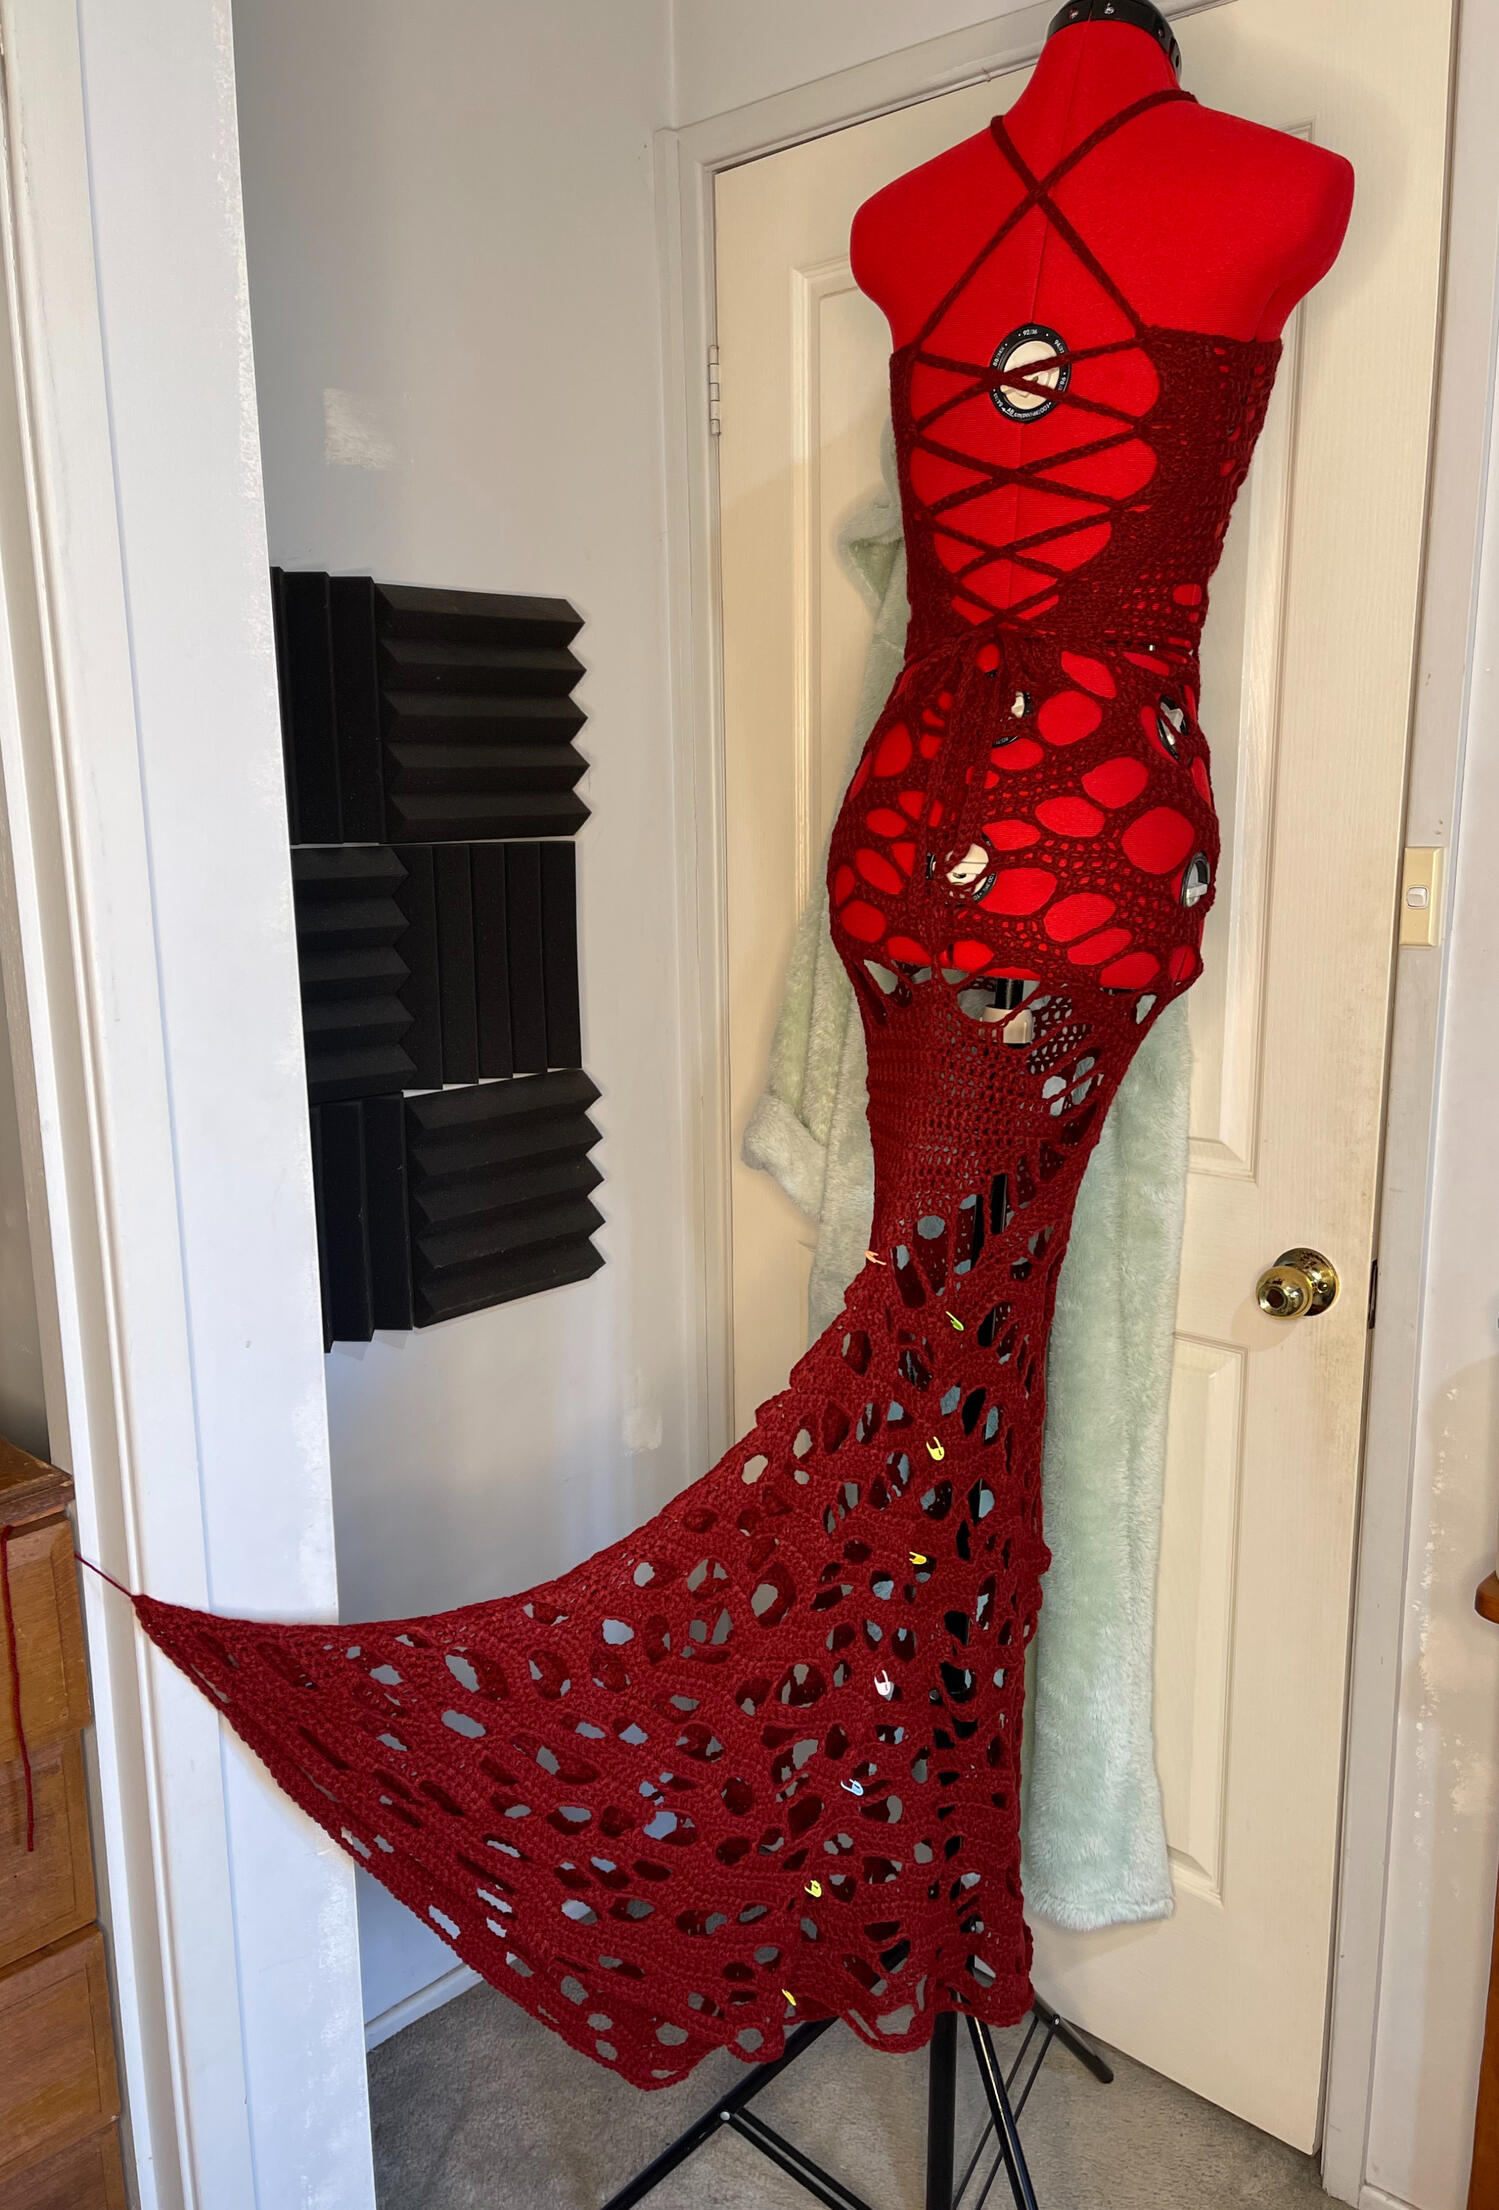
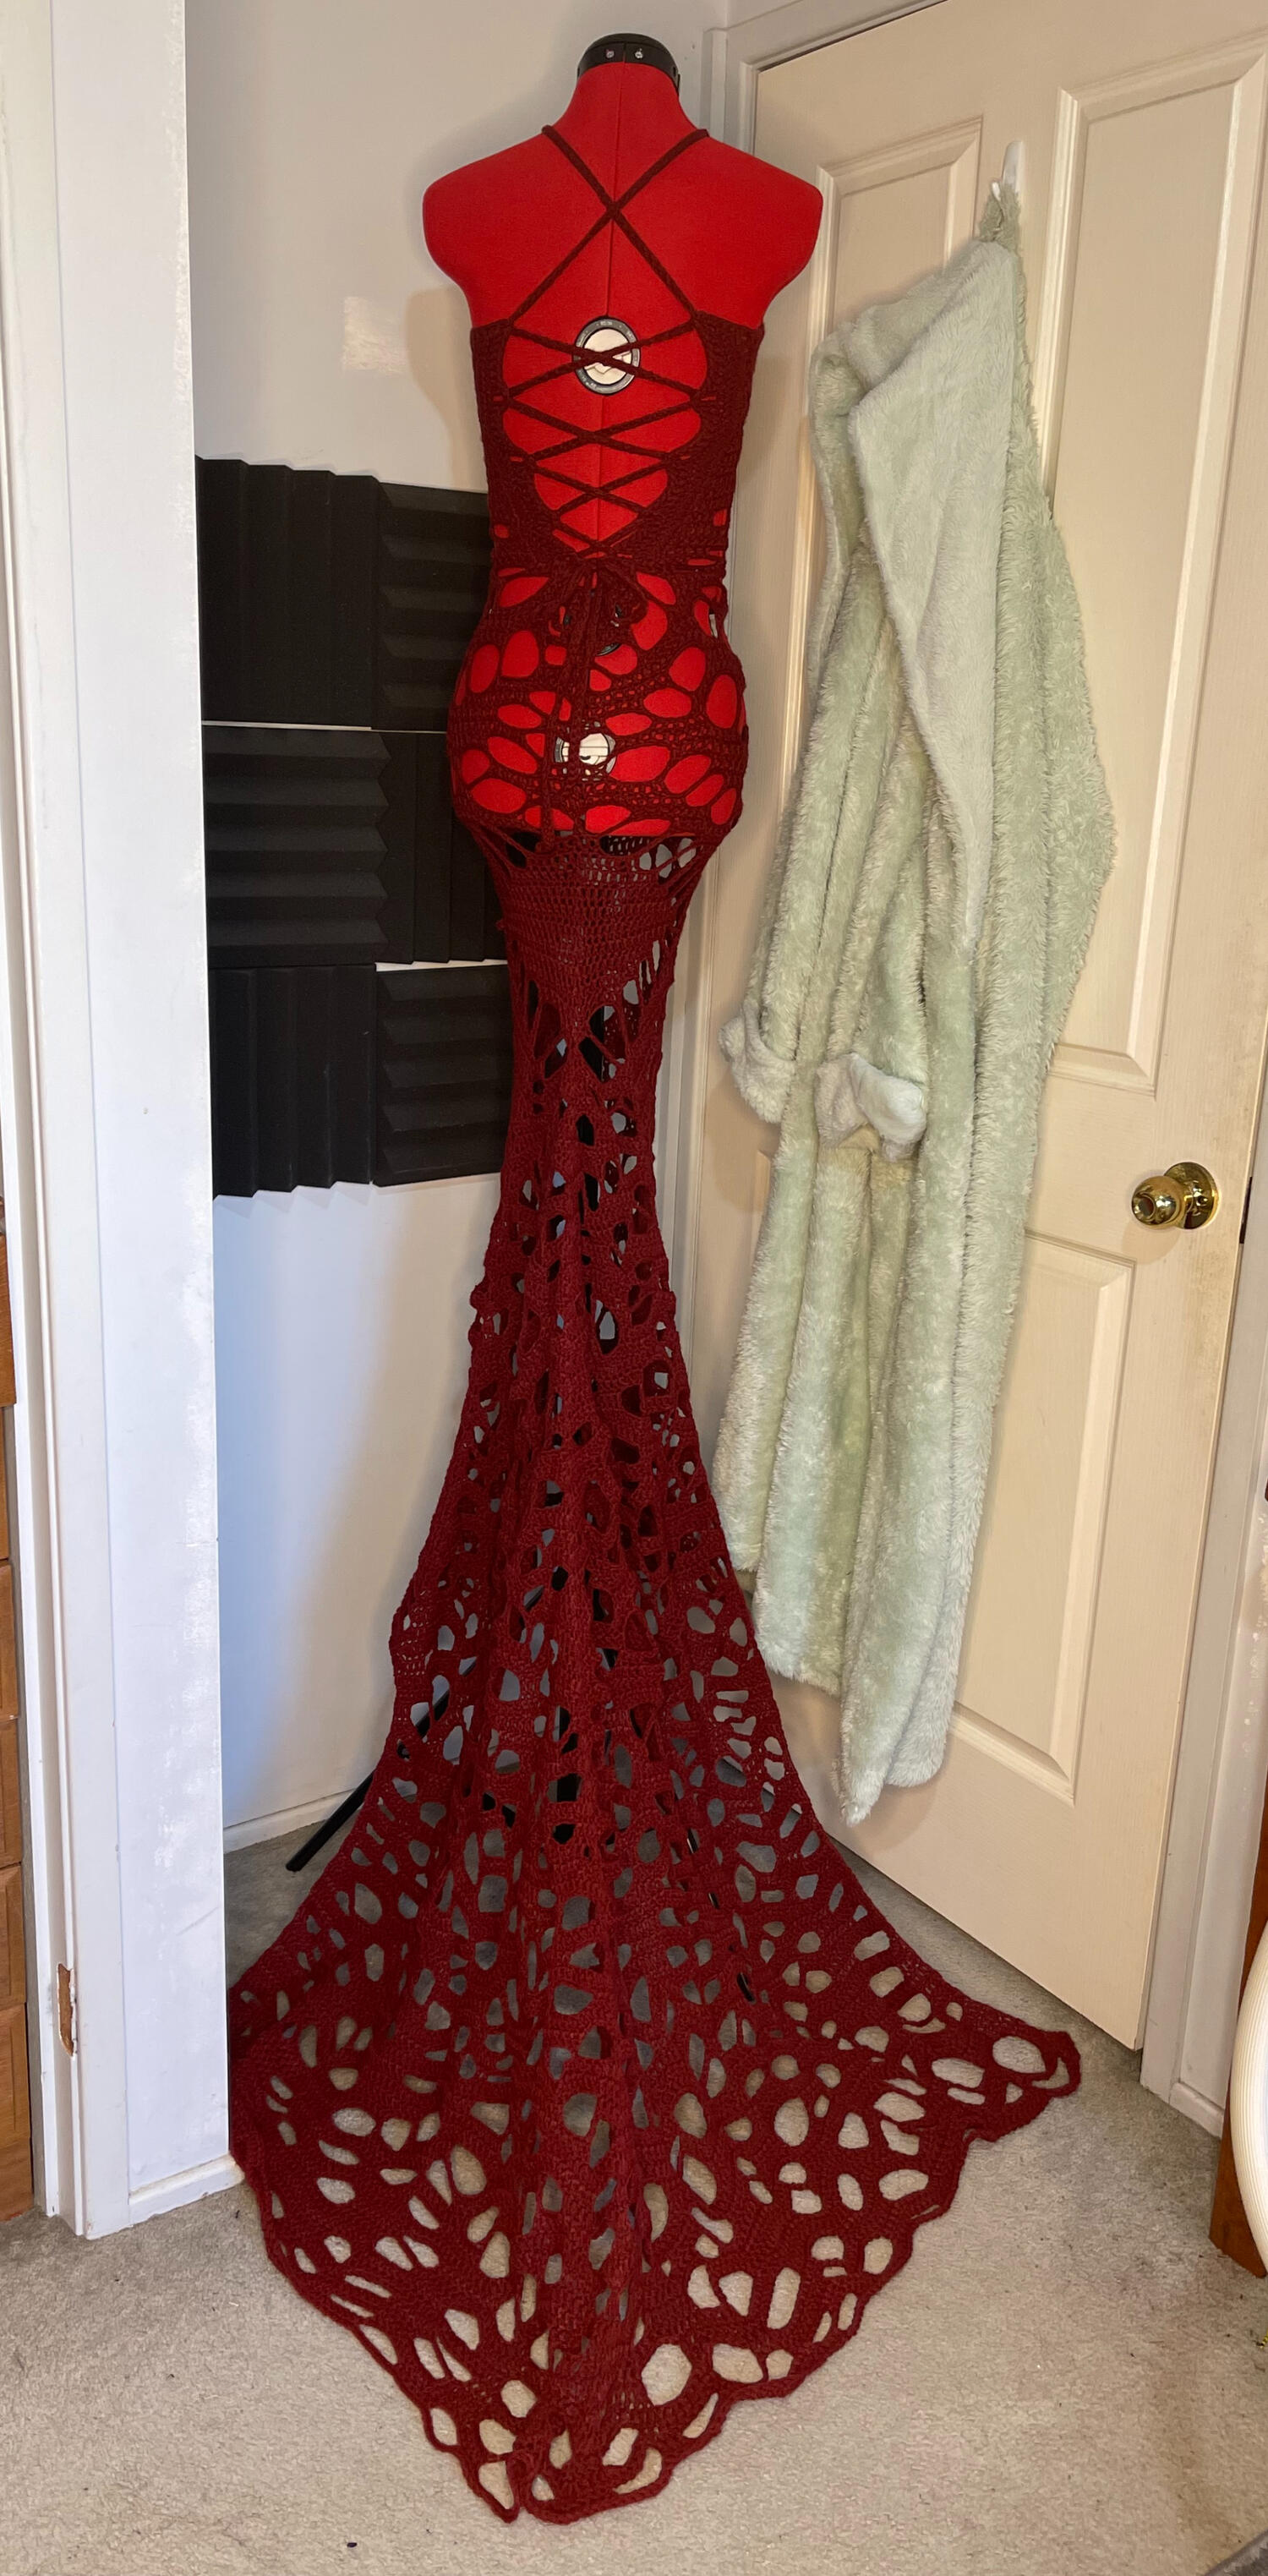
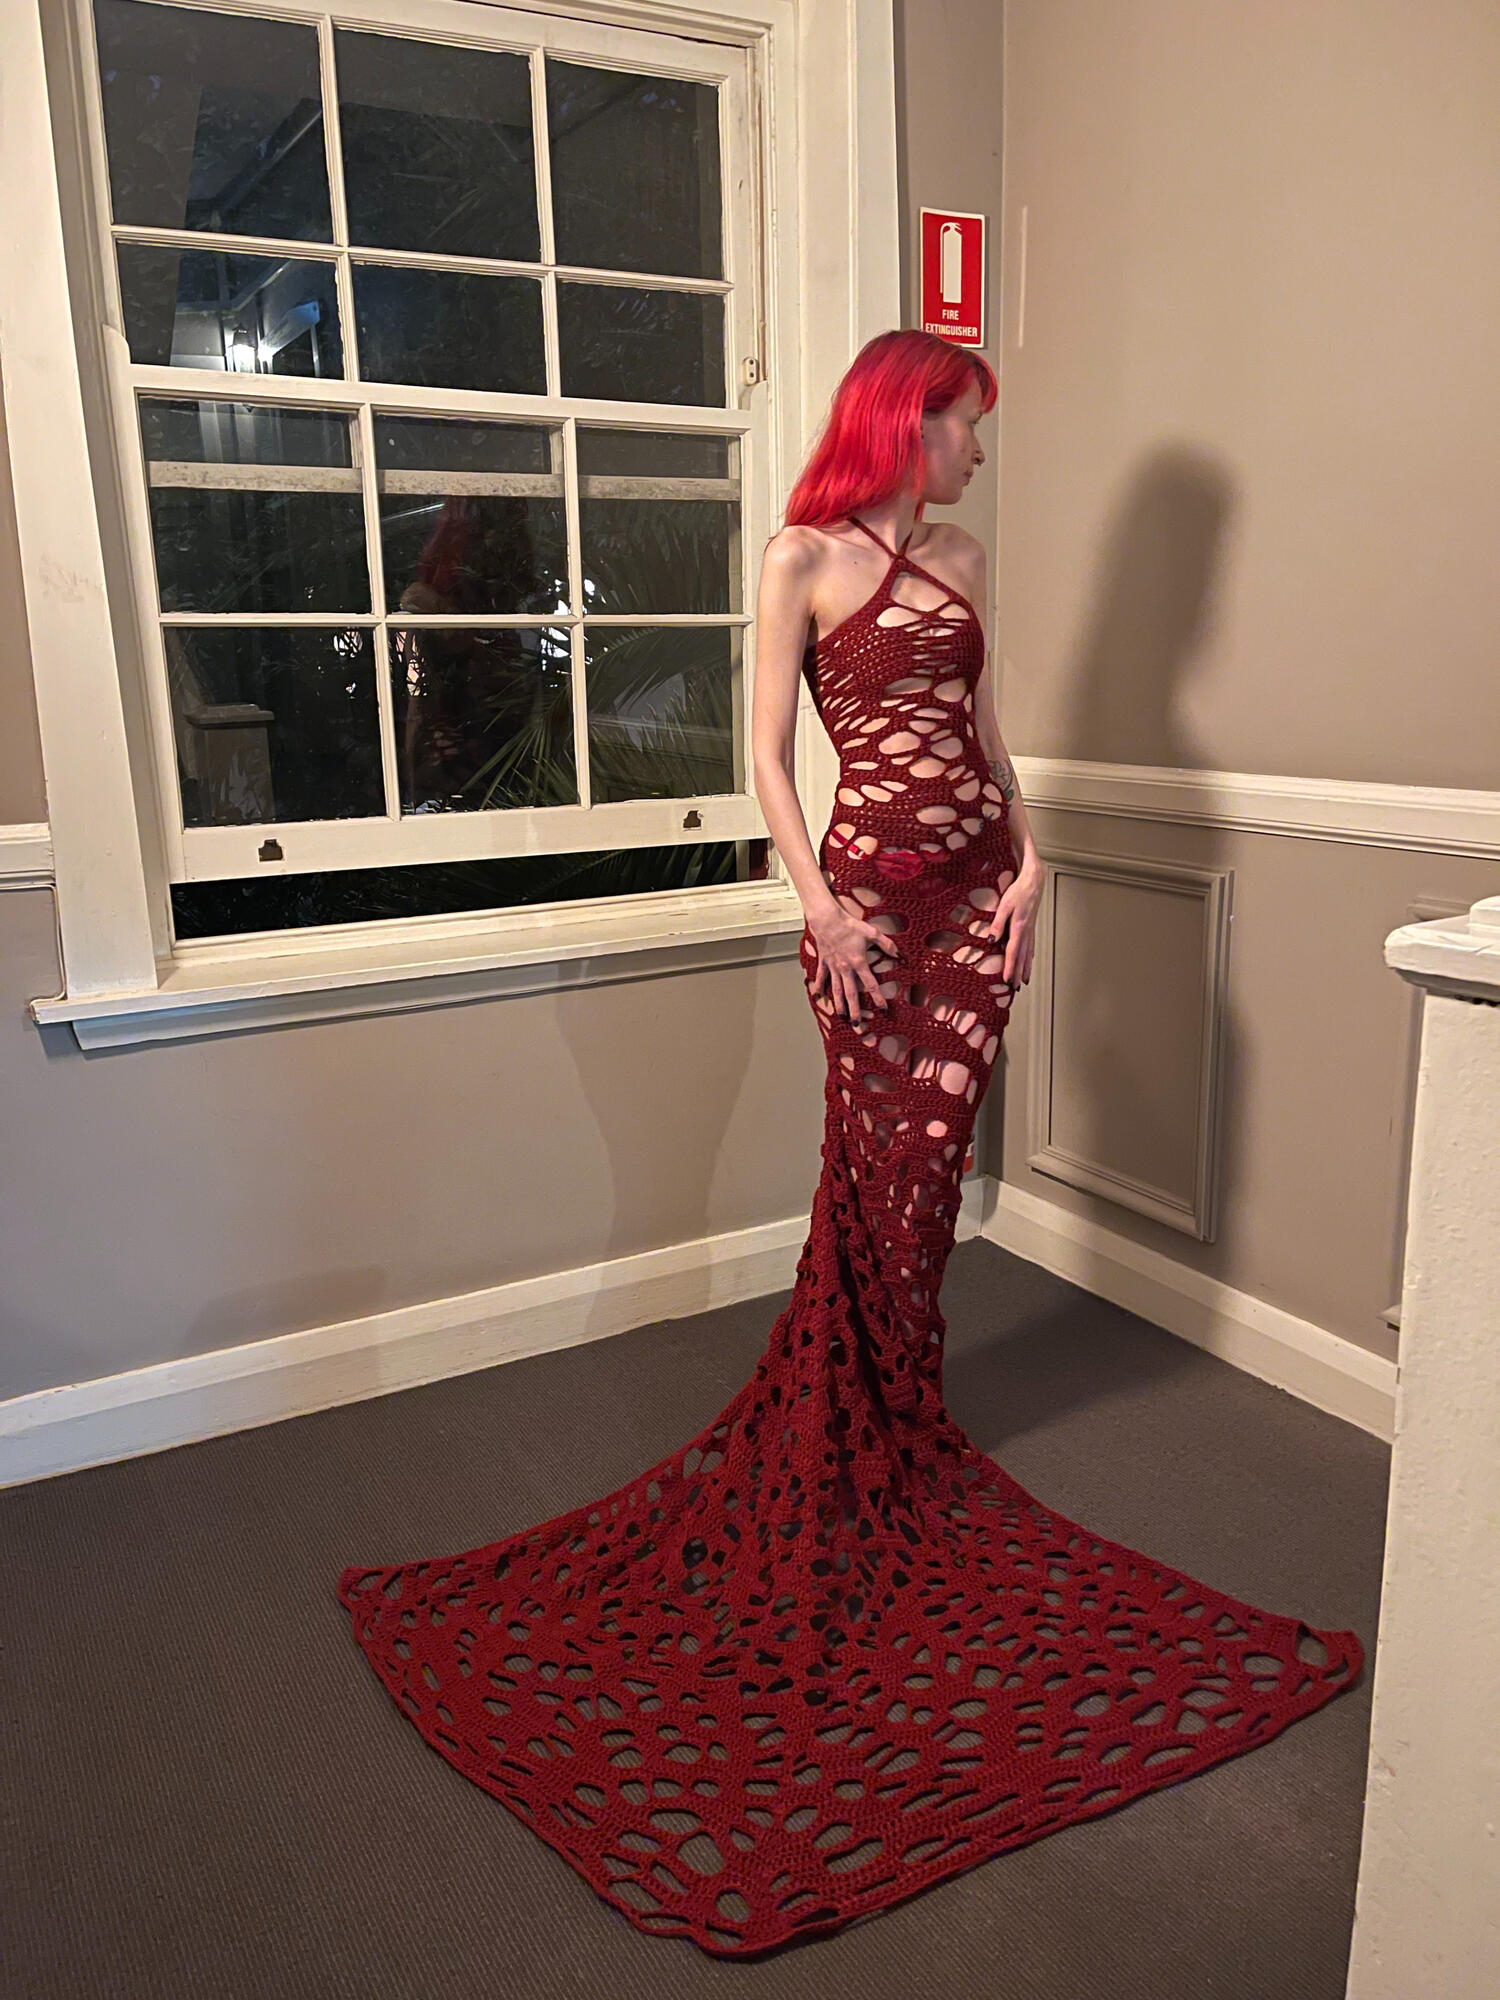
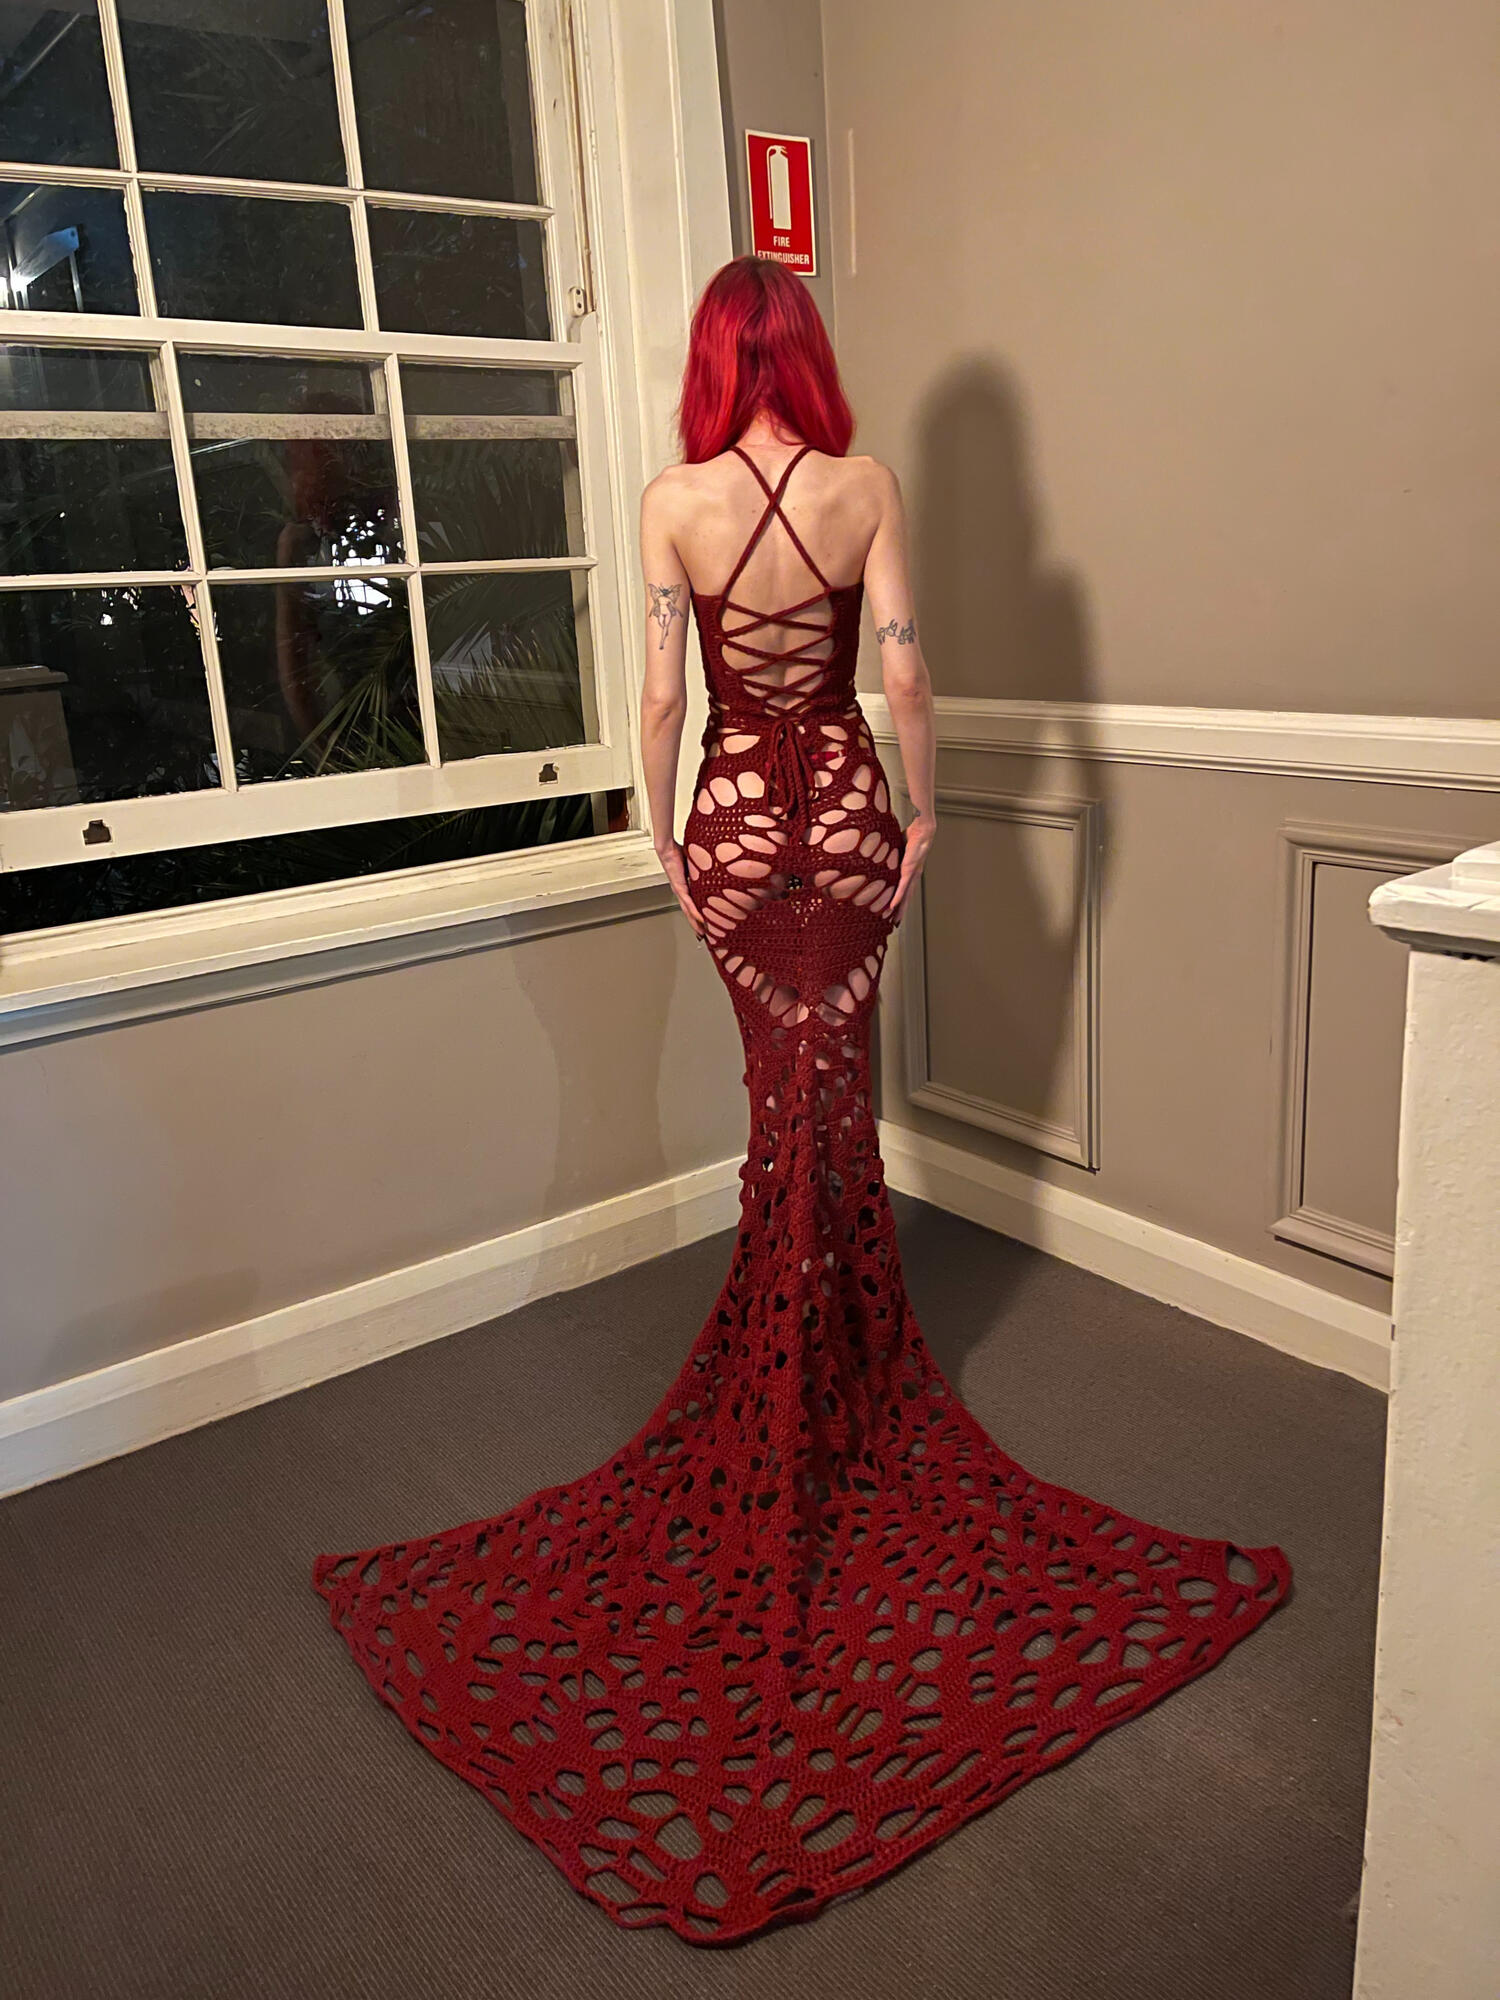
We will now be adding the train.
Find each 3DC increase on the sides of the dress, These will be the starting point, The middle where we will increase and ending point of the Train.ROW 59 - Slip knot into the middle of a 3DC. Chain 2 and DC into the same stitch. Continue the Random Holes or Spiral pattern until you get to the middle 3DC Increase ST. 3DC Increase into the middle of the 3DC Increase. (This will be the only increase in these rows) Then continue the Random Holes or Spiral pattern until you get to the middle of the last 3DC Increase. DC into the middle of the 3DC increase. This ends the row. Chain 2, and DC into the same stitch To start the Next row.Now go and weave in the end at the start of the row.ROWS 59- End of yarn (Should be Around 35 rows but can be alot less, or more. Its Dependent on how big your holes are), Will be just doing row 58 Over and over again Until you run out of yarn where there is not enough left for another row, then Chain 1, Cut Yarn with enough to weave in The last End.AND YOU'RE DONE!Also, if you do make this, please let me see it tag me on Instagram @king_Norb. I would love to see if it works for others.
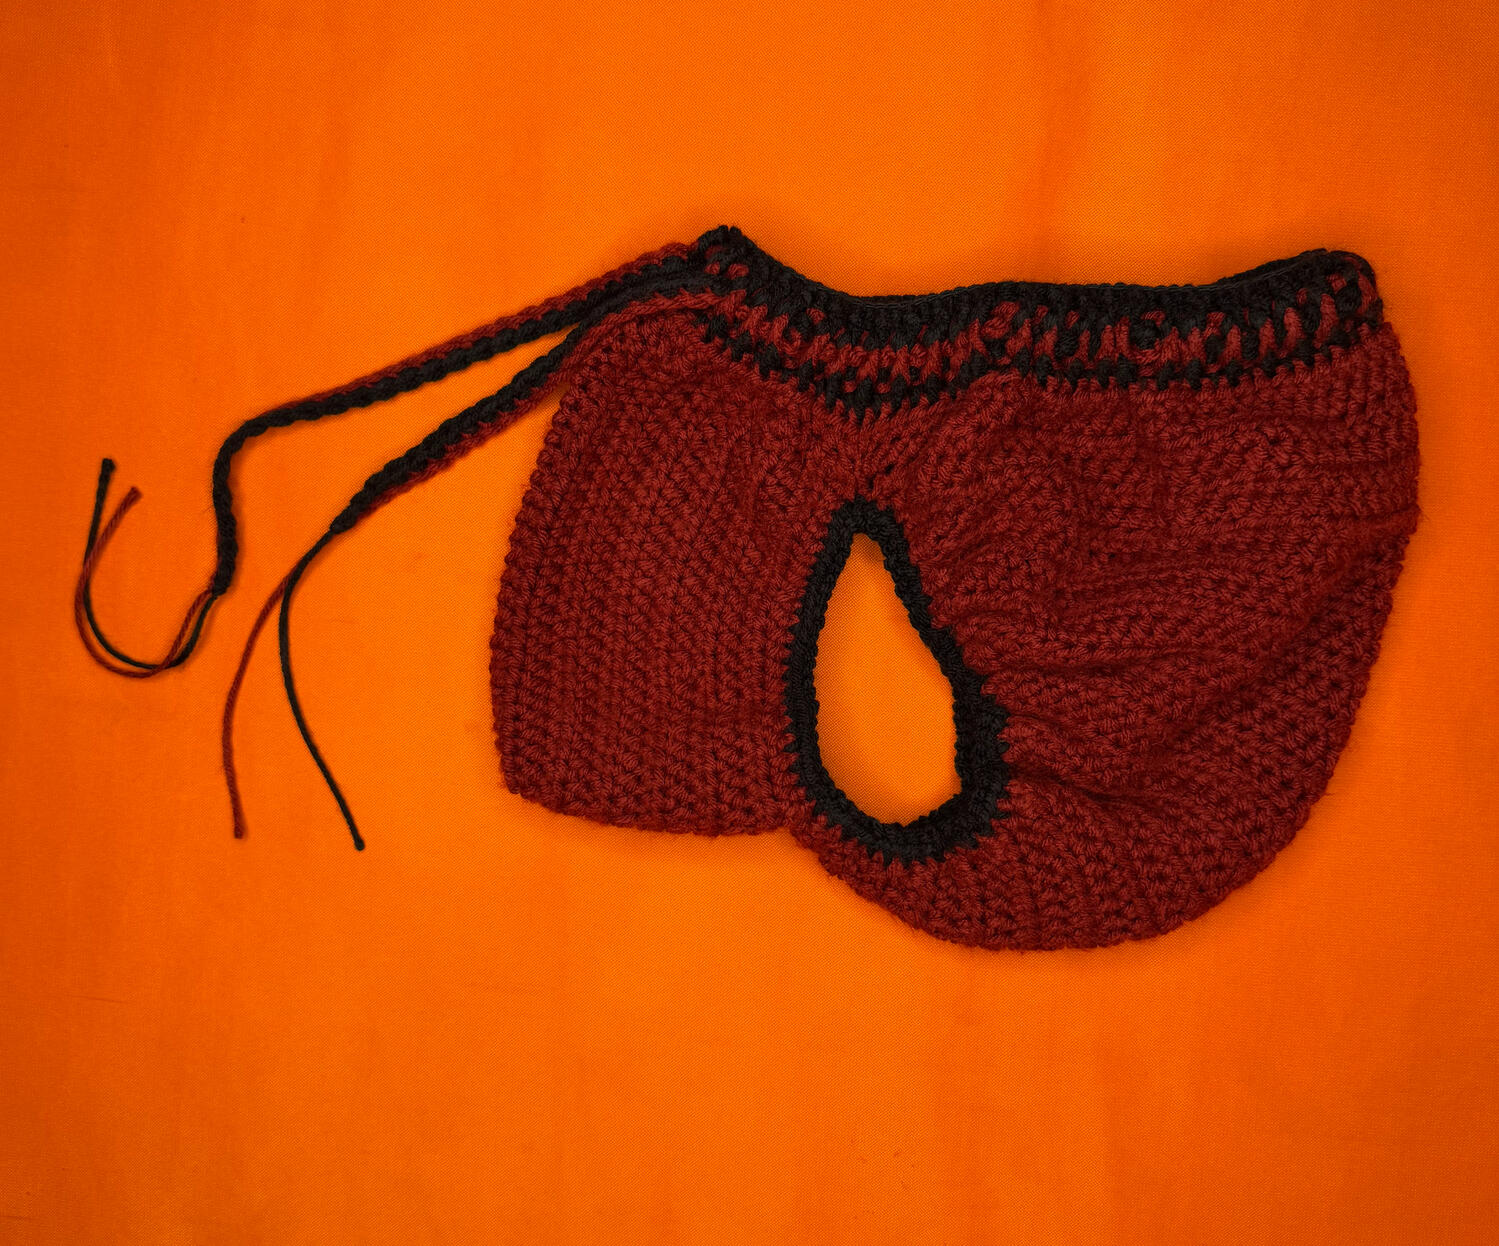
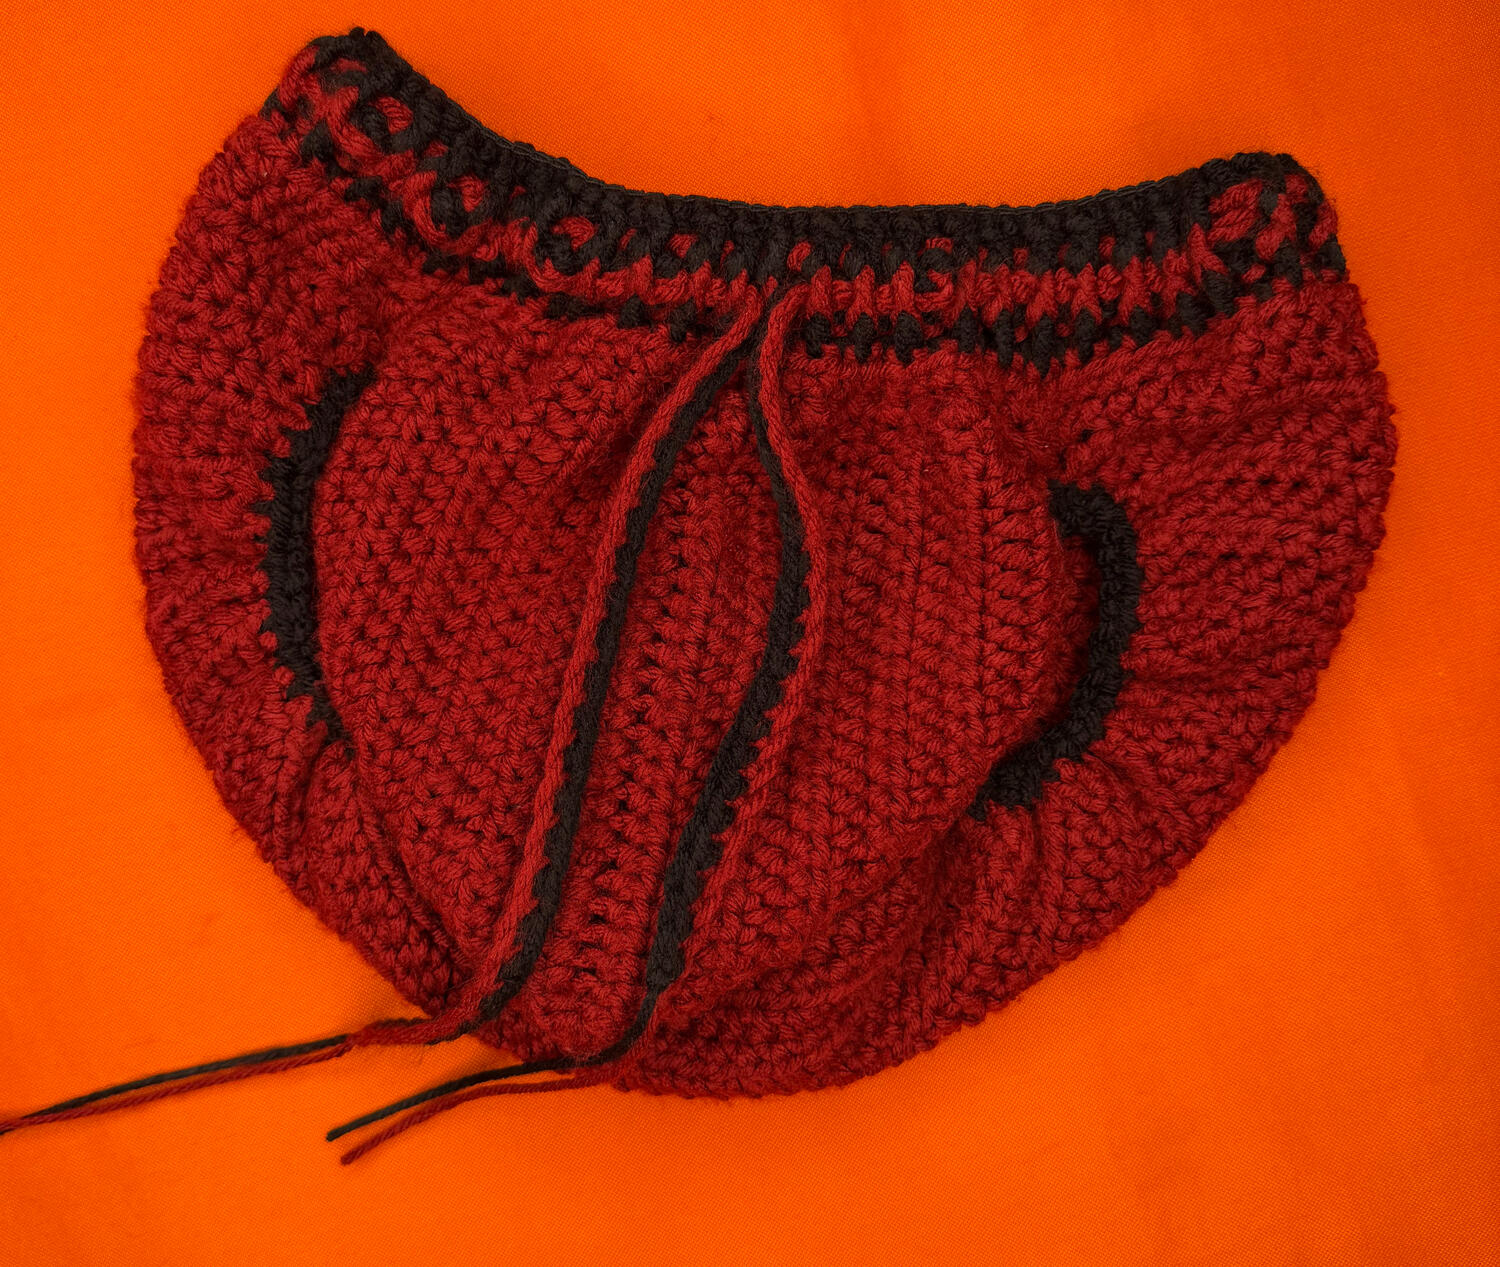
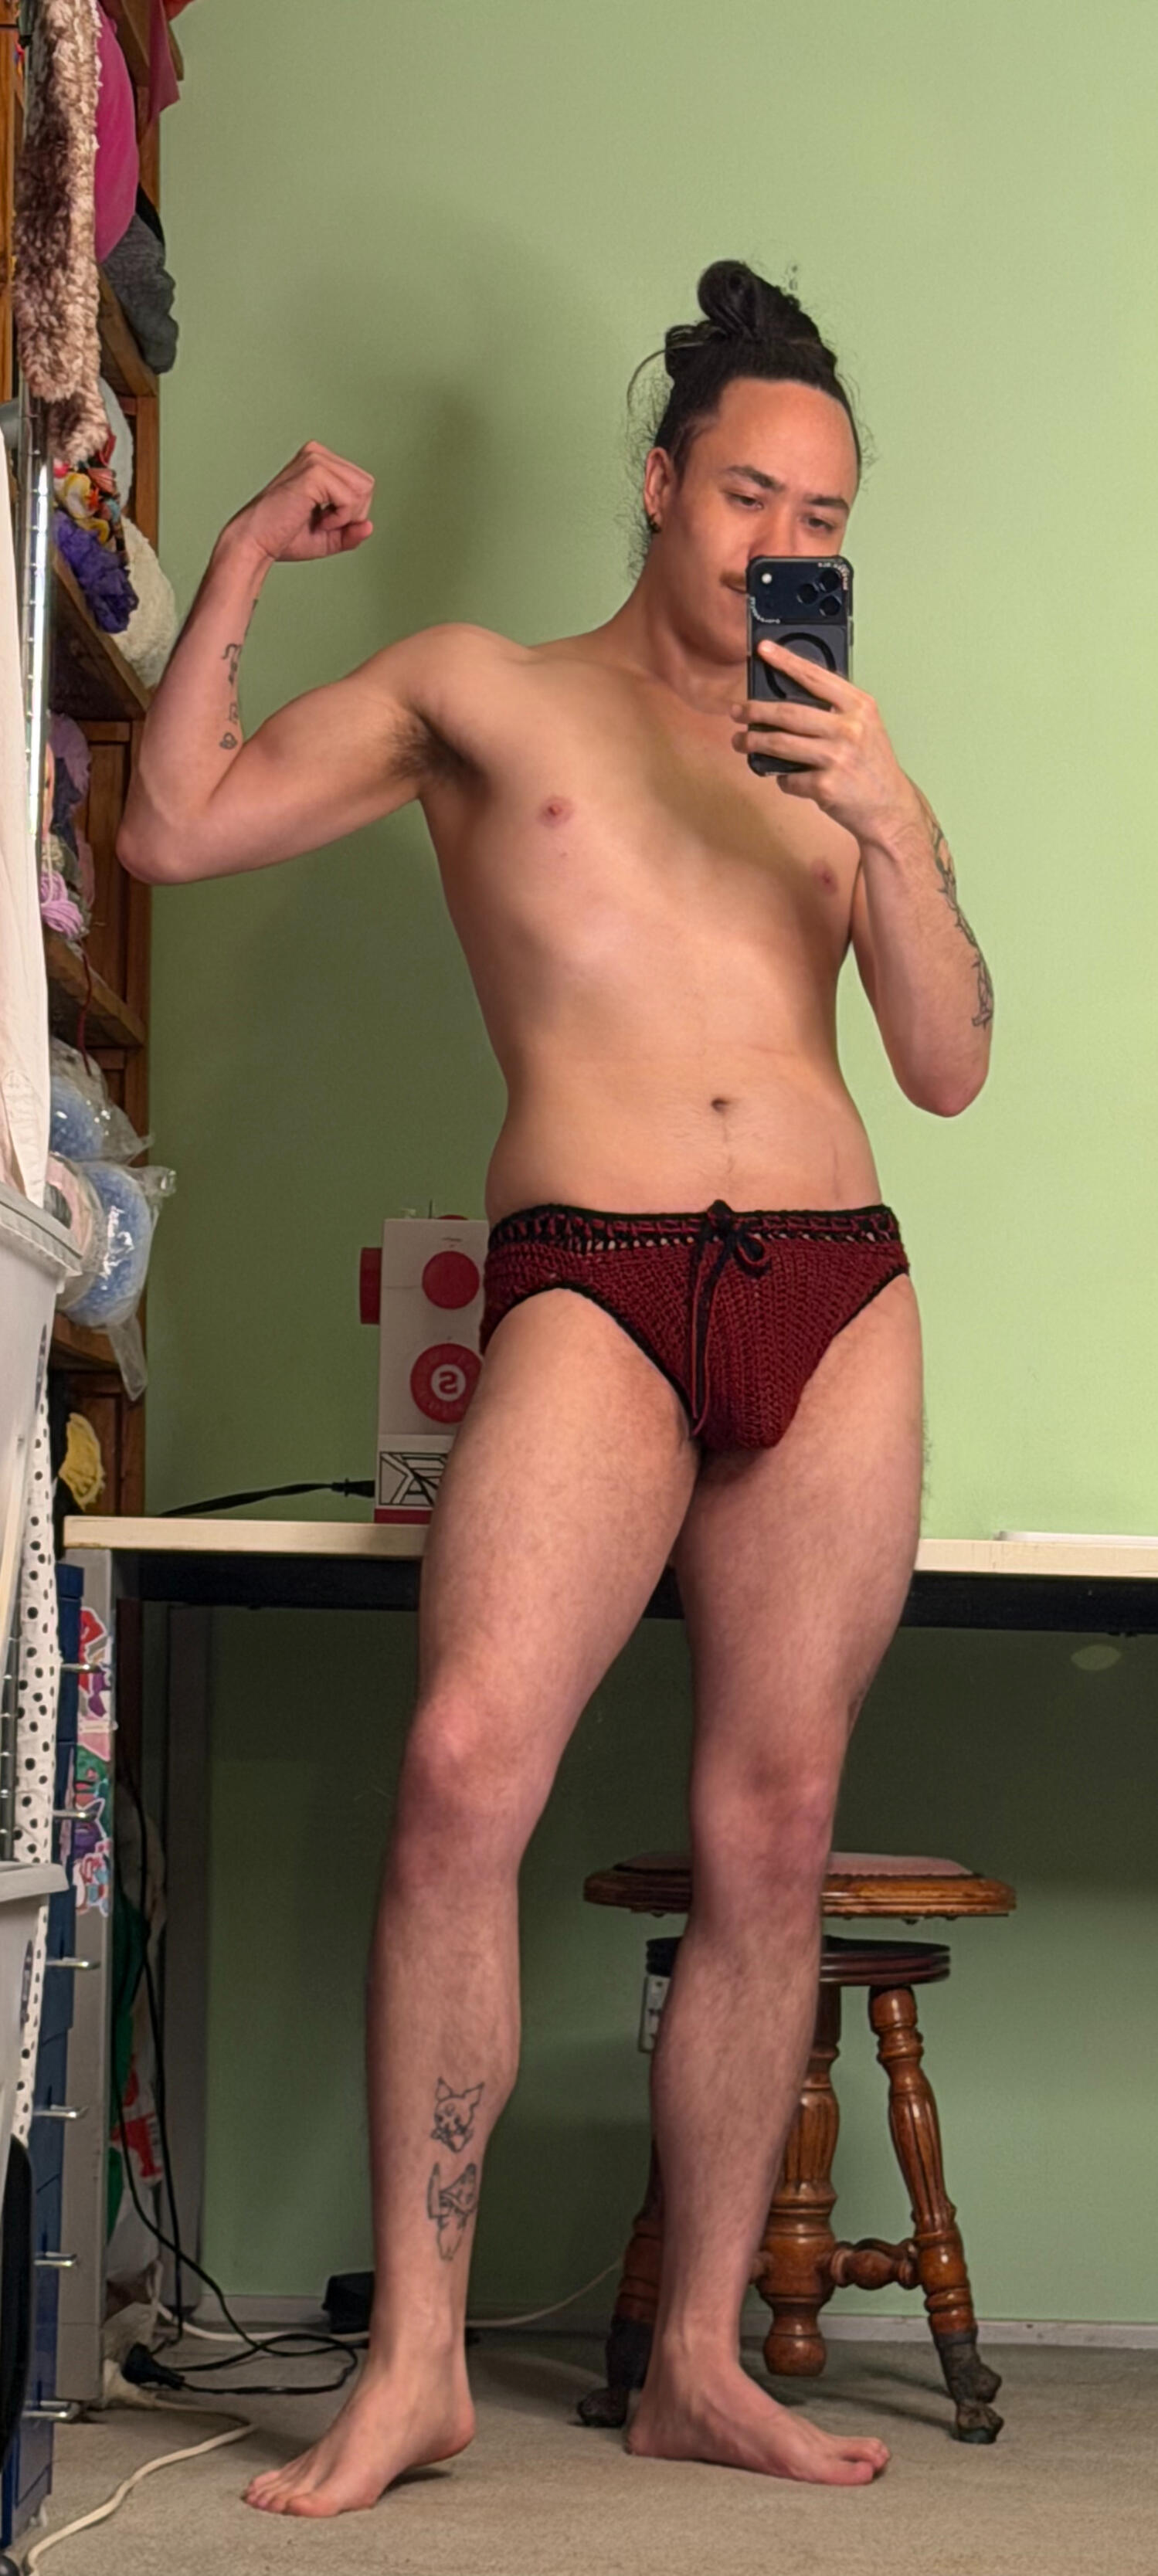
Speedos Pattern
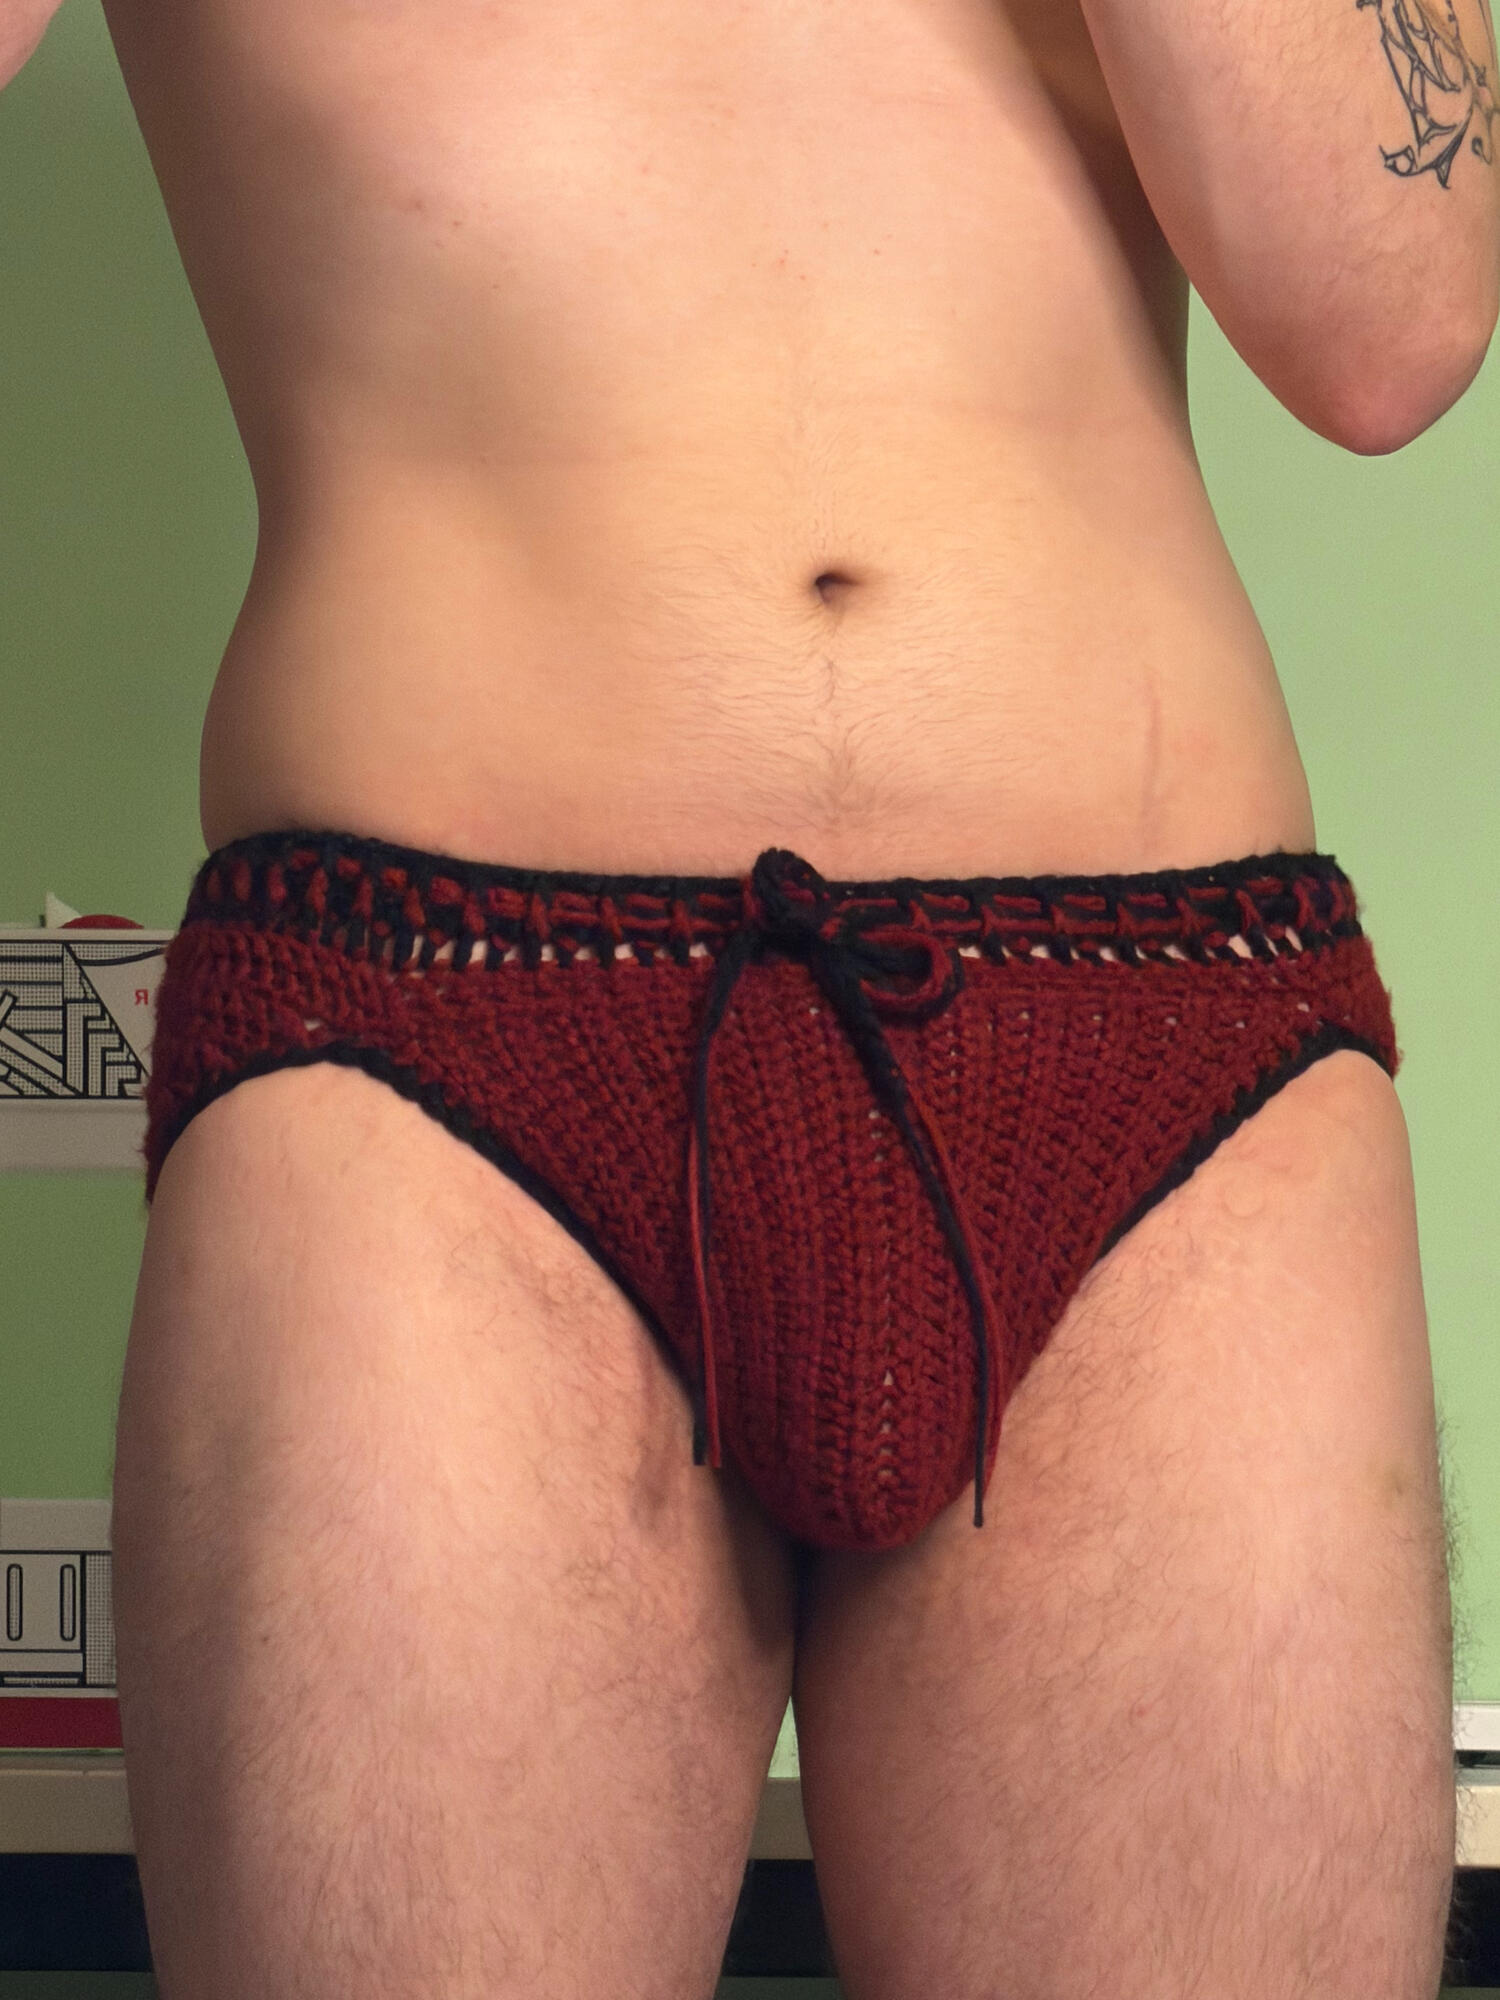
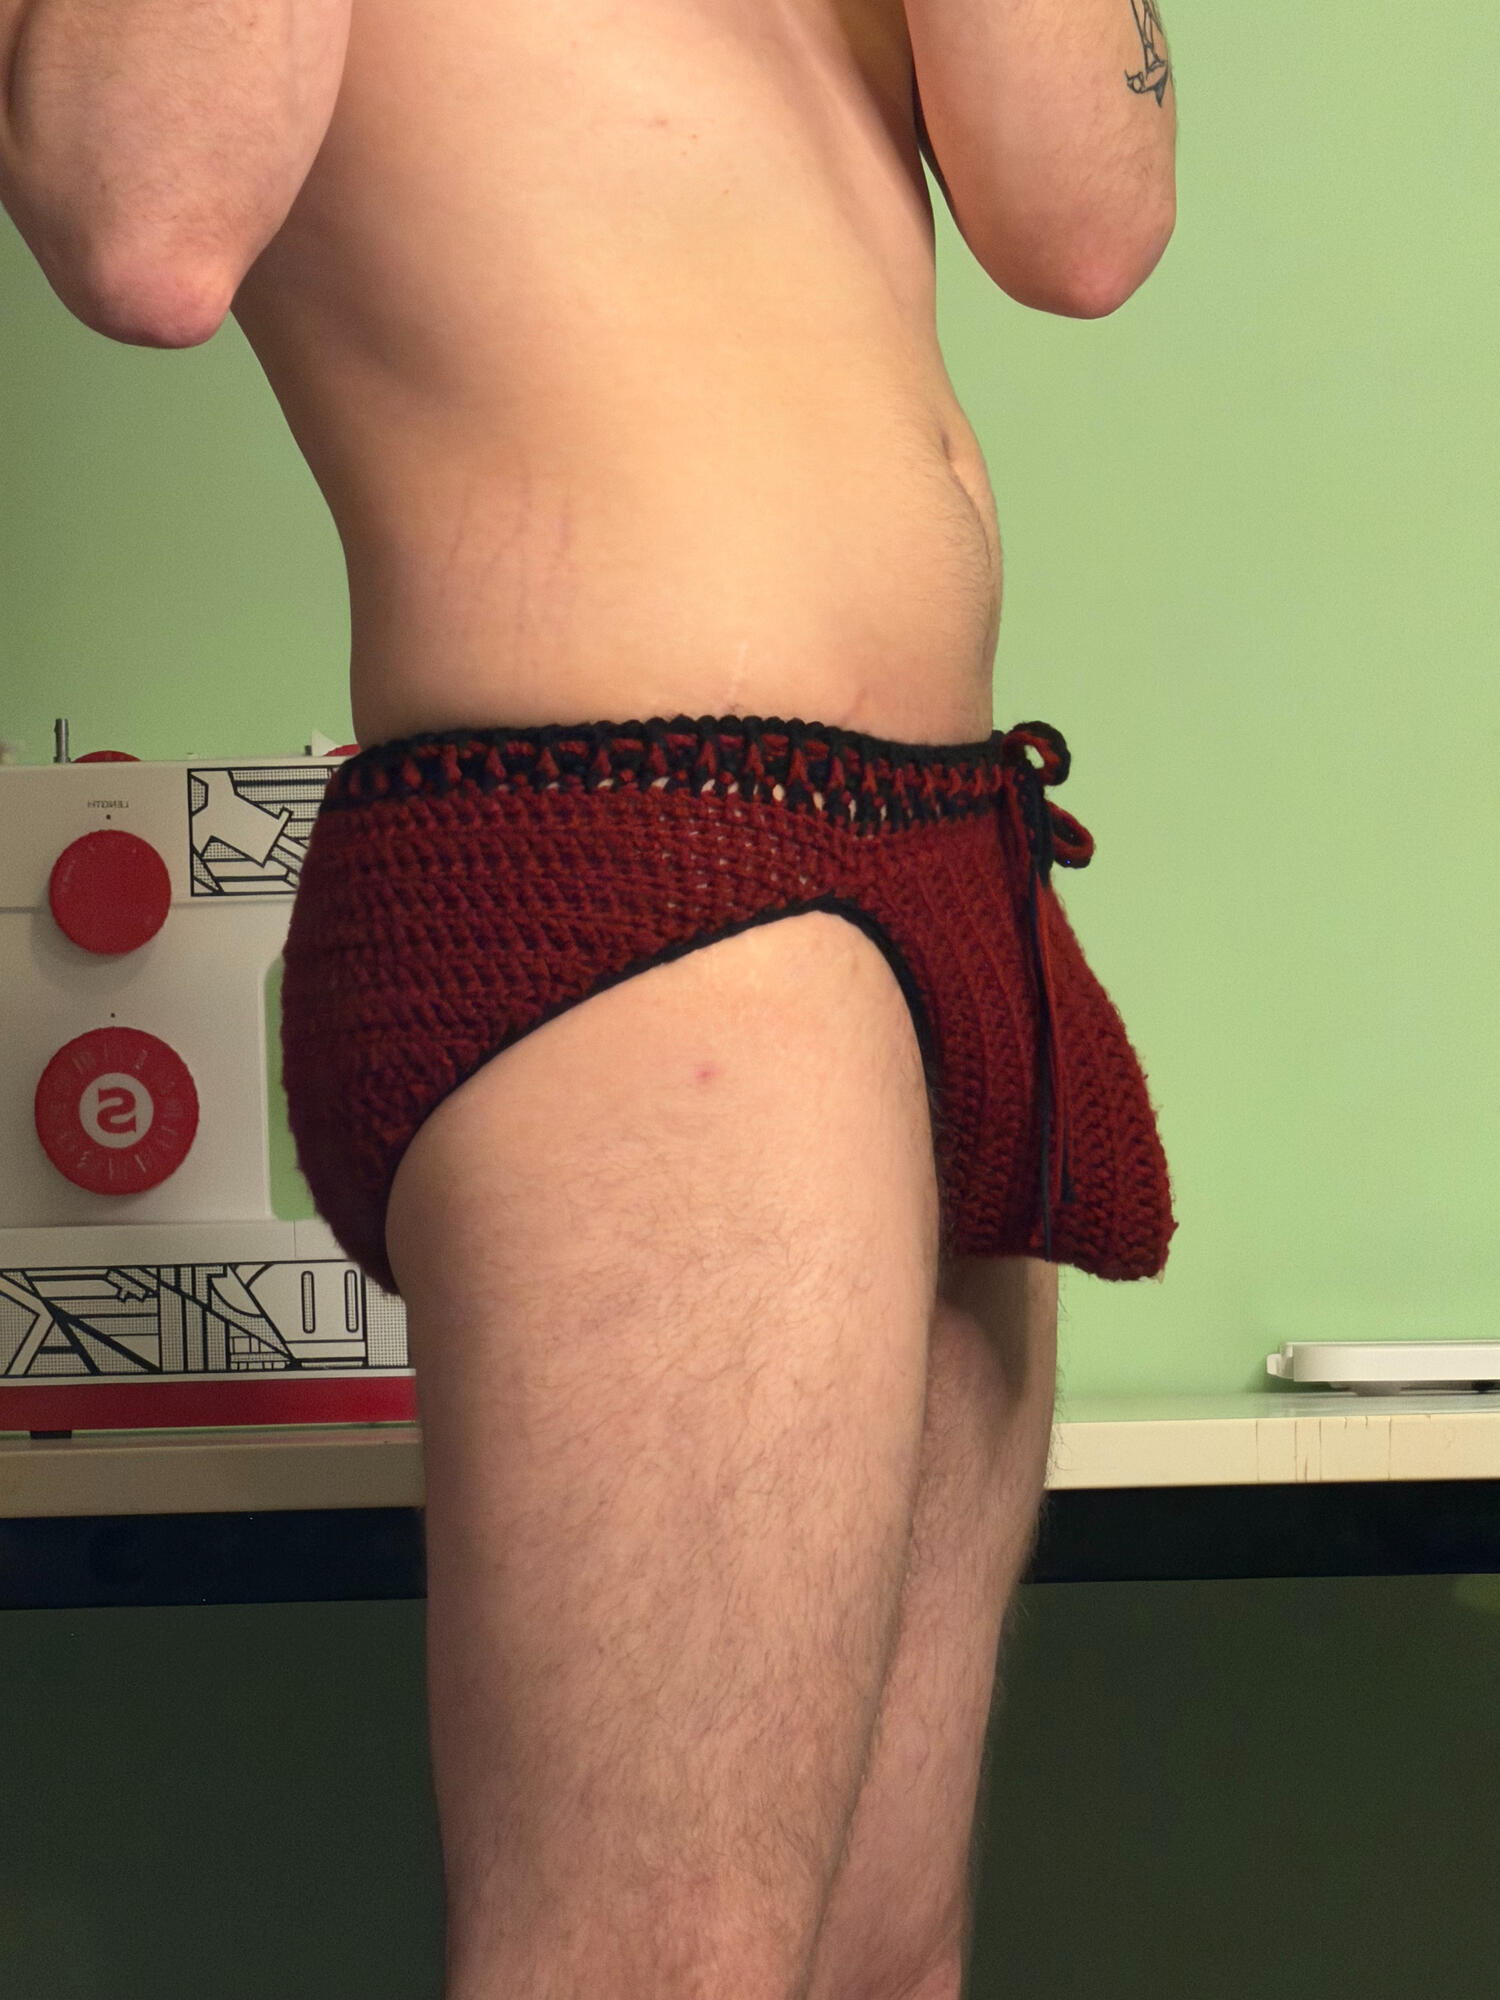
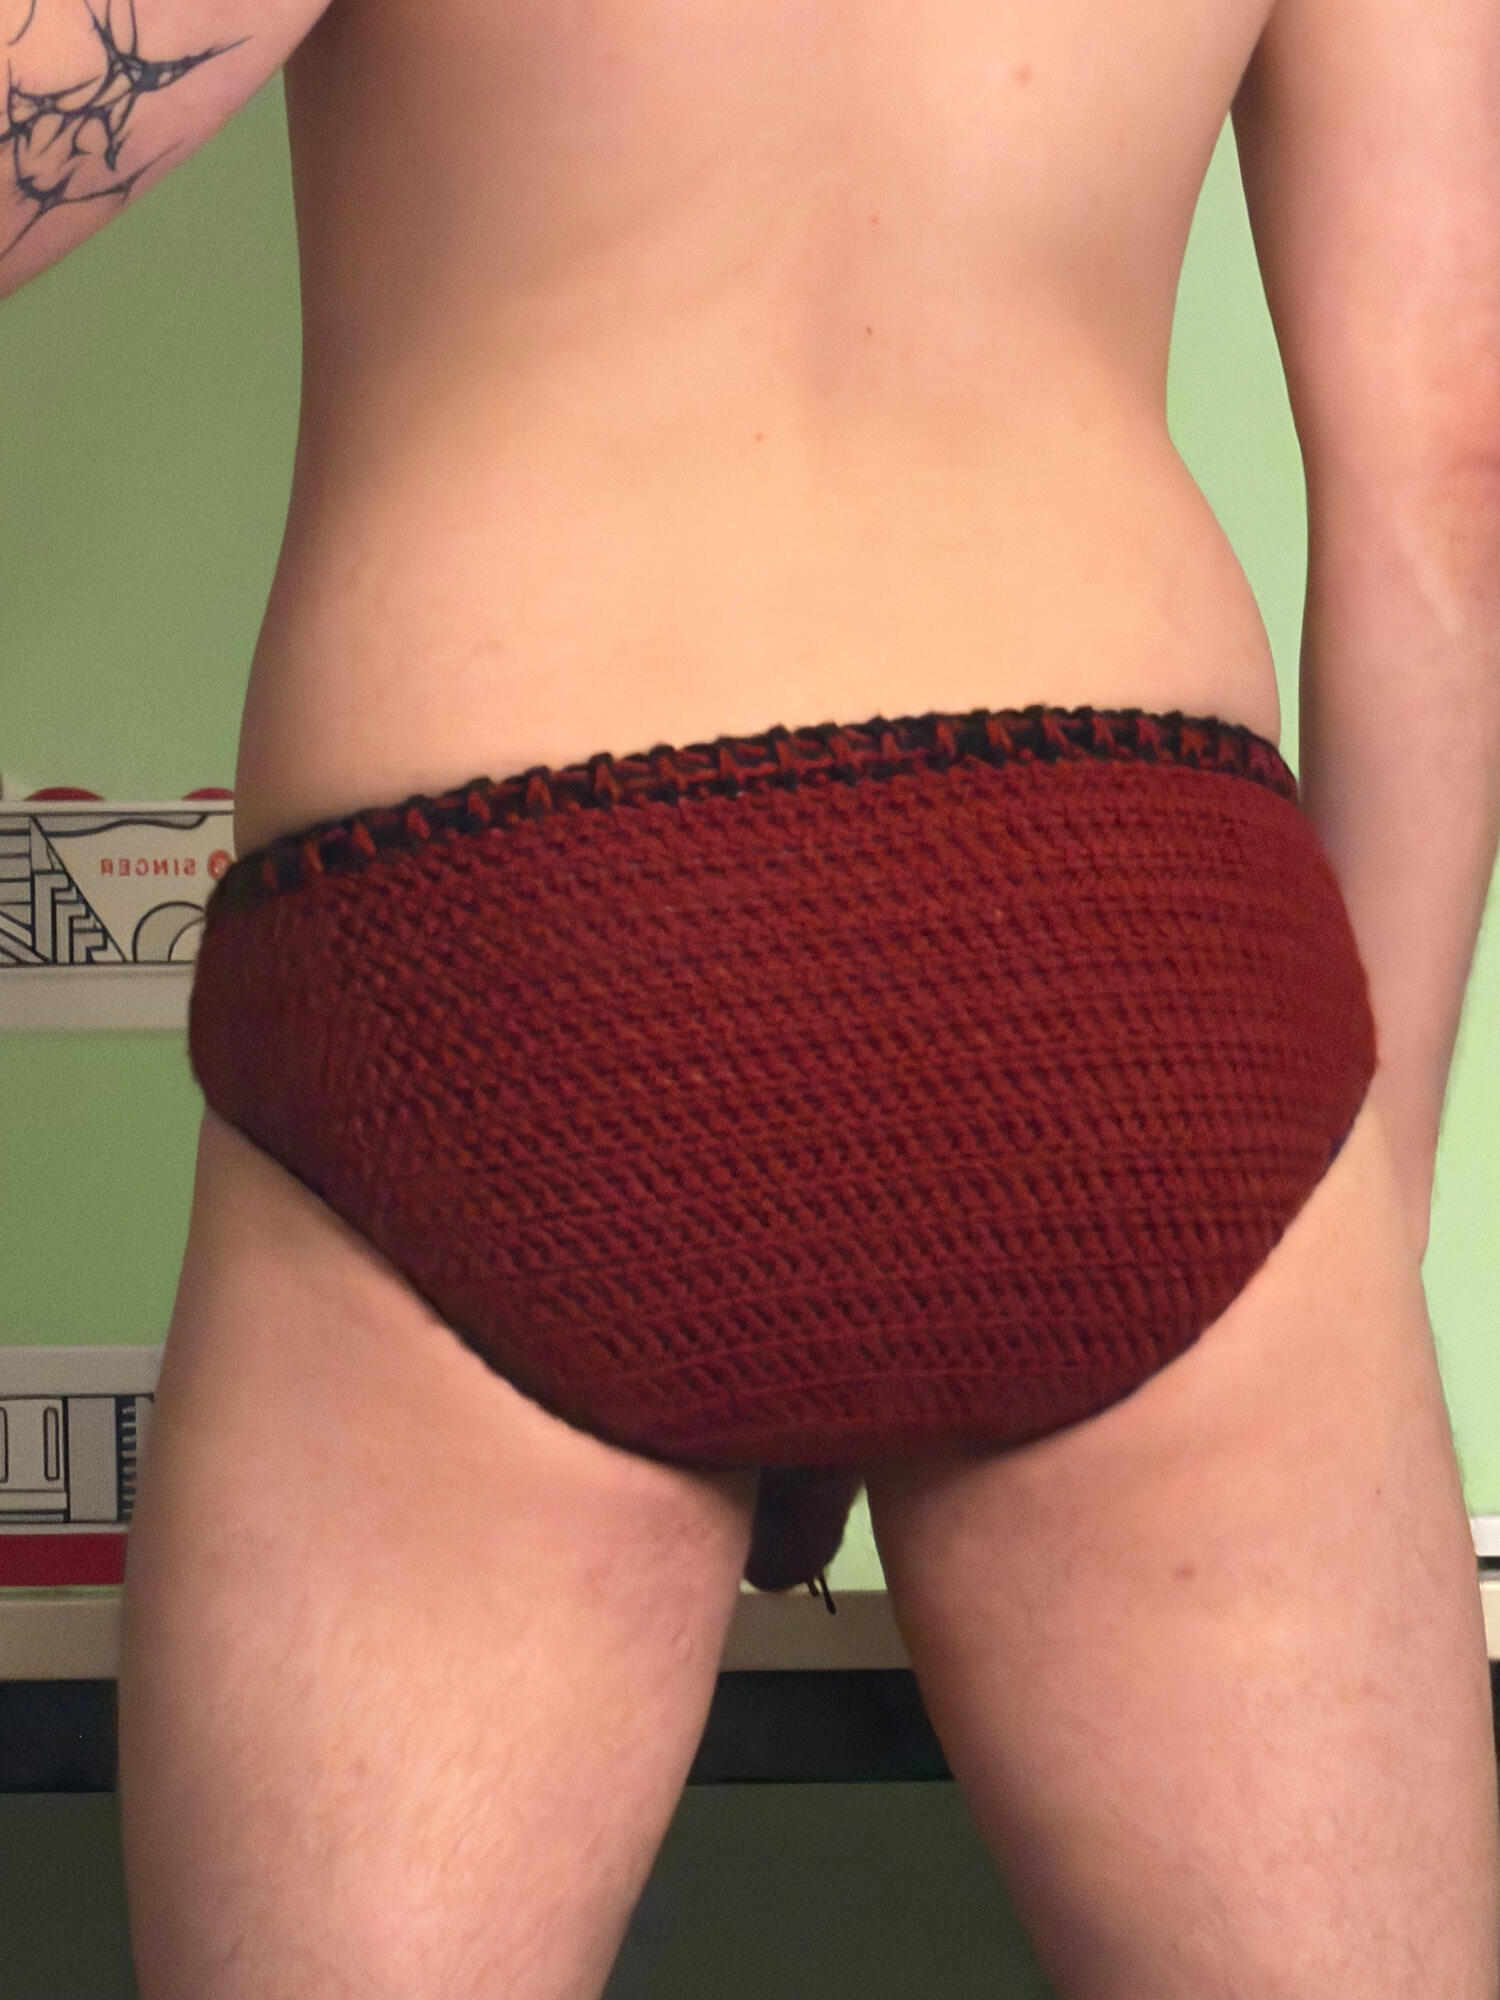
Items UsedHook - Size 6.0mm and 2.5mm
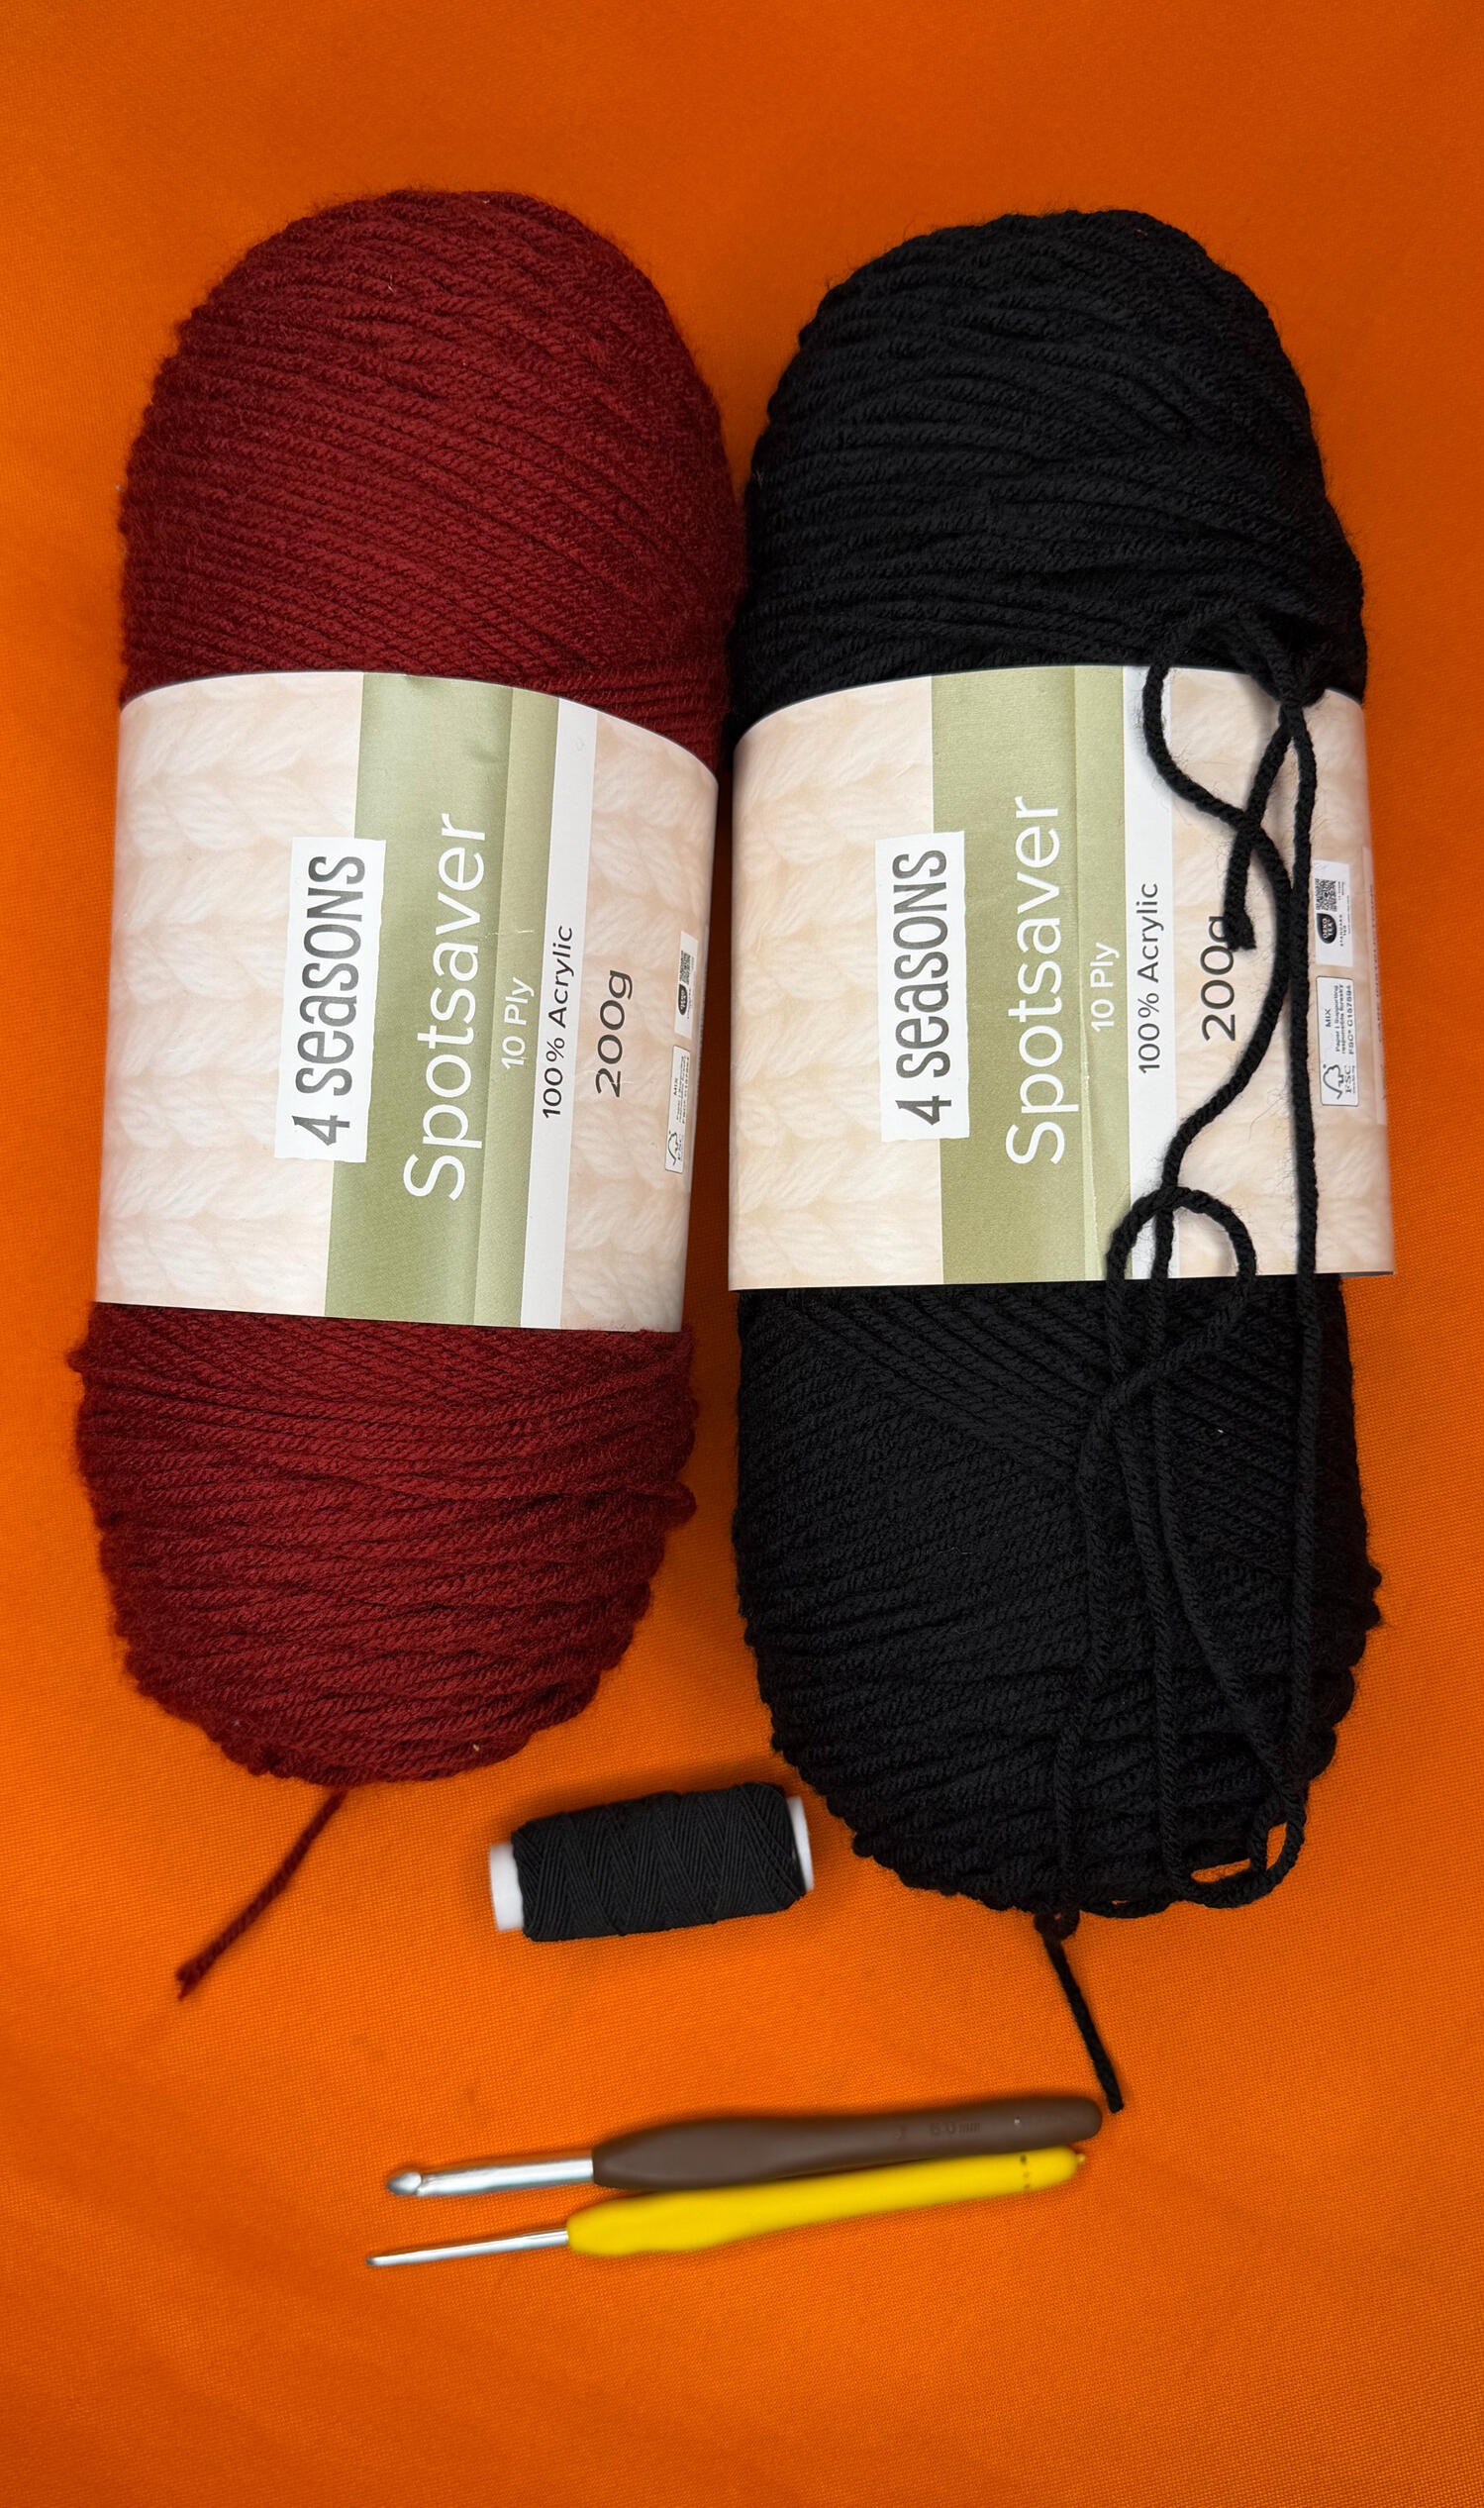
Yarn - 50g Black 4 Seasons Spotsaver 10PLY 100% Acrylic 200g.
150g Red 4 Seasons Spotsaver 10PLY 100% Acrylic 200g.
Elastic Thread (I'm using black)
Stitches (US Terminology)Chain - Chain
SC - Single Crochet
HDC - Half Double Crochet
DC - Double Crochet
INC - Increase
ST - Stitch or stitches
SL ST - Slip Stitch
Slip Knot
Below I have added a google Doc's Verson so you can download it as a PDF if you would like
Increase size tipsFront pouch - this can be increase in height on row 1. If you want a larger or smaller front pouch, increase or decrease the starting chain.Similarly, with the width, you can stop before the 12th row, or continue past 2 rows.
Under crotch - you can increase or decrease the under crotch in rows 2-6.When you get to row 38, if the back panel doesn’t reach the front panel and sit around your waist nicely, you can do a HDC Foundation chain and increase the leg hole opening to accommodate a wider leg.Also, you can continue past row 40 if it doesn’t cover above the crack.
Everything else should automatically adjust sizing if everything above is correct.
Front pouch
Using red yarn until told to change
Row 1
Chain 24. Chain 1 more and then HDC down the chain into 23 ST.
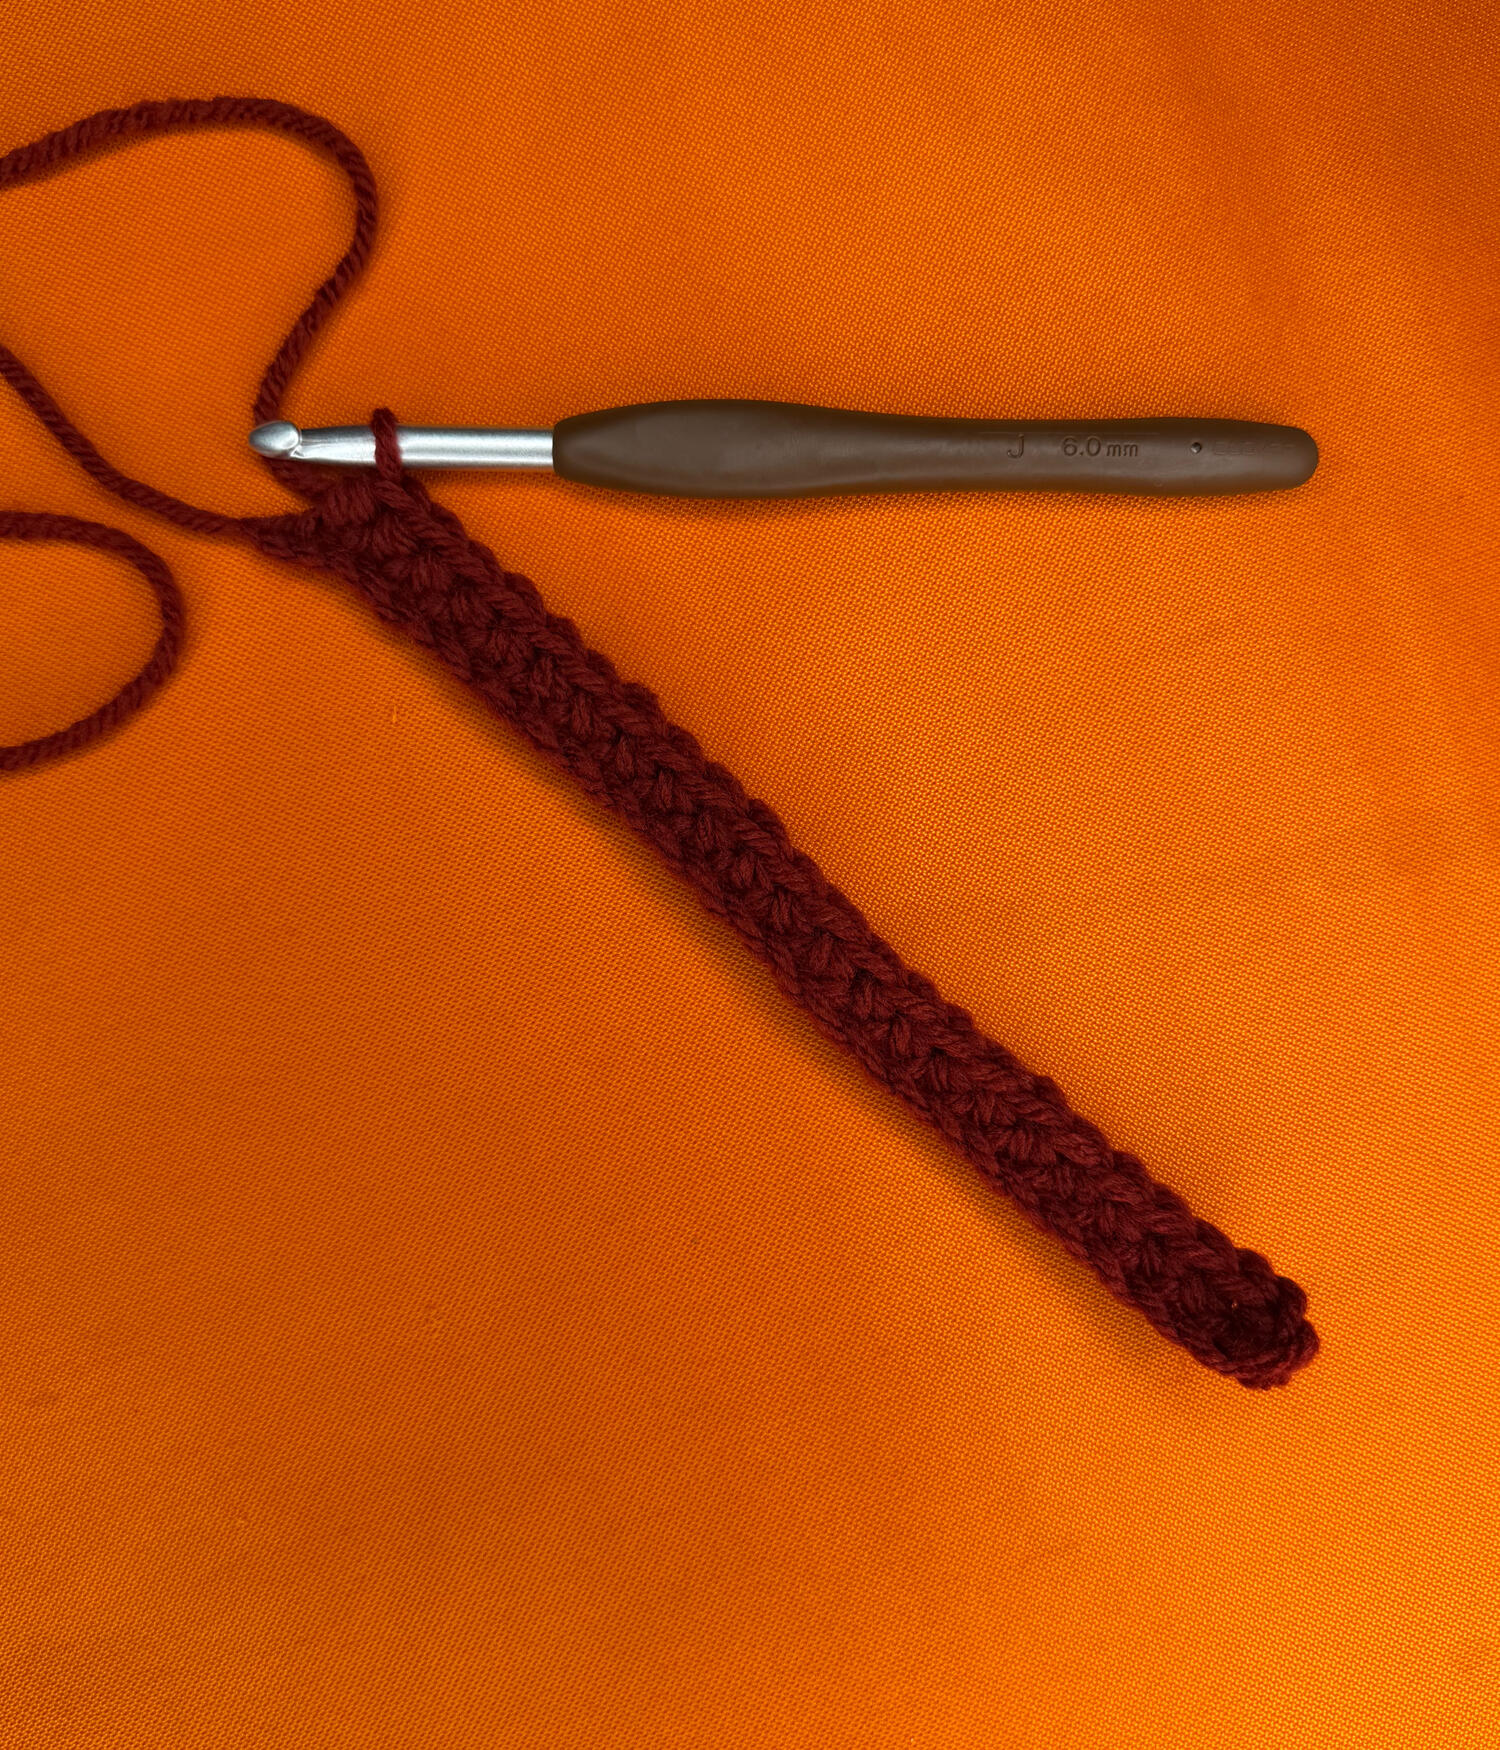
In the 24th ST you will add 5 HDC into the ST
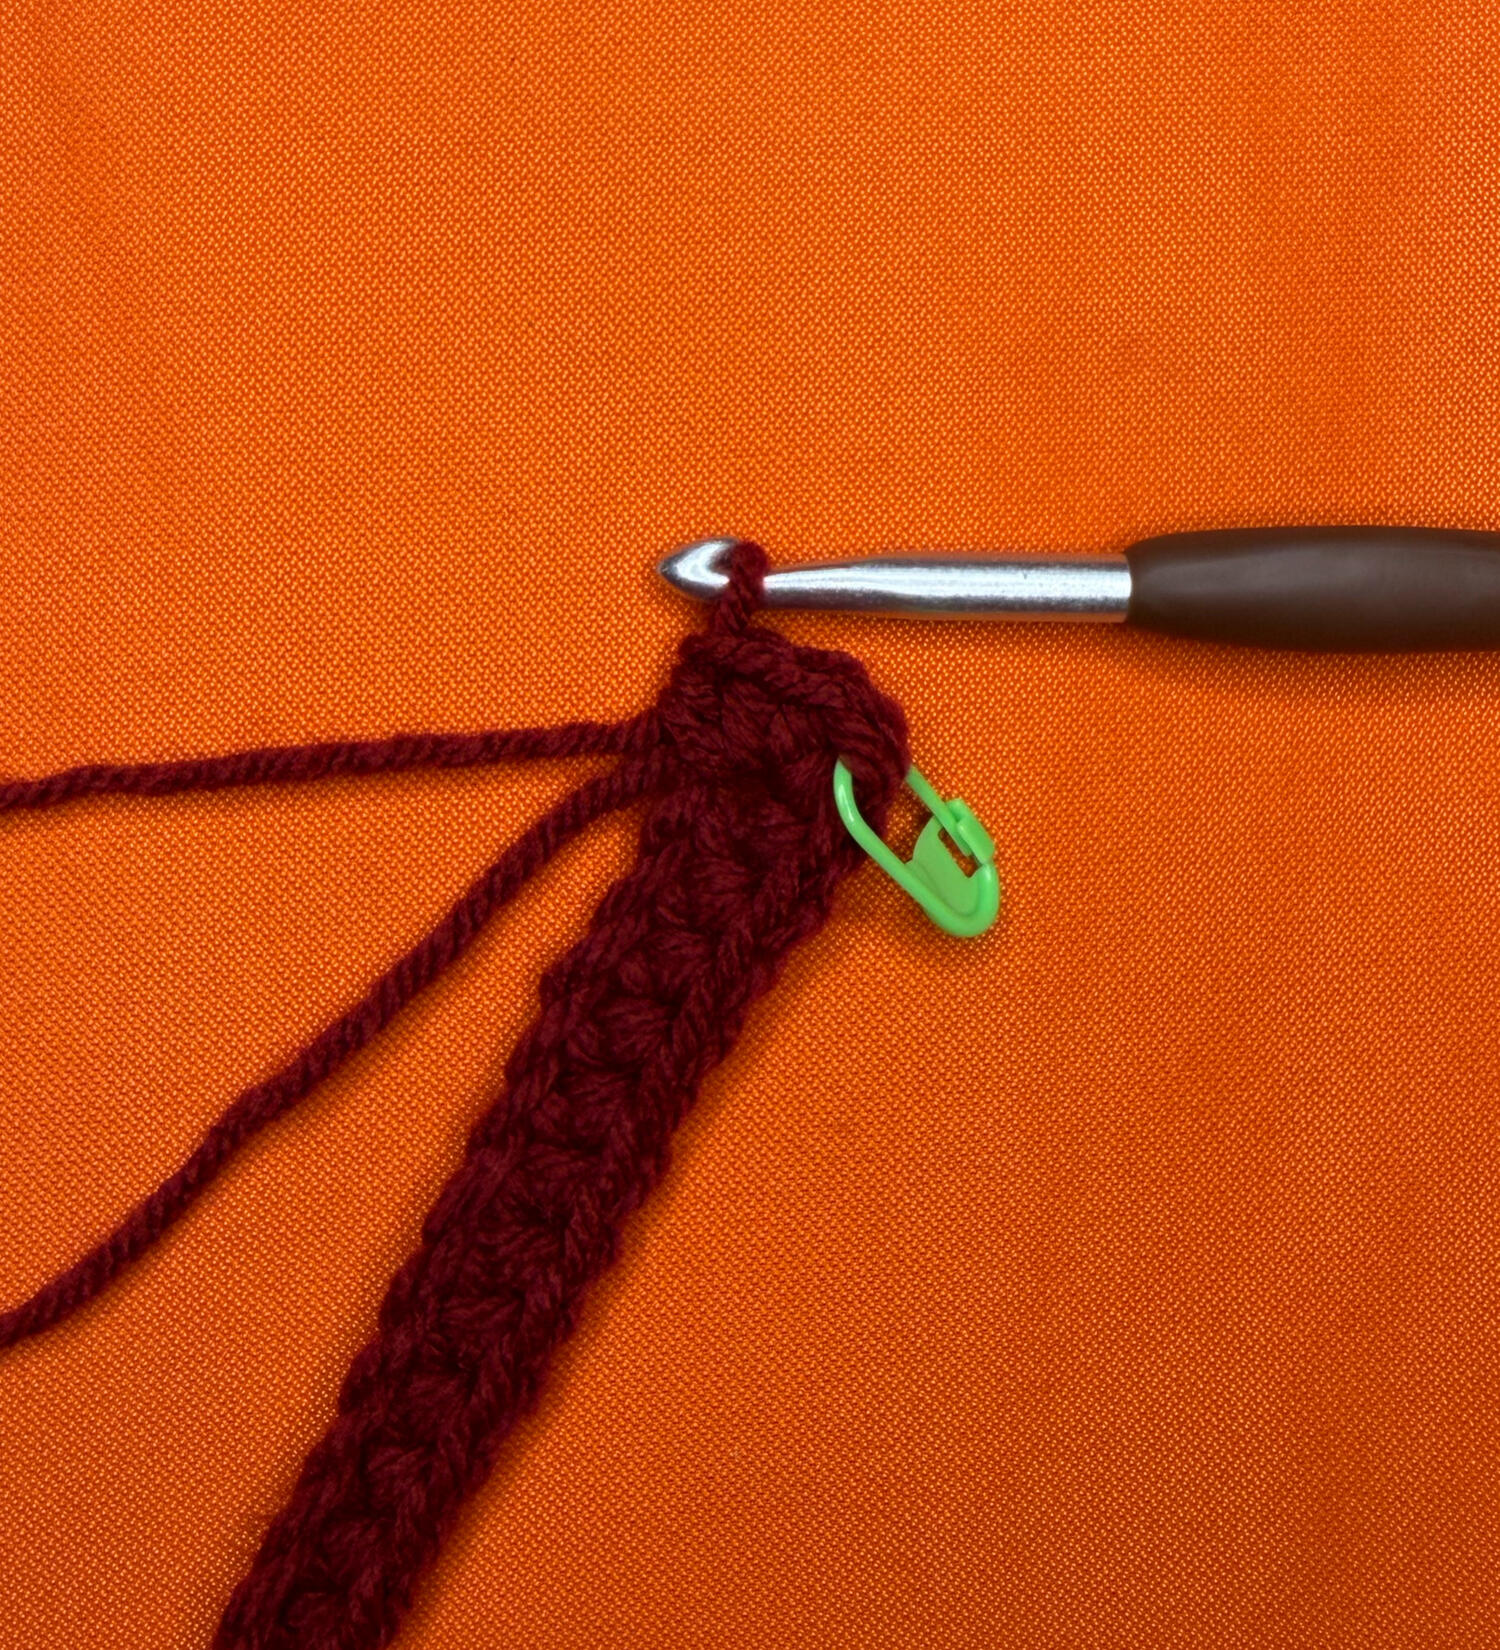
Now HDC into the 23 ST on the other side.
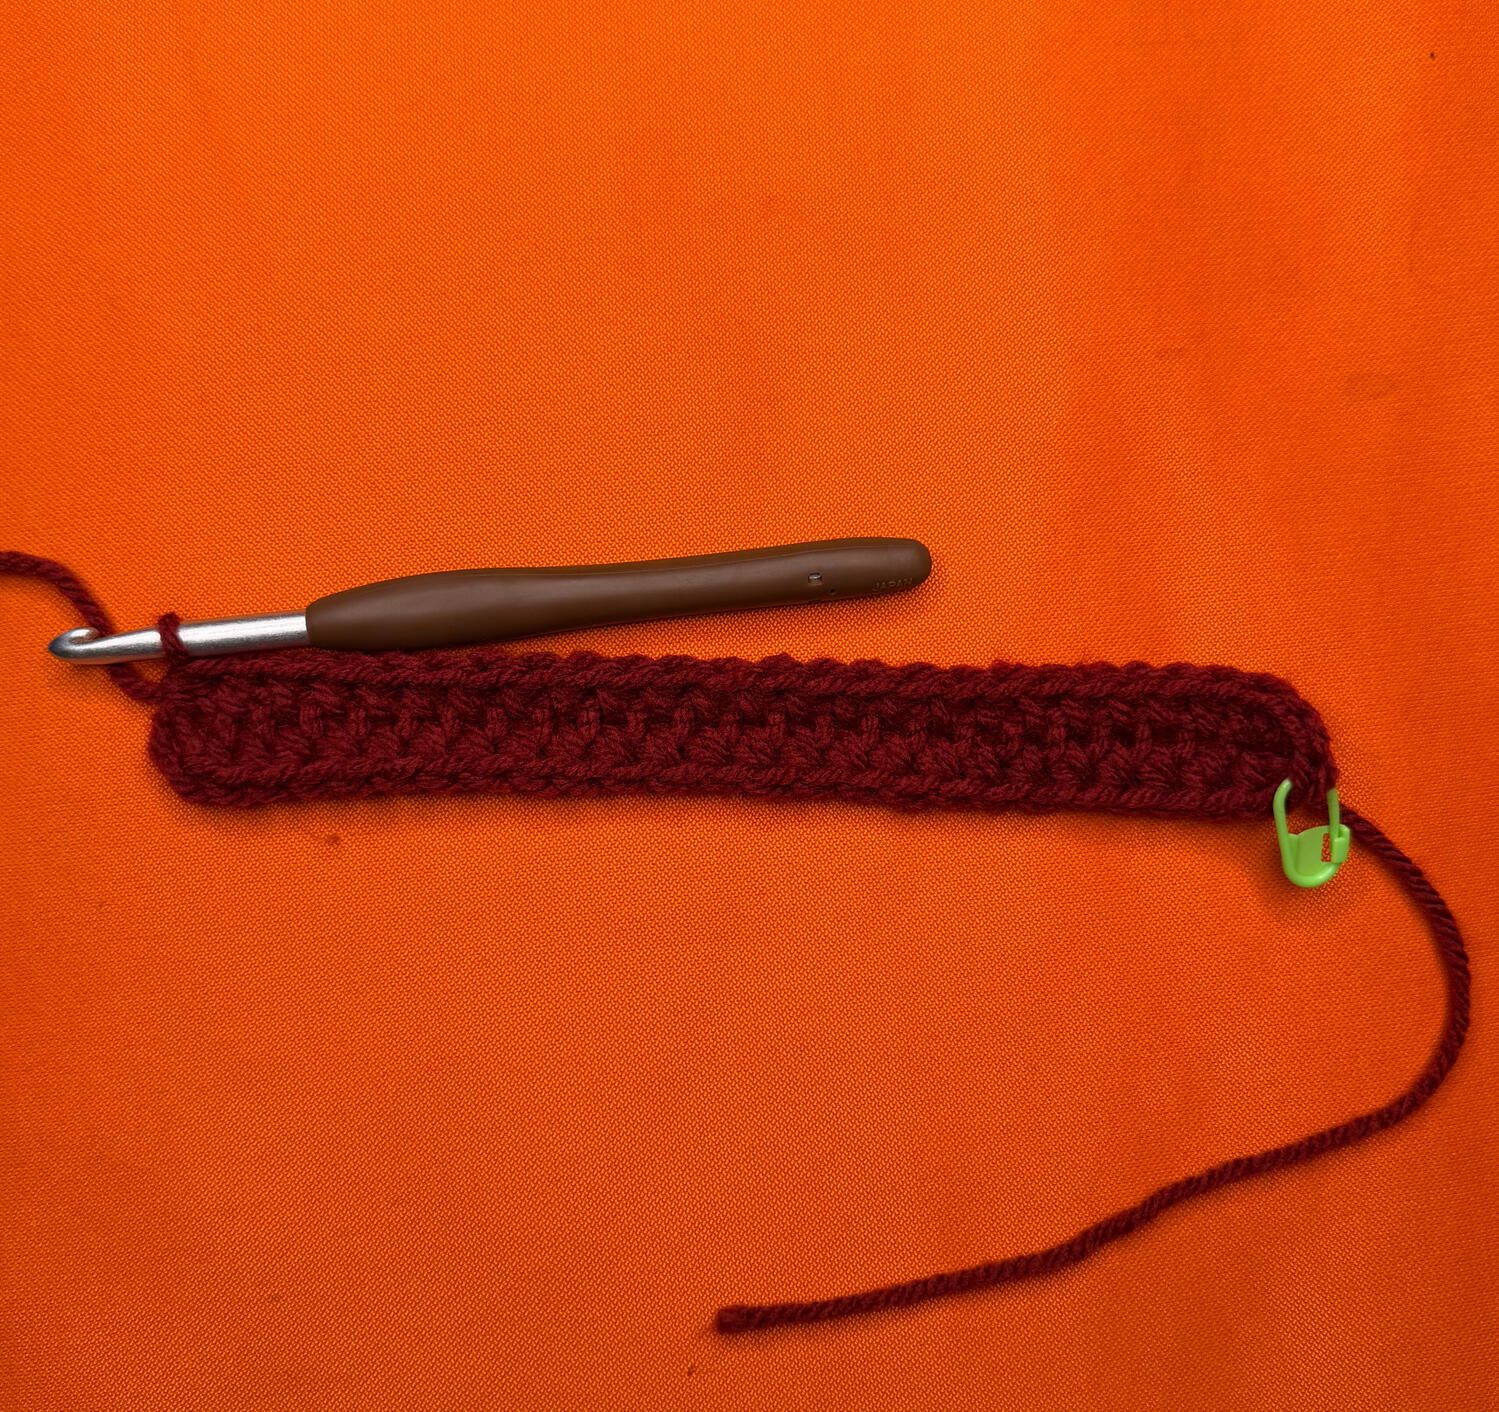
Row 2 - 12
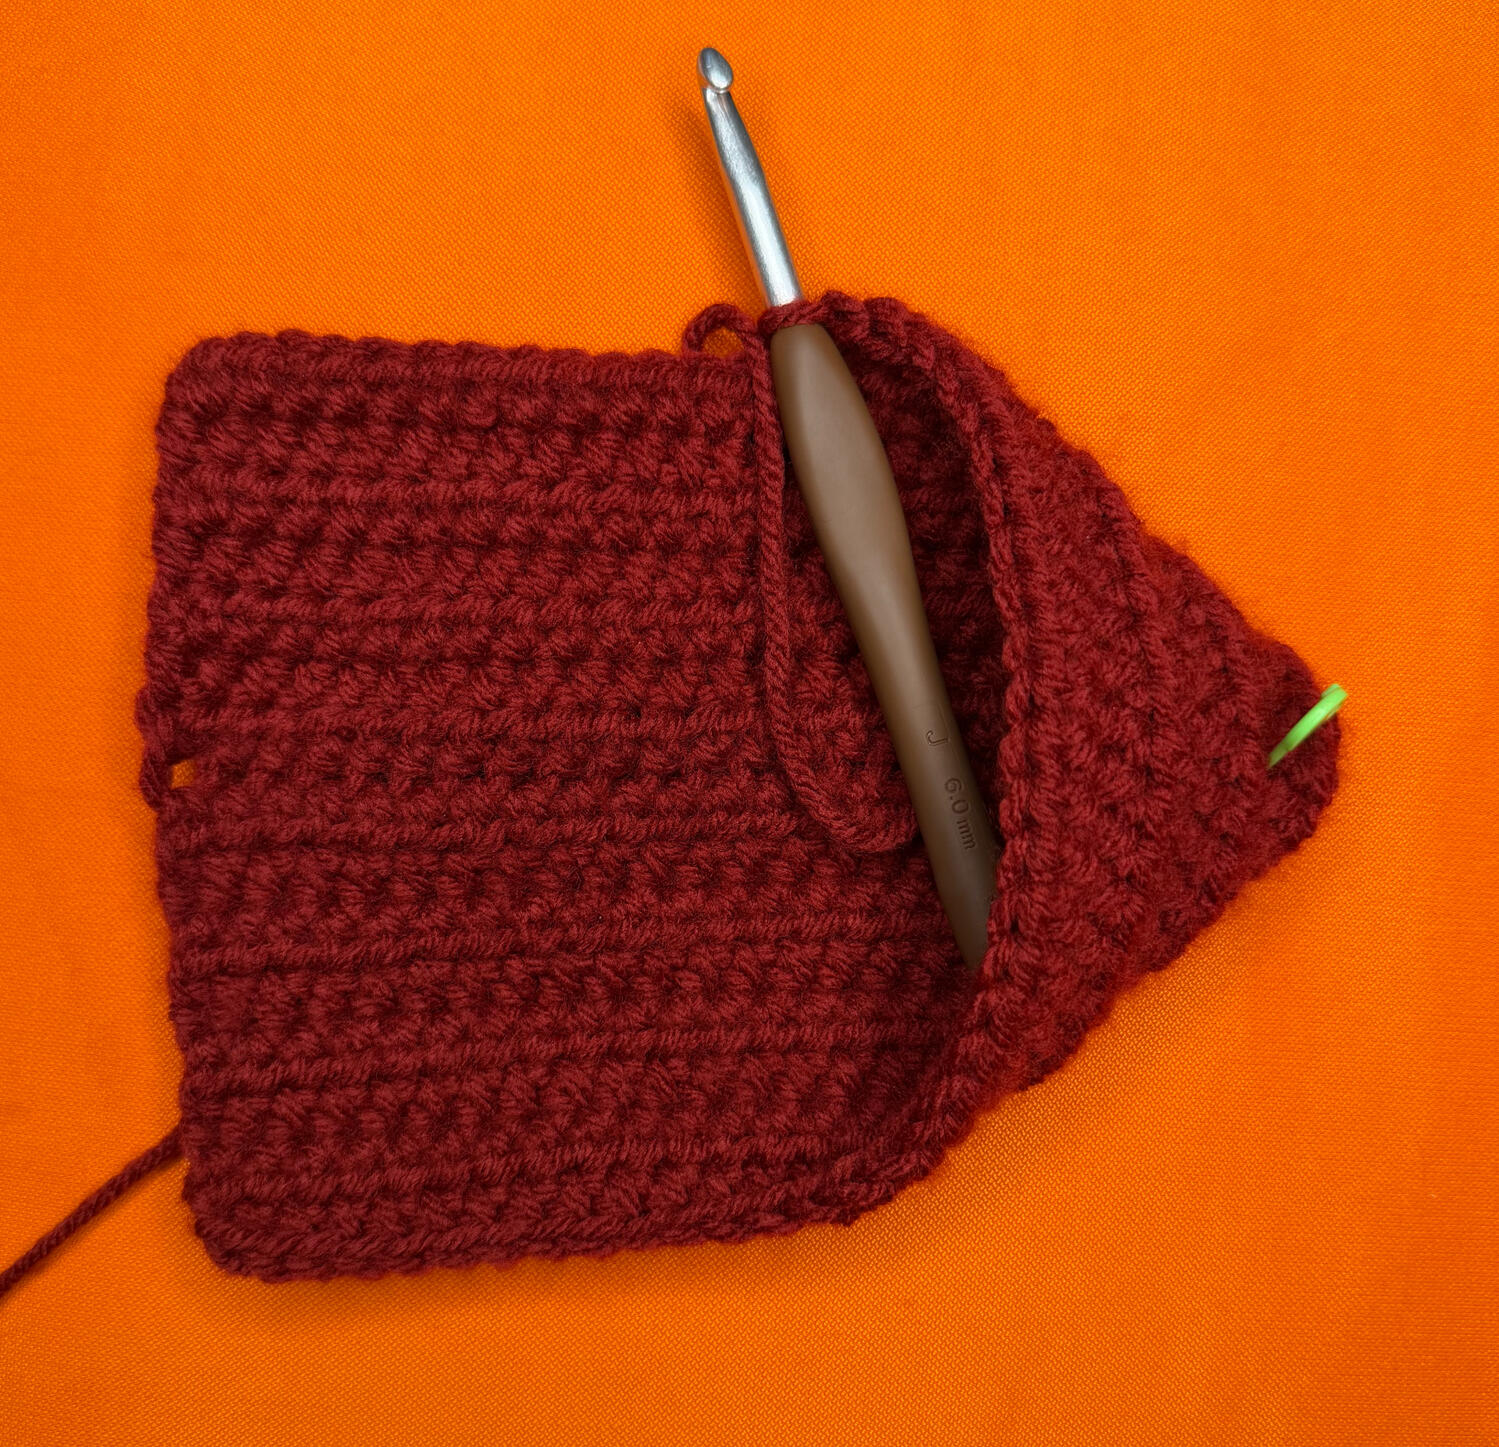
Chain 1, turn your work, and HDC all the way around into every ST. There should be 25 ST, the middle 1, then 25 more ST. Bringing to a total of 51 ST.
Now chain 1, cut a long tail to weave in later and pull through
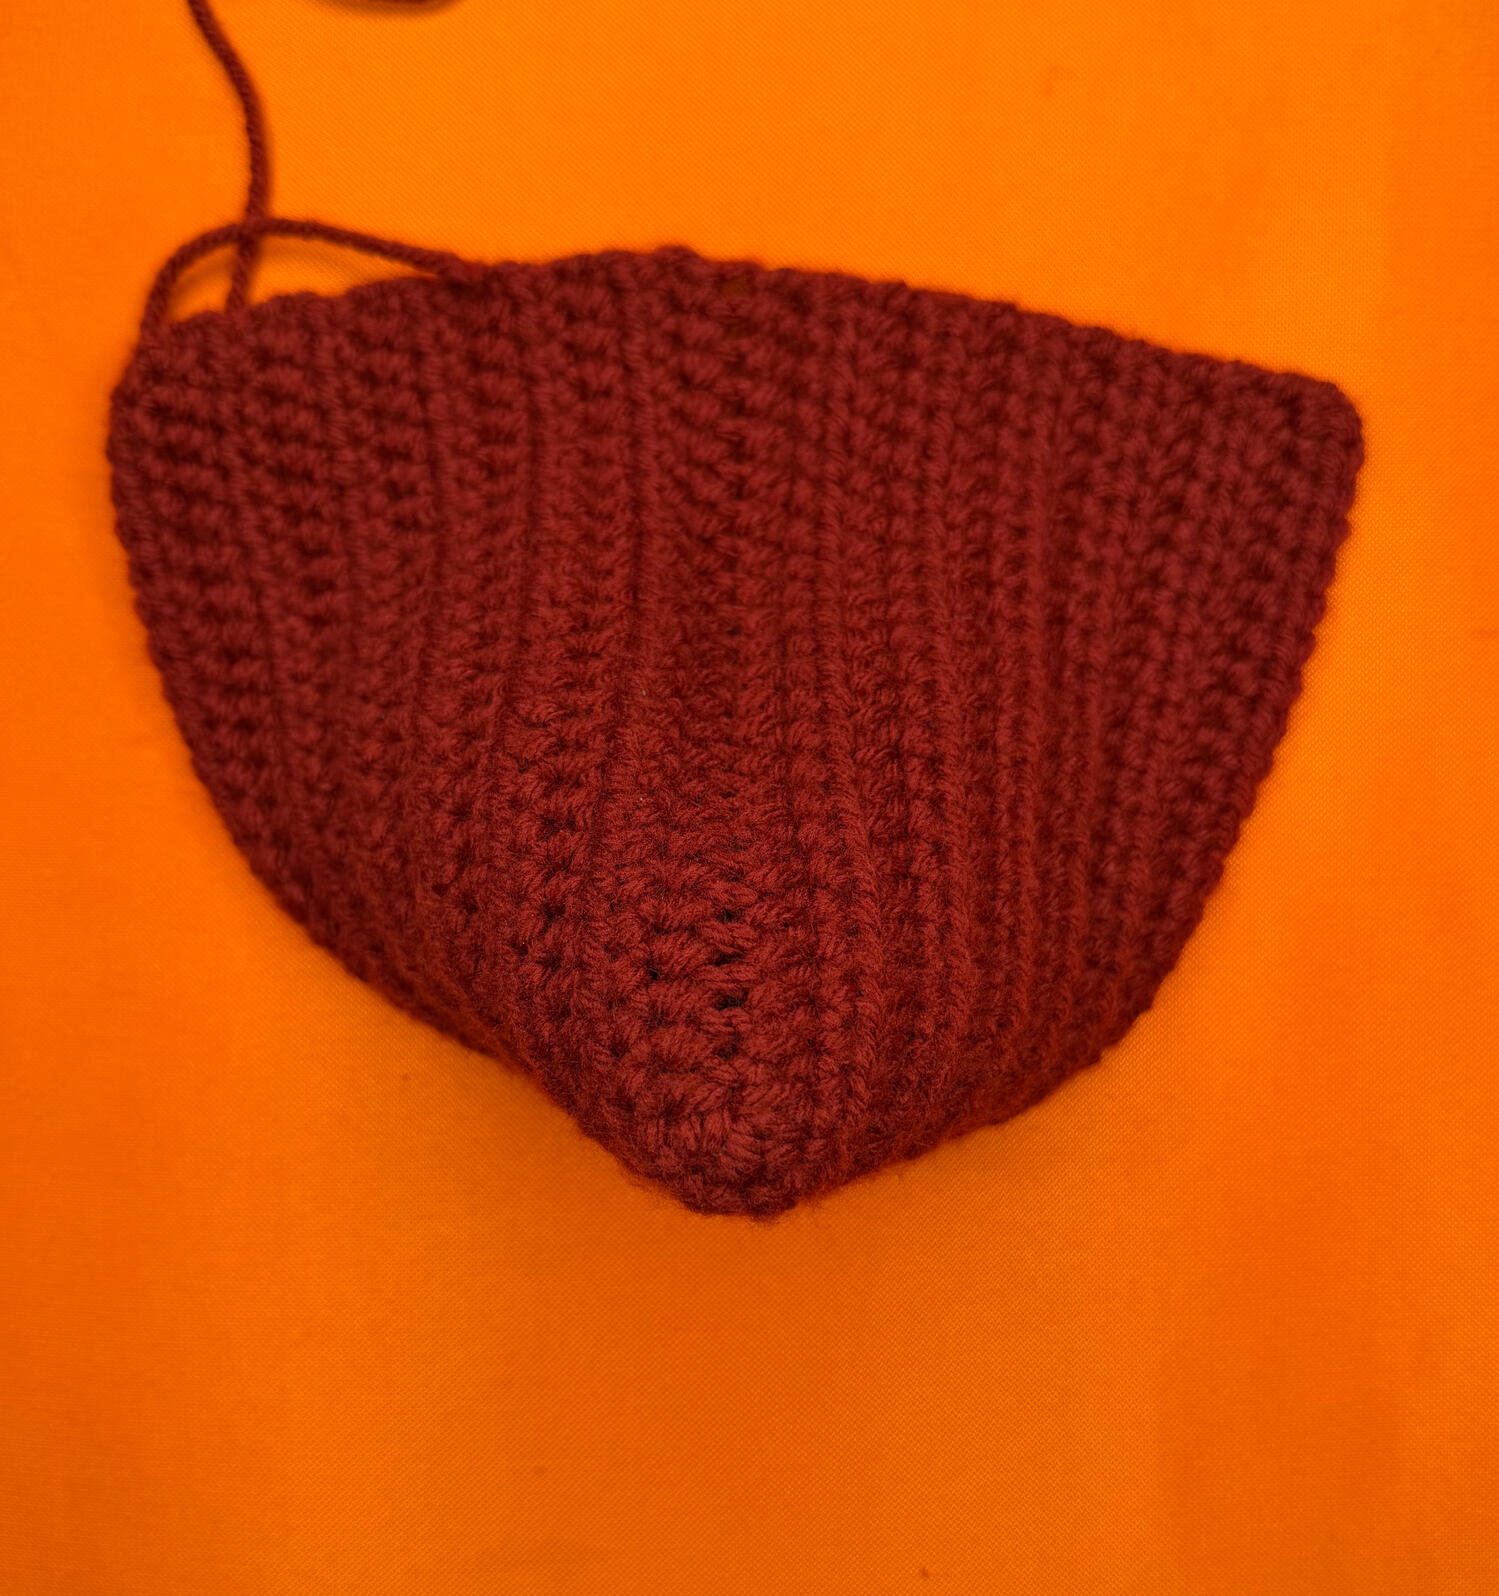
Under crotchRow 1
Taking new yarn. Find the middle 5 ST, we are going to start HDC 5 across.
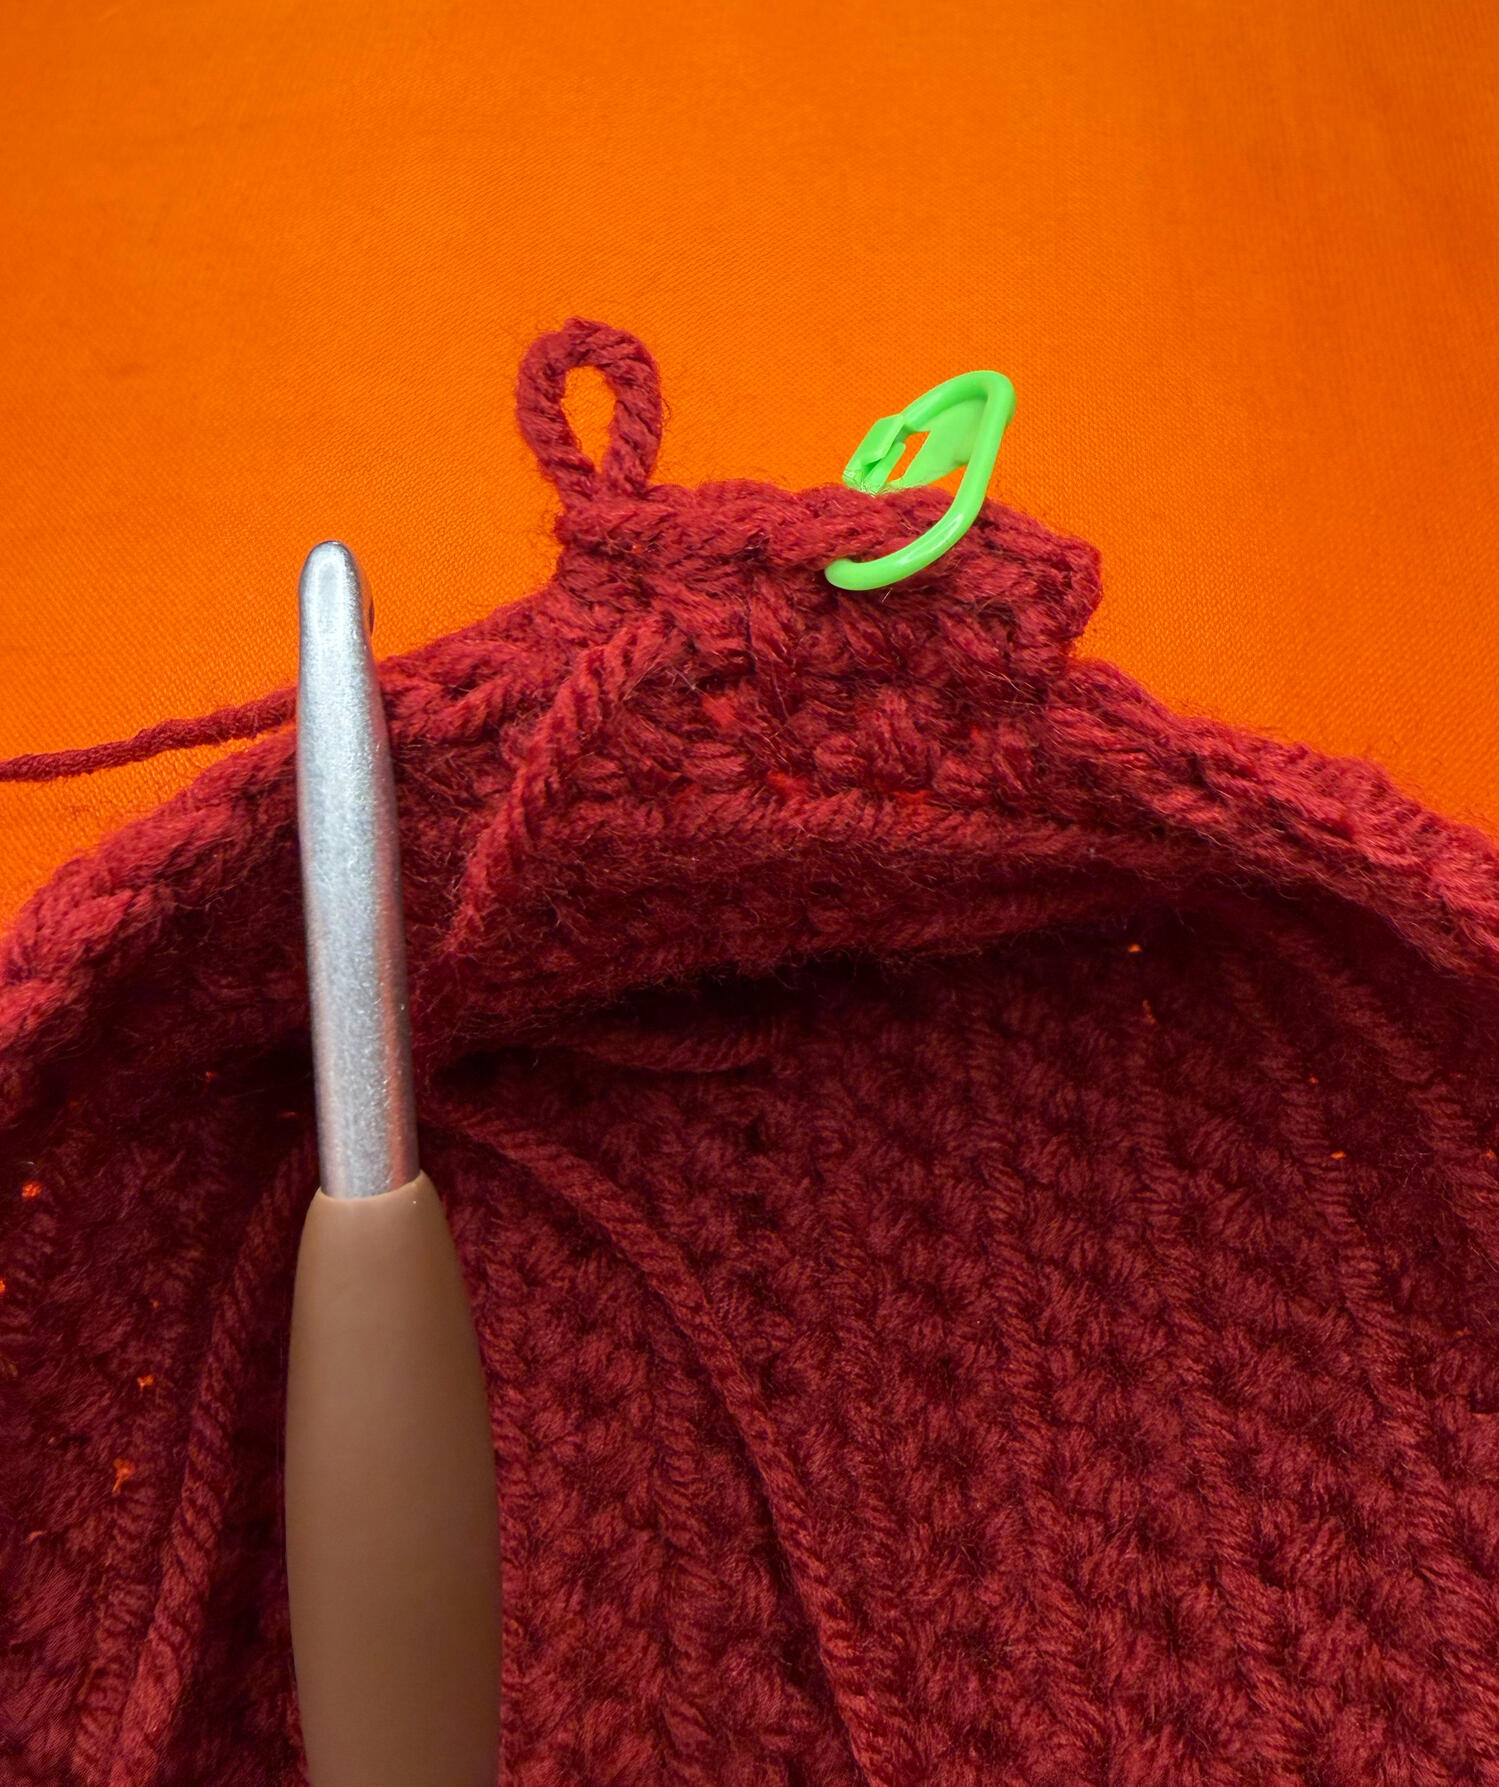
Row 2-6
chain 1 and turn work, HDC all 5 ST
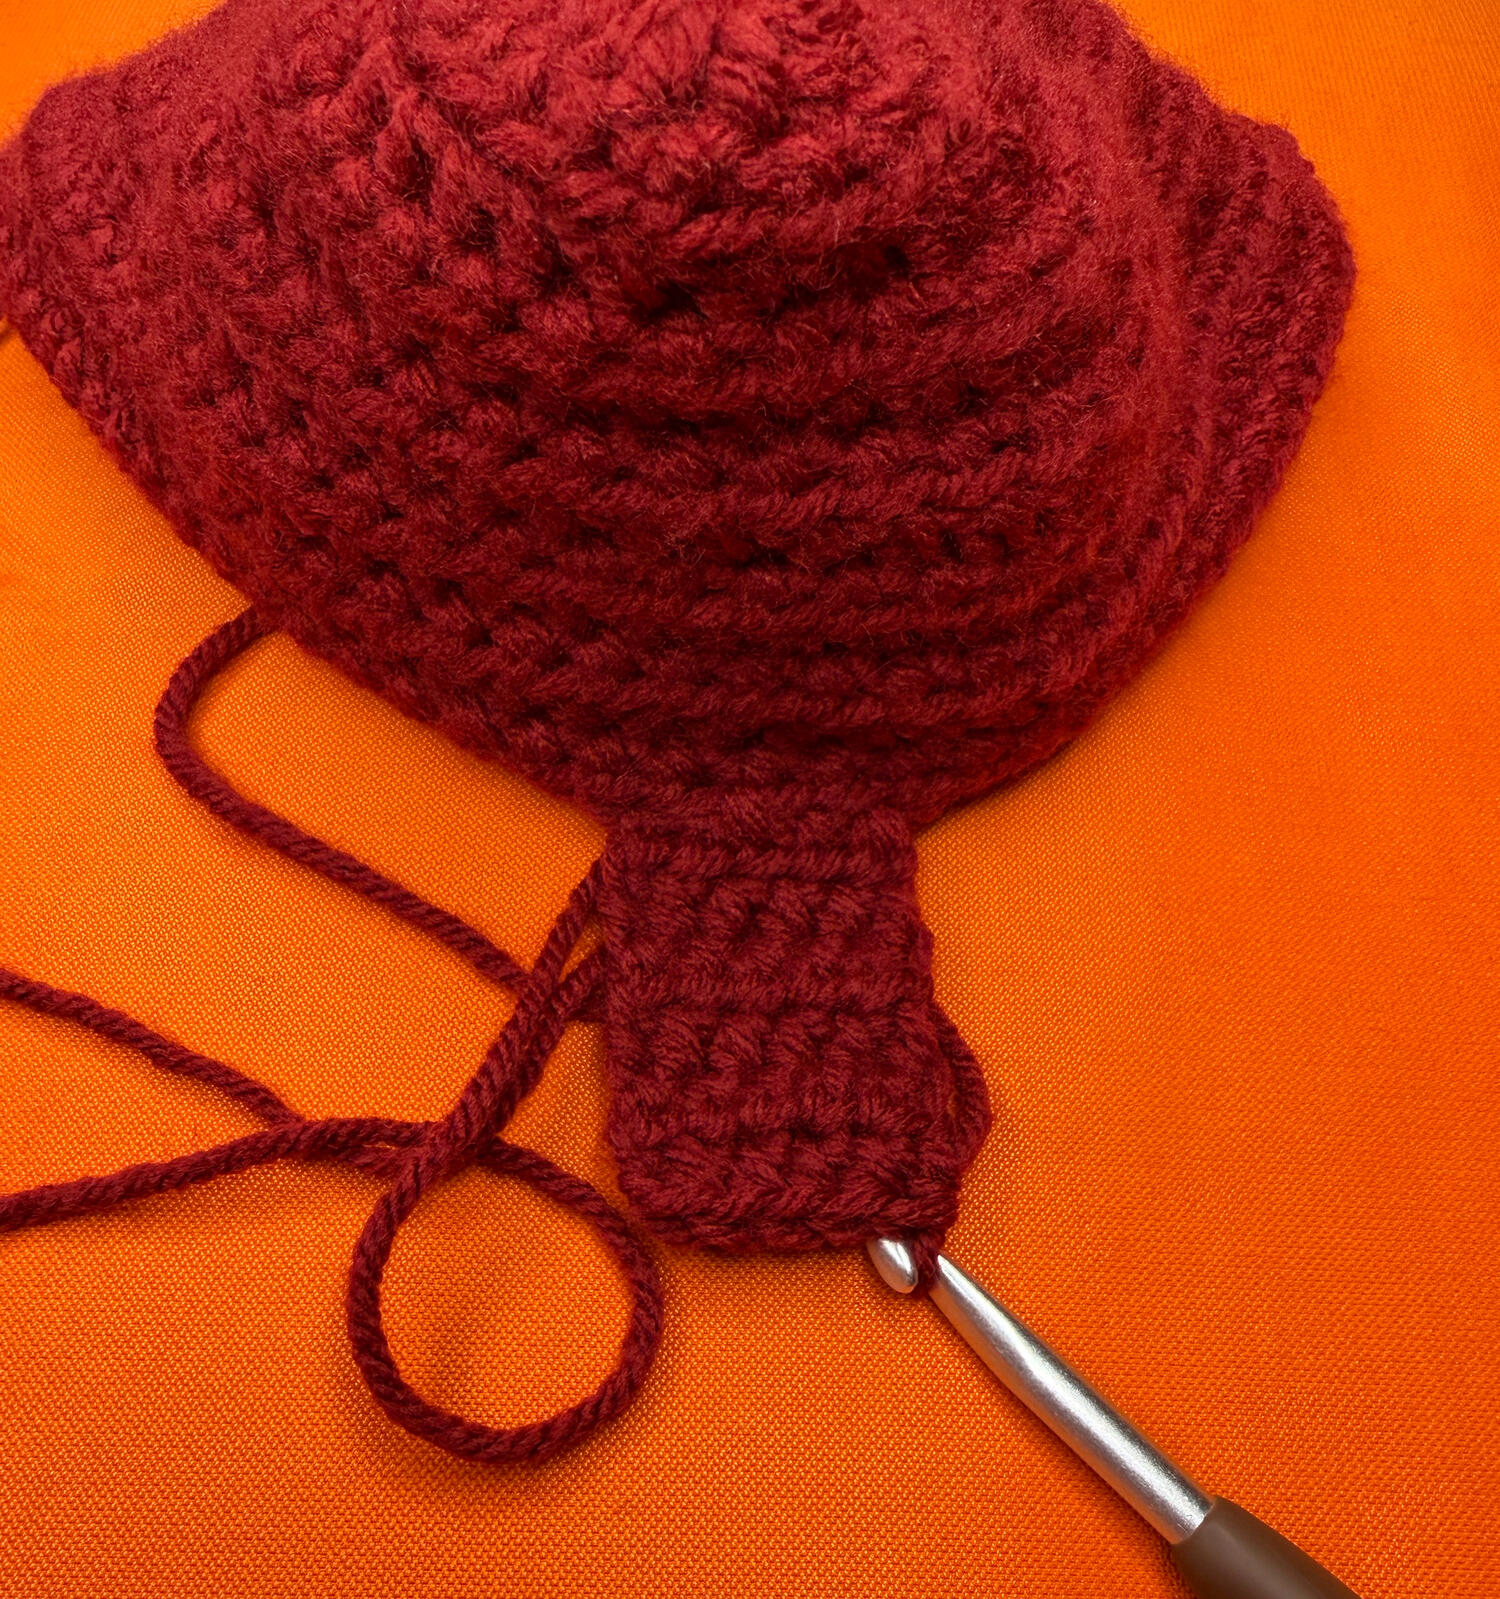
Rows 7- 38
At the start and end ST of each row INC. This increases each row by 2 every time.
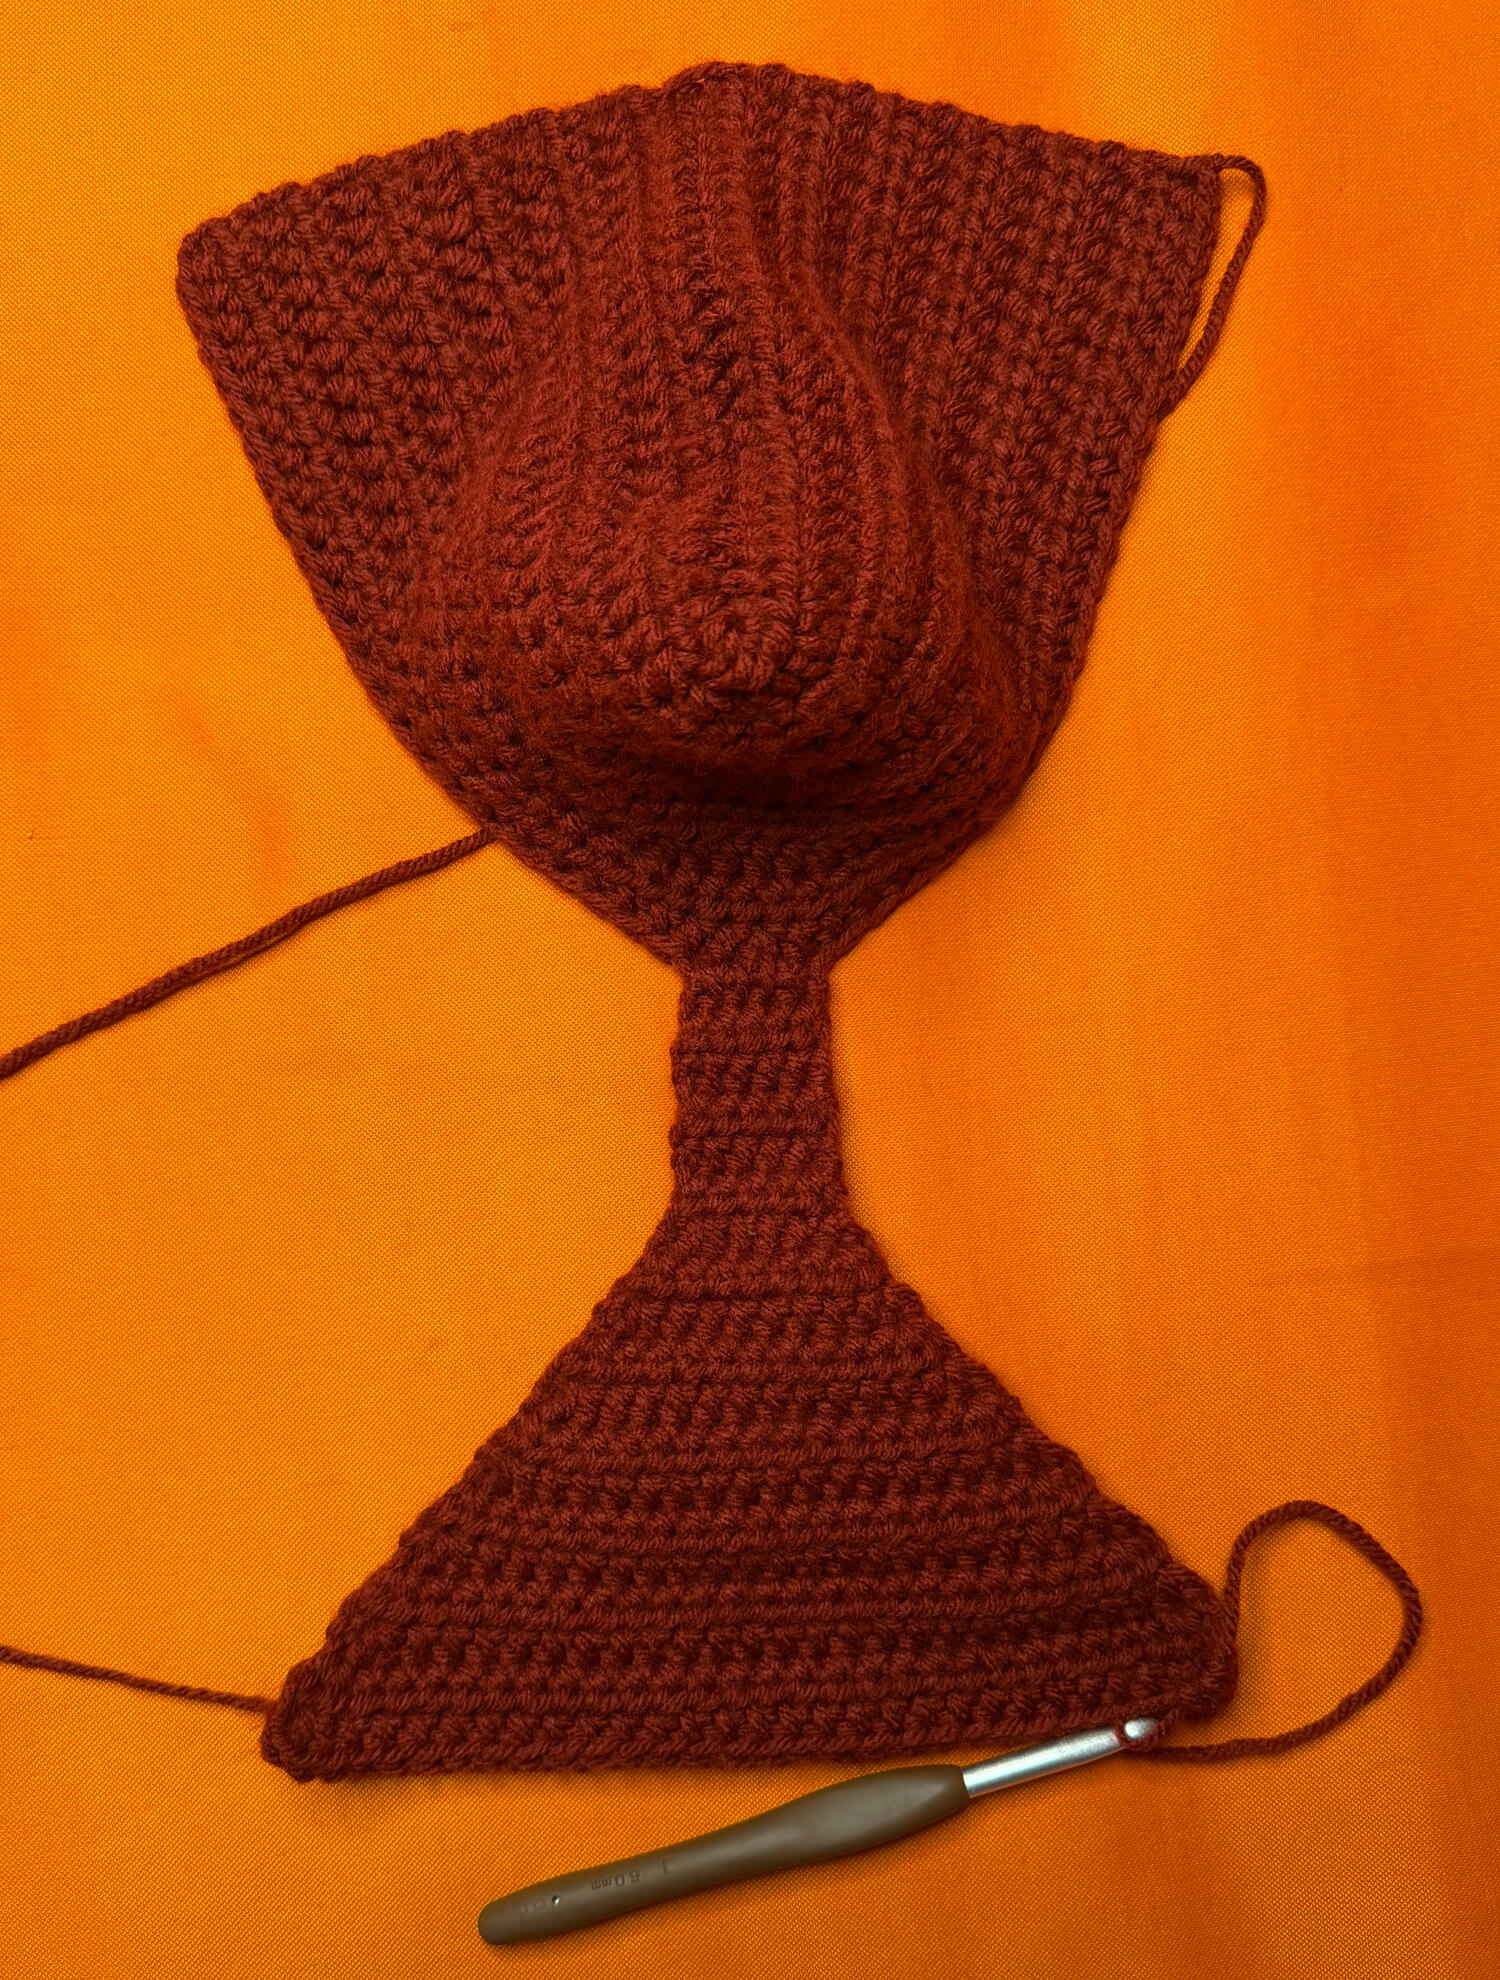
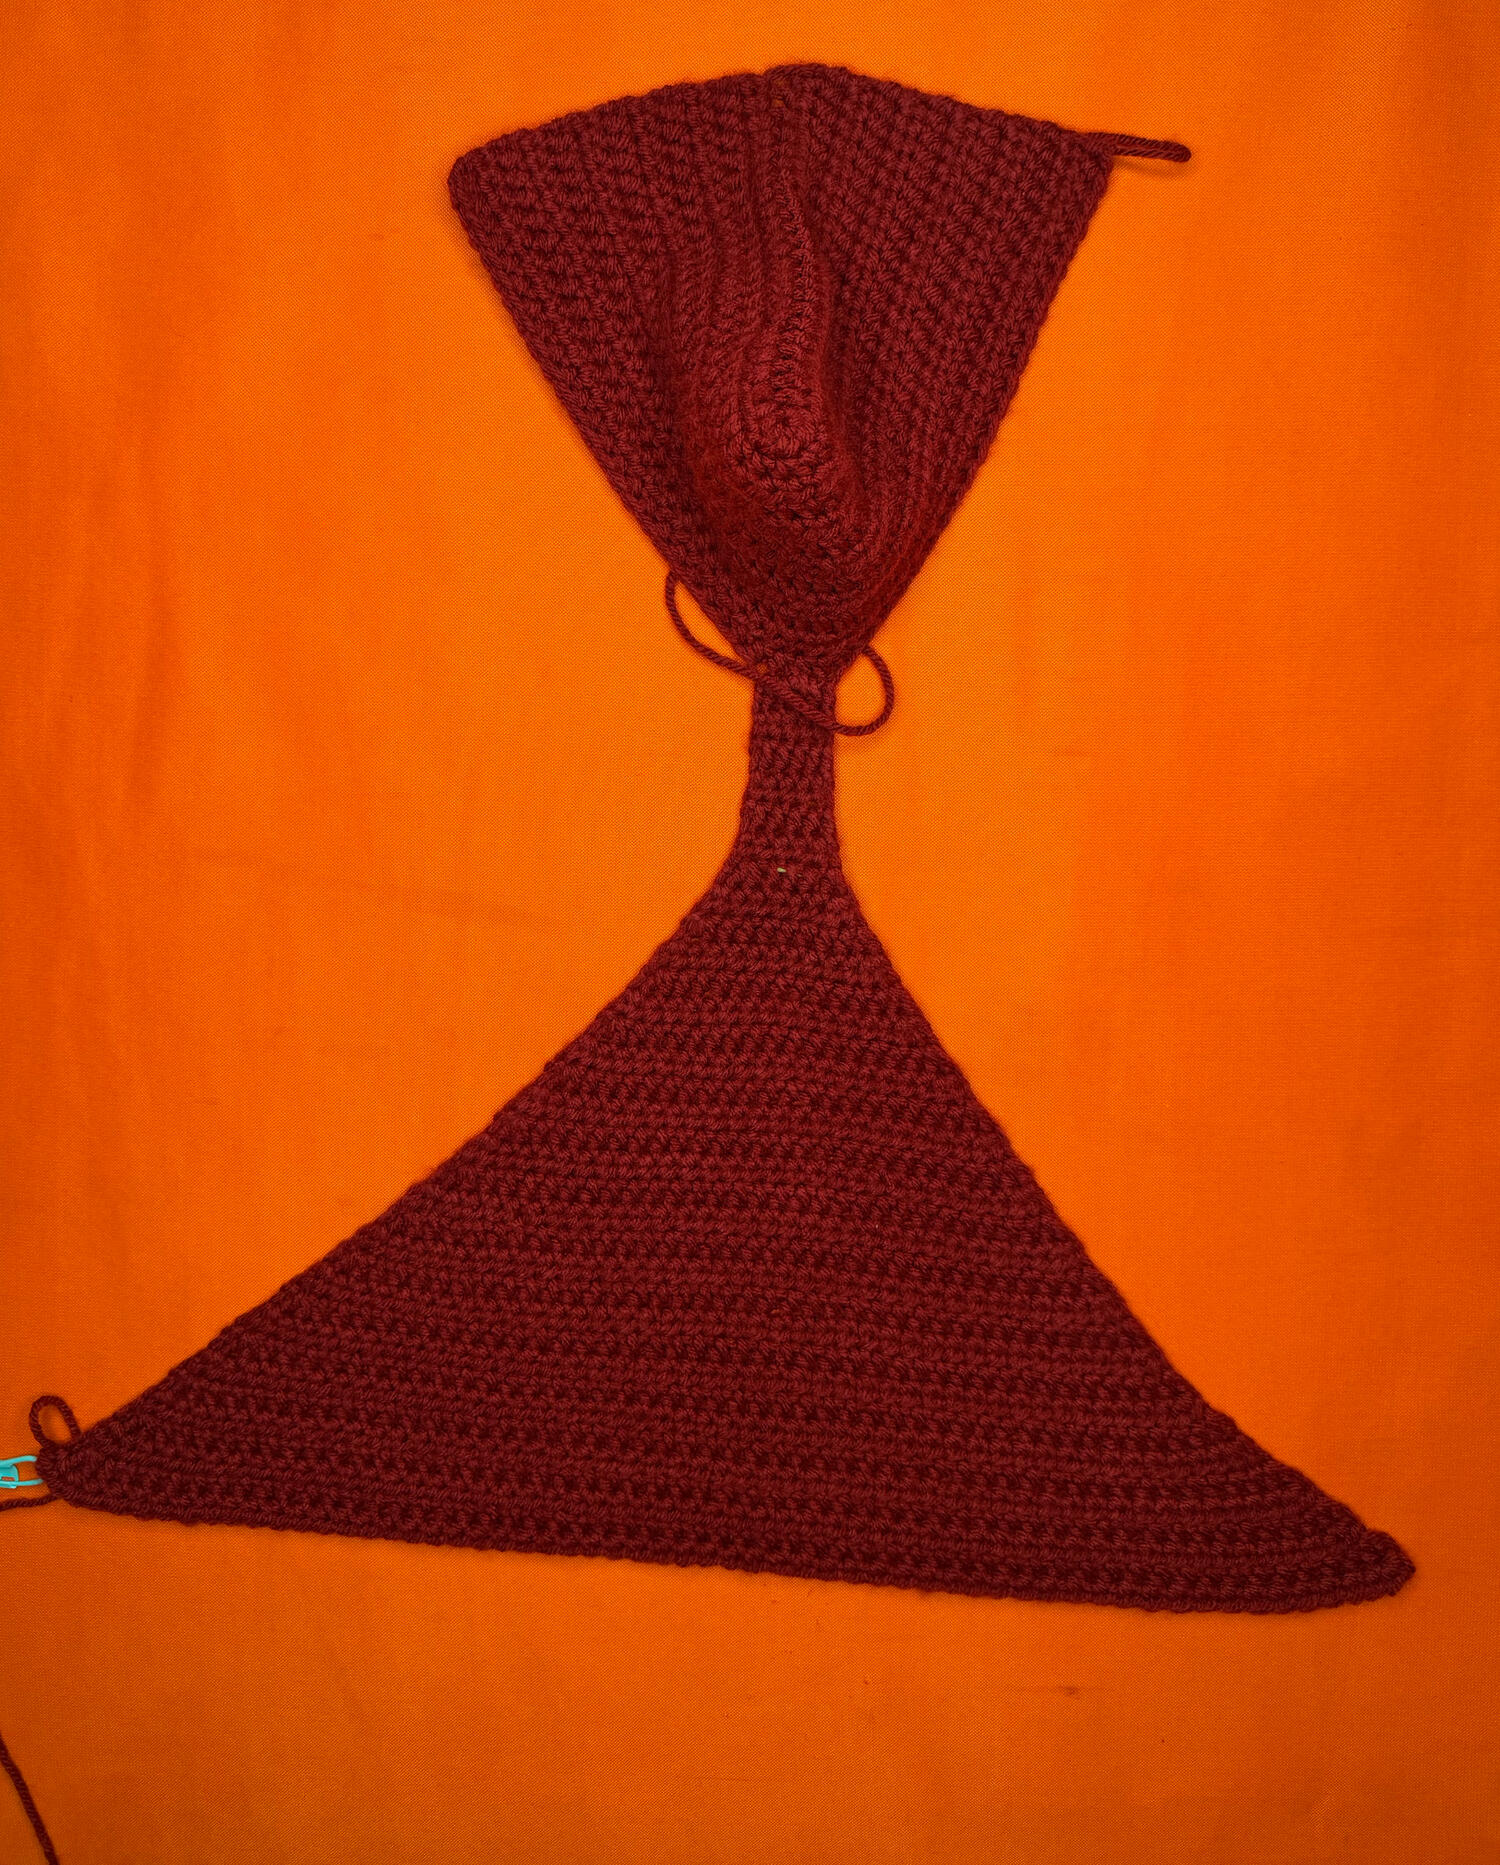
Row 39
Chain 1 and then work, HDC Increase into the first ST. Then HDC into the next 65 ST, and HDC INC in the last ST.
Now to attach it to the front panel, HDC into the front panel
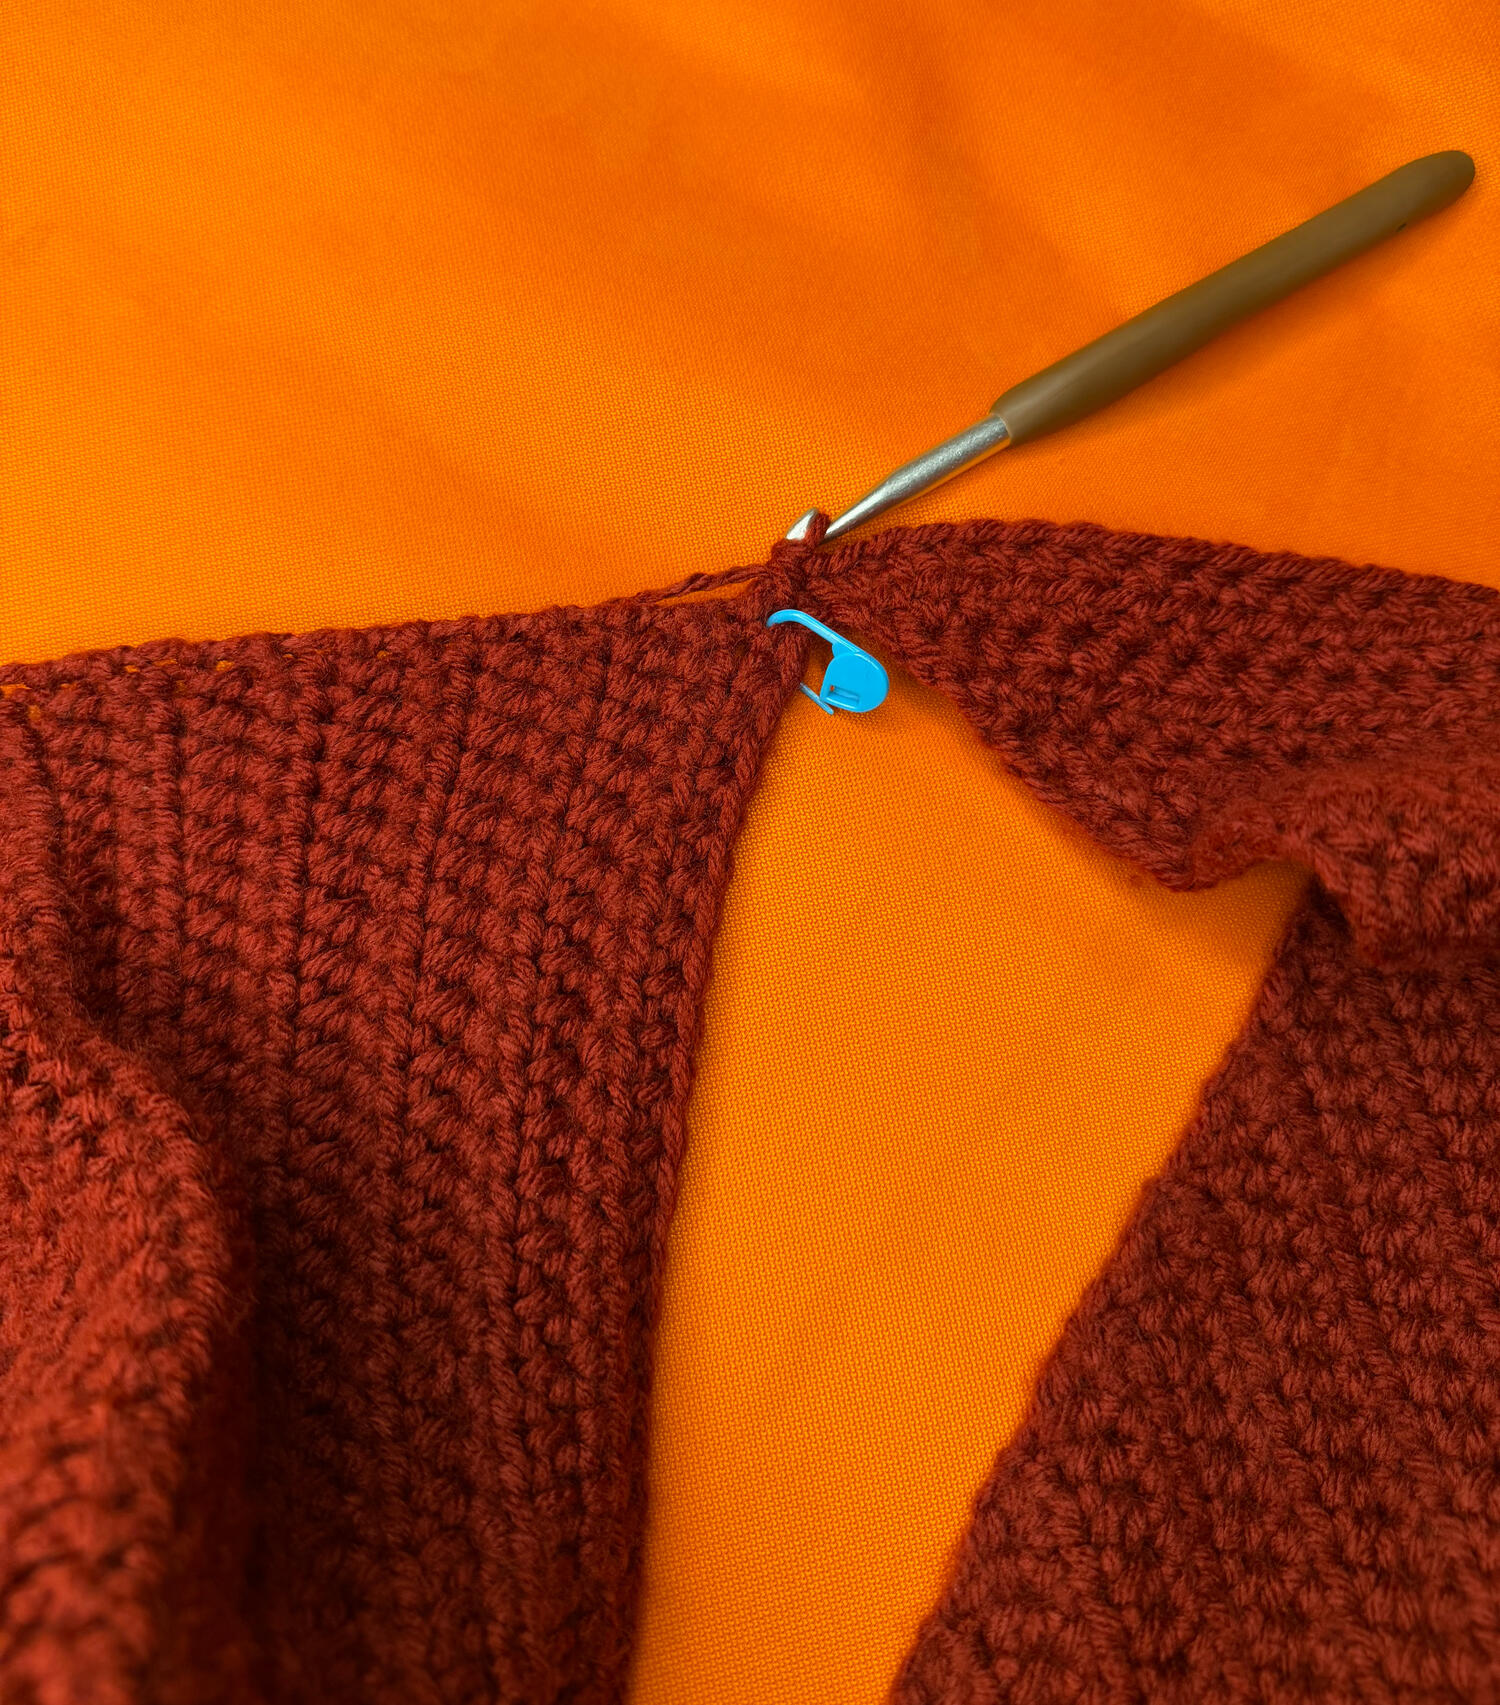
Now HDC across the front, should be 24 ST across the front. Then SL ST to the back panel to join
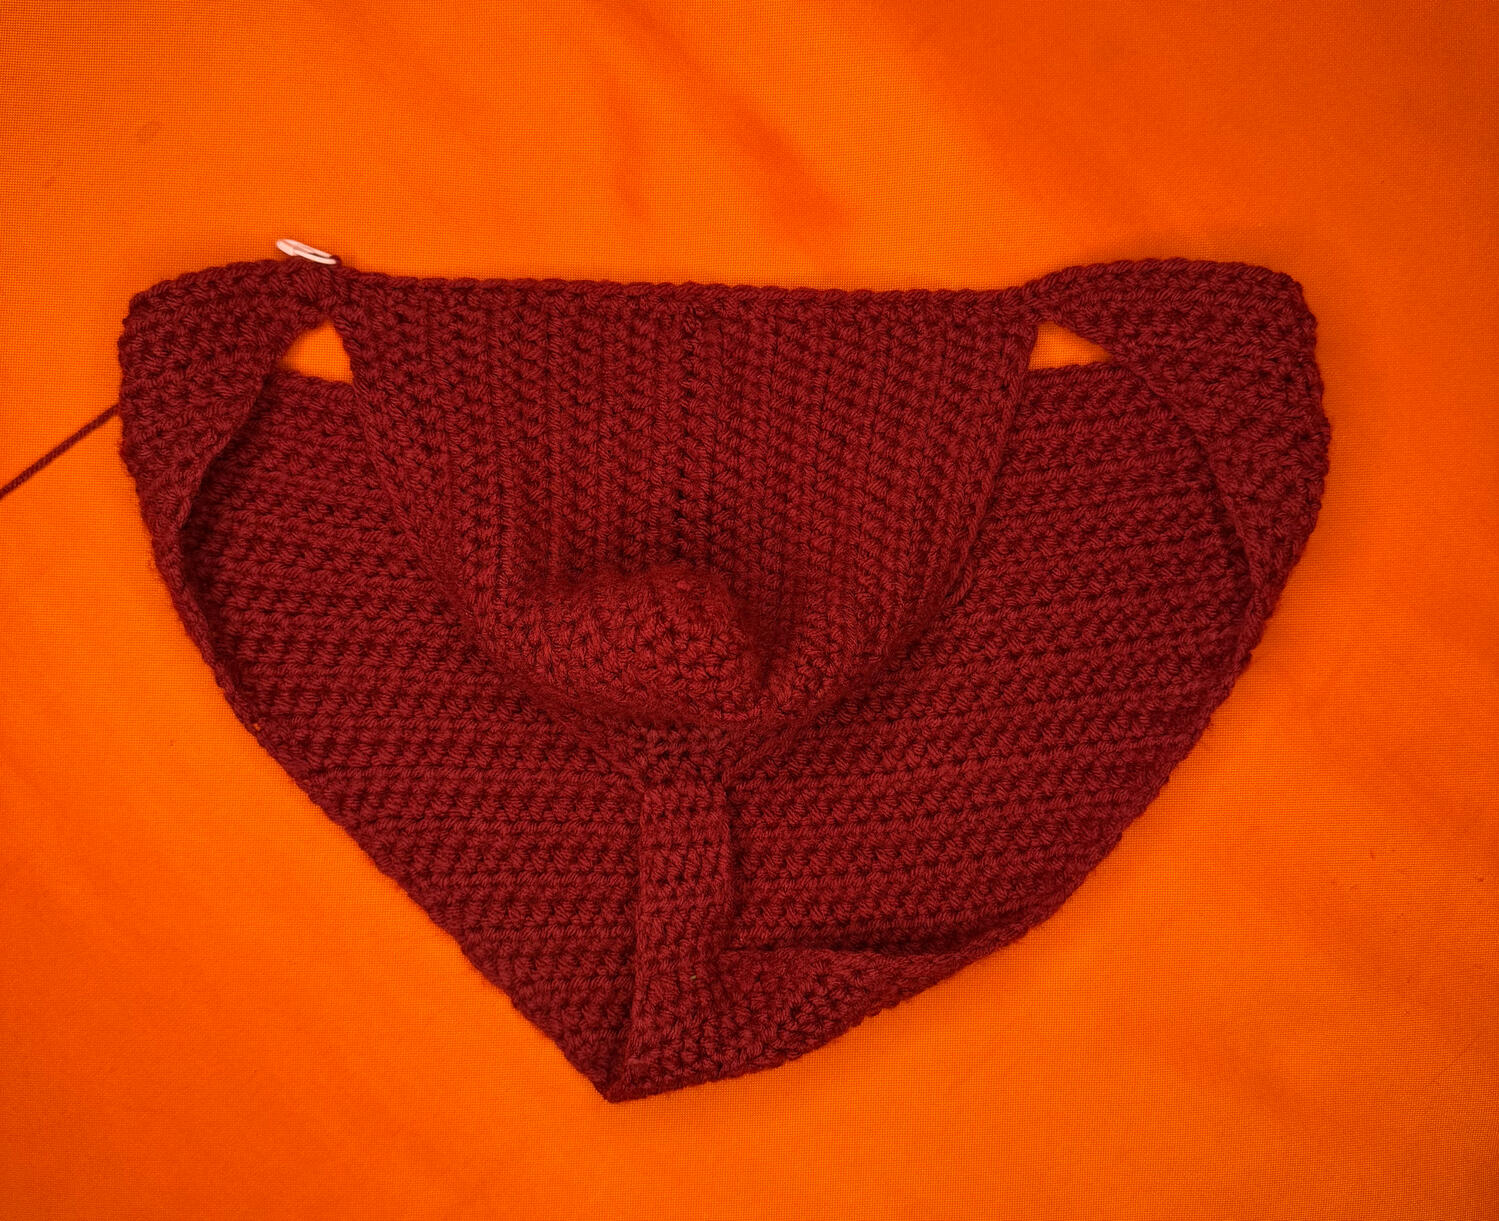
Row 40
Chain 1, then worked then HDC around in the circle. Then SL ST into the first ST. Chain 1 and cut a tail to weave in and pull through.
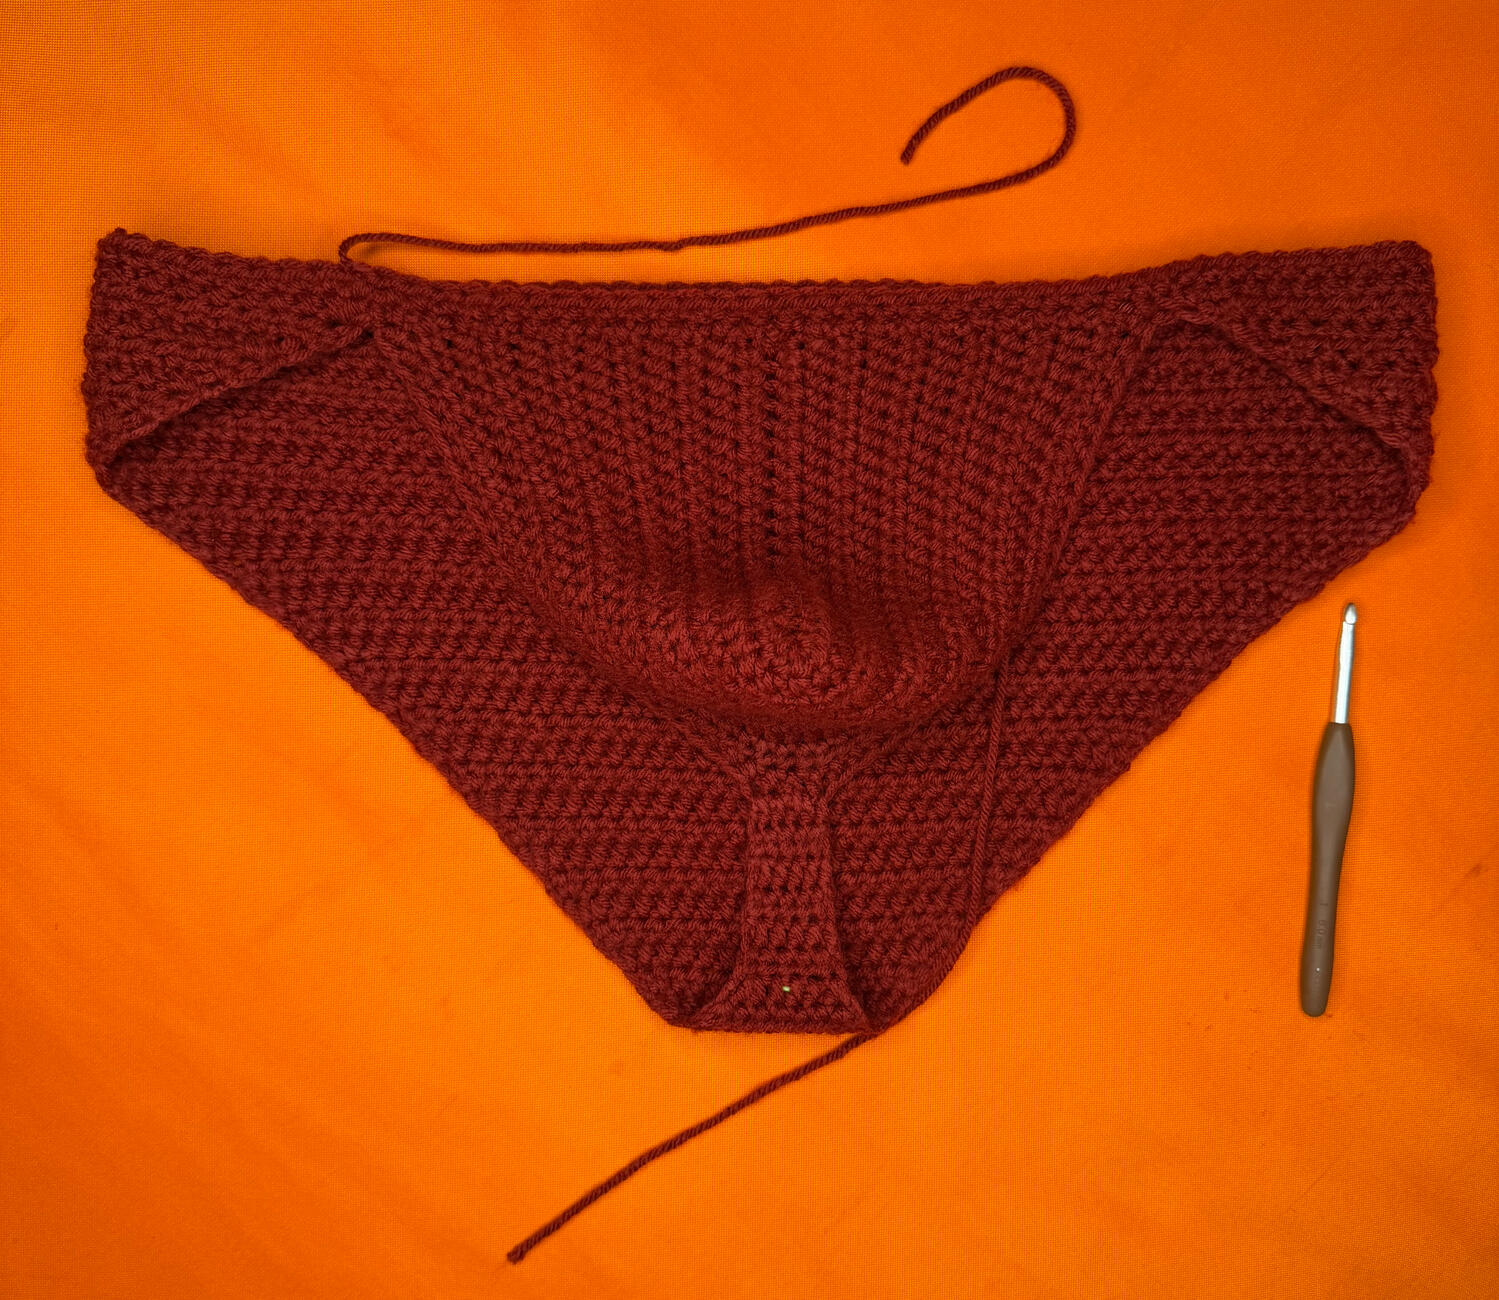
Waistband - alternating between black yarn, red yarn and elastic yarn.
Row 1
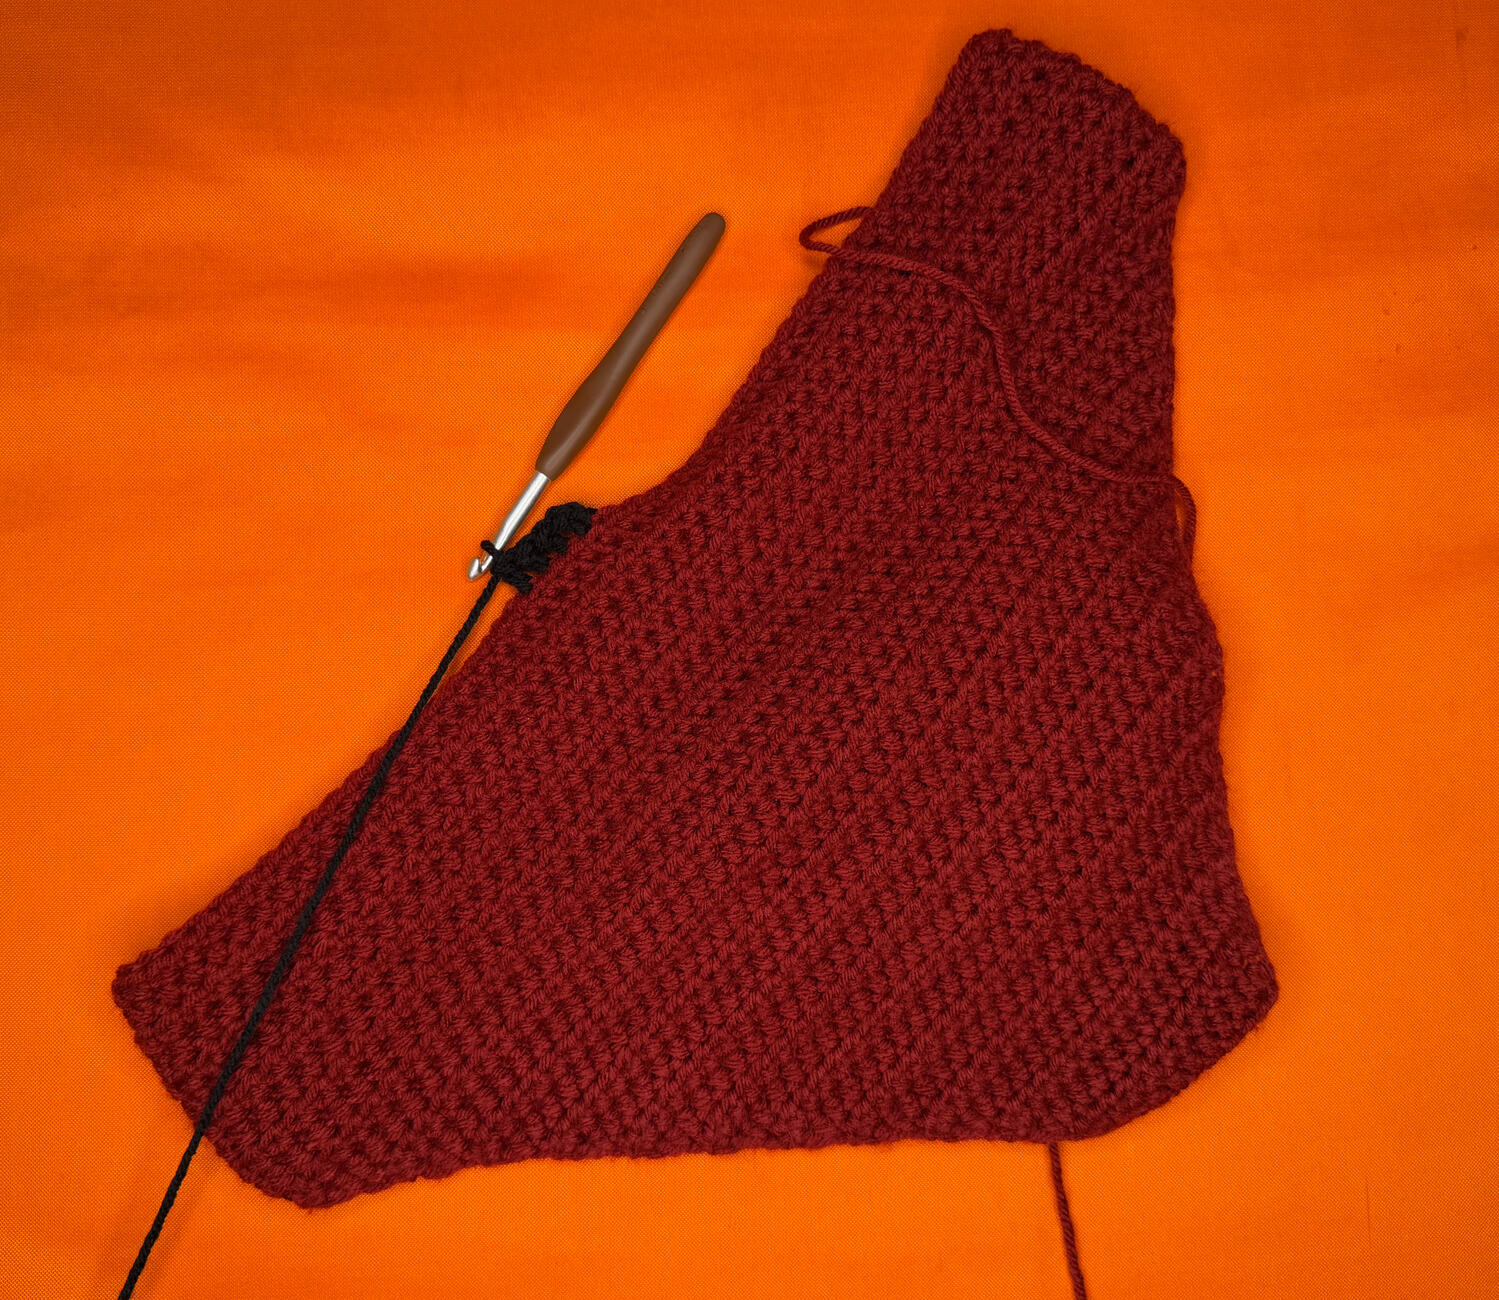
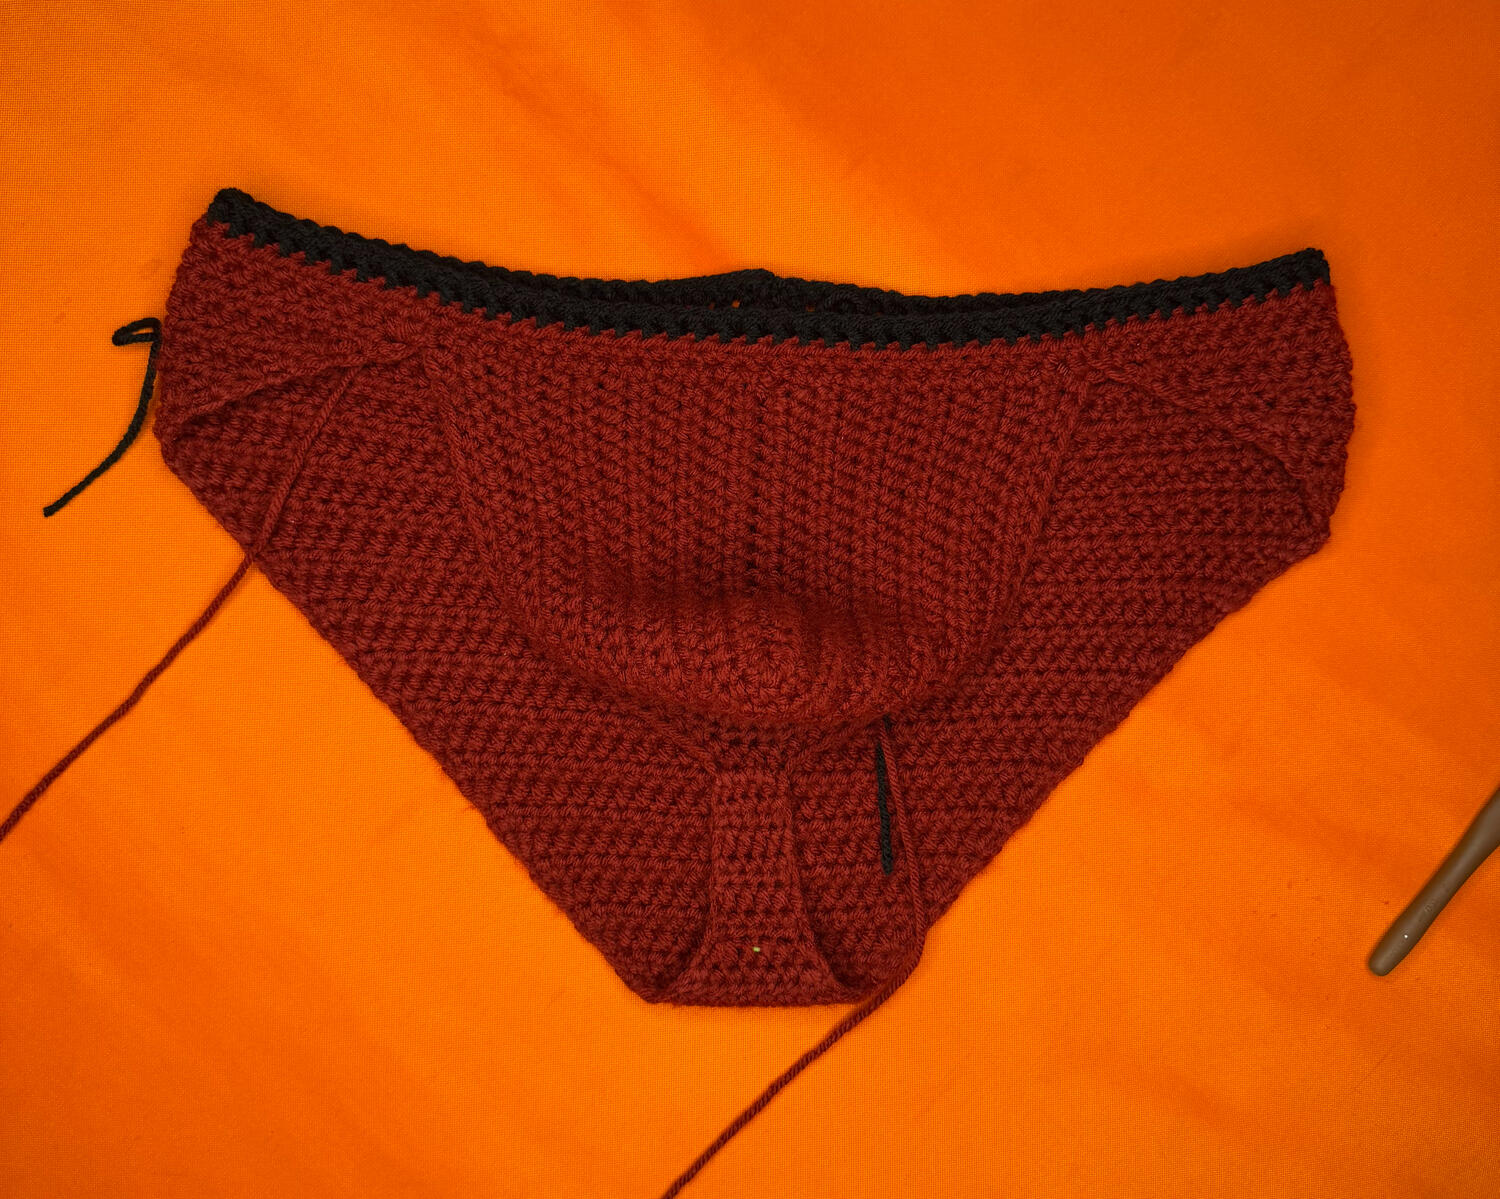
using black yarn. Around the middle of the back, attach black yarn. Then DC around the waist. Then SL ST into the first ST. Chain 1 and cut a tail to weave in and pull through.
Row 2
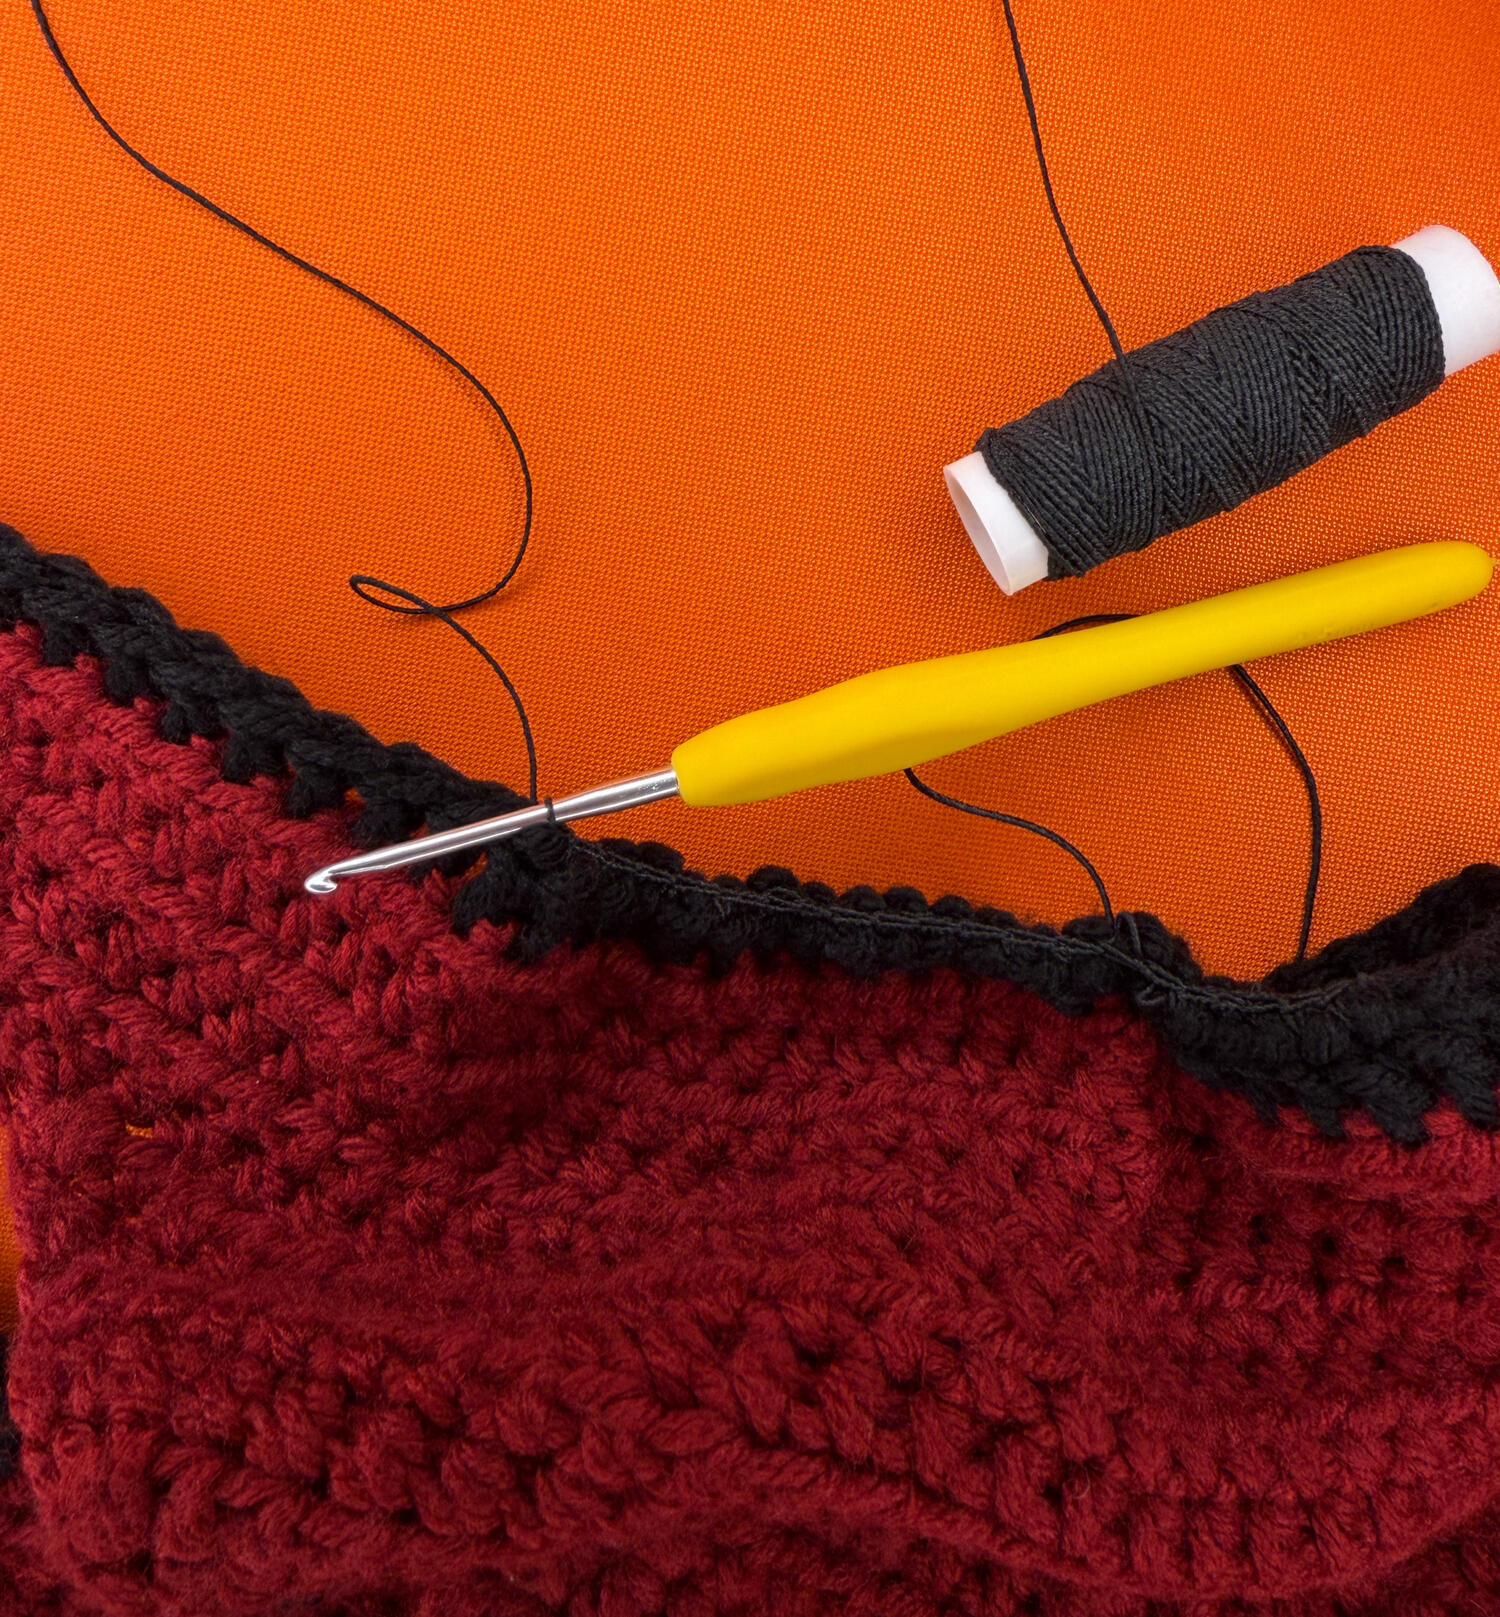
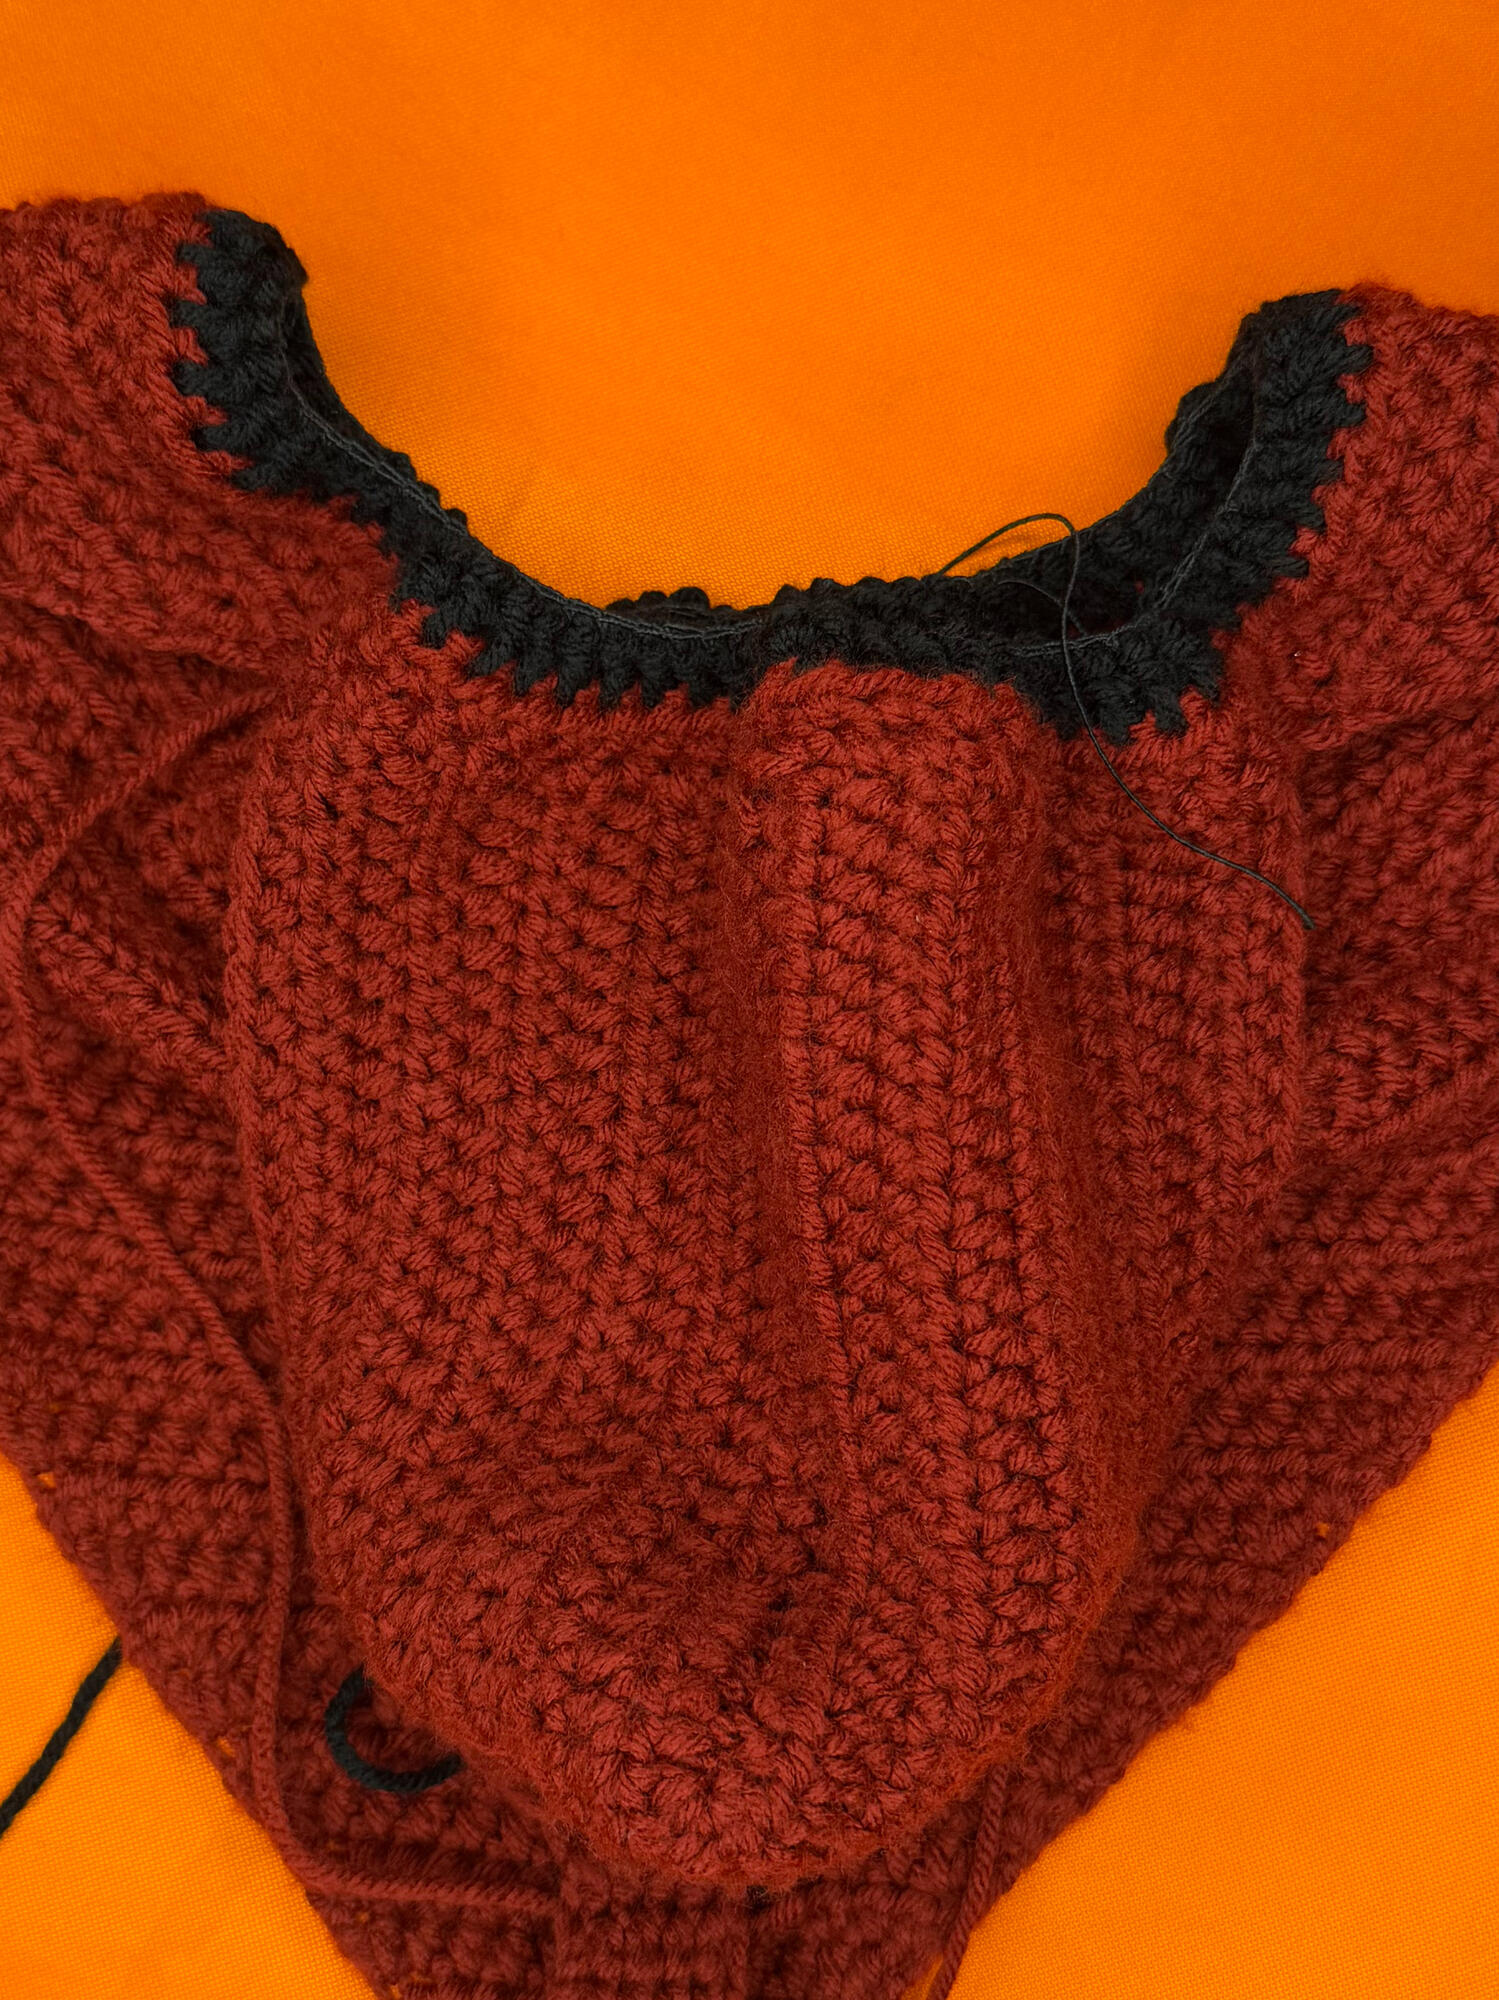
Using elastic yarn (remember 2.5mm hook for the elastic) . Around the middle of the back, attach the elastic yarn. Then SC around the waistband. Then SL ST into the first ST once at the end. Chain 1 and cut a tail to weave in and pull through.
Row 3
Attaching the red yarn into the back post ST. You will alternate between back posting and front posting the ST from row 1 around the waistband. Then SL ST into the first ST once at the end. Chain 1 and cut a tail to weave in and pull through. (If you find you have 1 to little for an even front/back post ST, add 1 randomly in order to make it even)
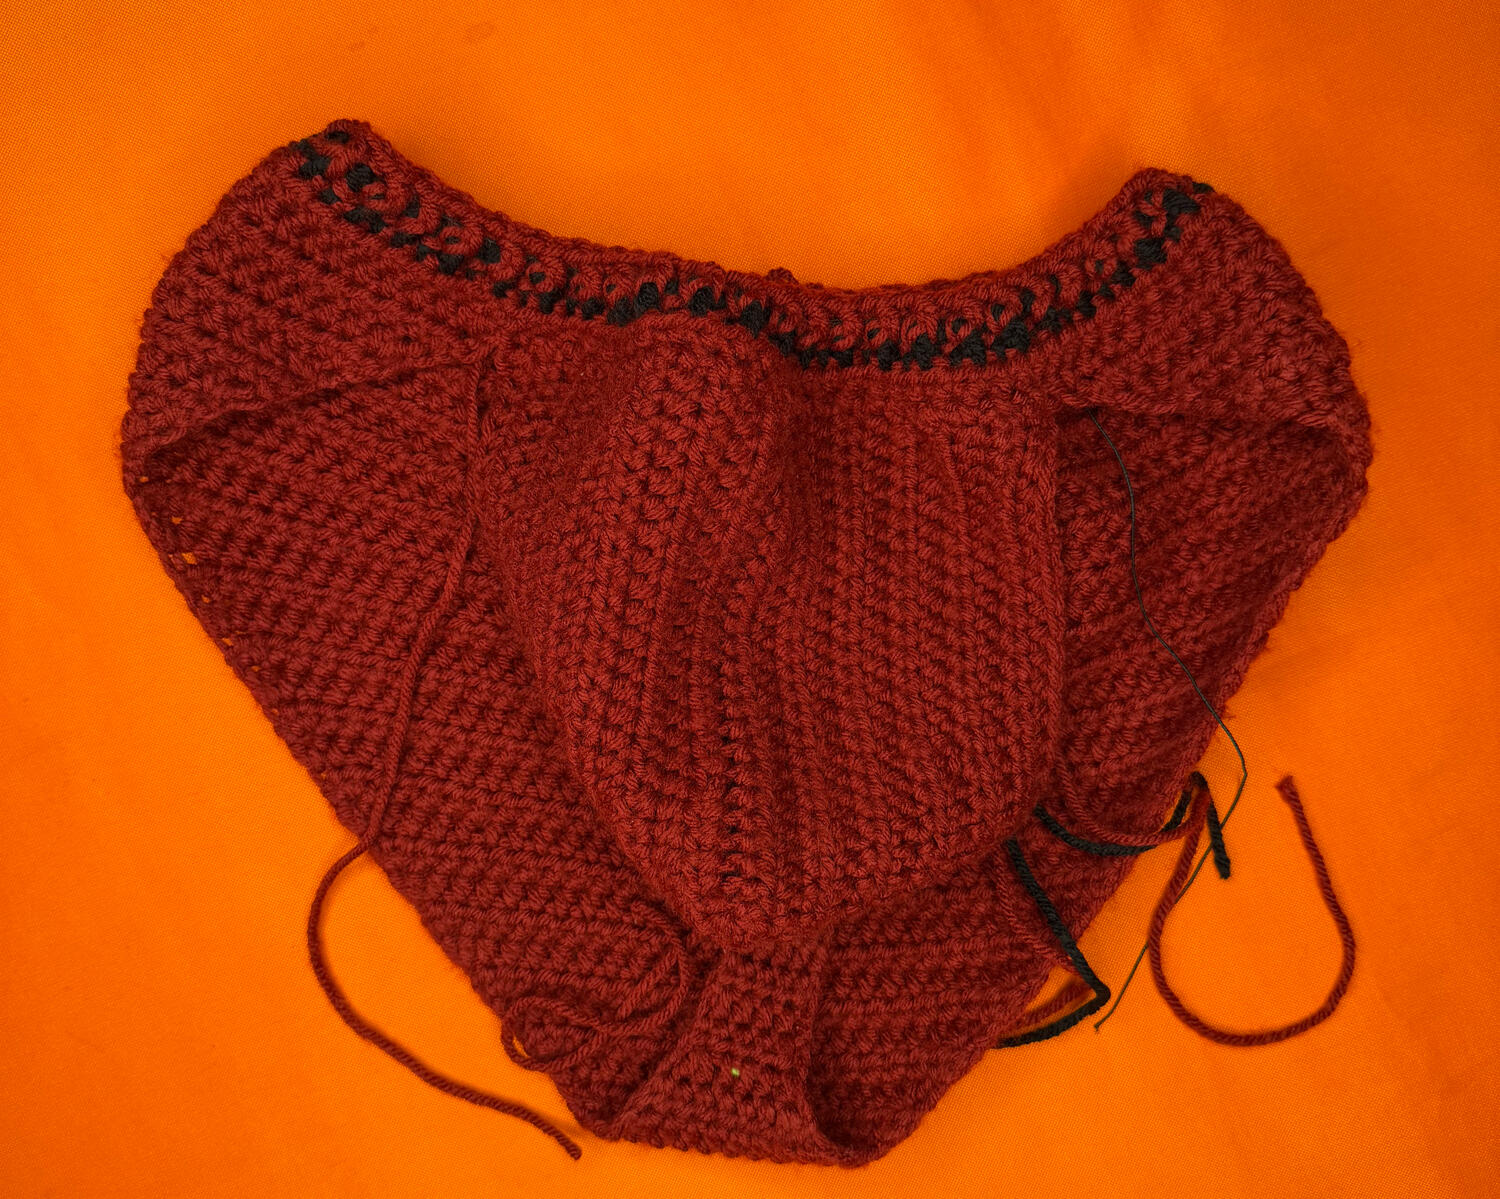
Row 4
Attaching black yarn into the back post ST. You will alternate between back posting and front posting the ST from row 1 around the waistband. Then SL ST into the first ST once at the end. Chain 1 and cut a tail to weave in and pull through.
Row 5
Using elastic yarn (remember 2.5mm hook for the elastic) . Around the middle of the back, attach the elastic yarn. Then SC around the waistband. Then SL ST into the first ST once at the end. Chain 1 and cut a tail to weave in and pull through.
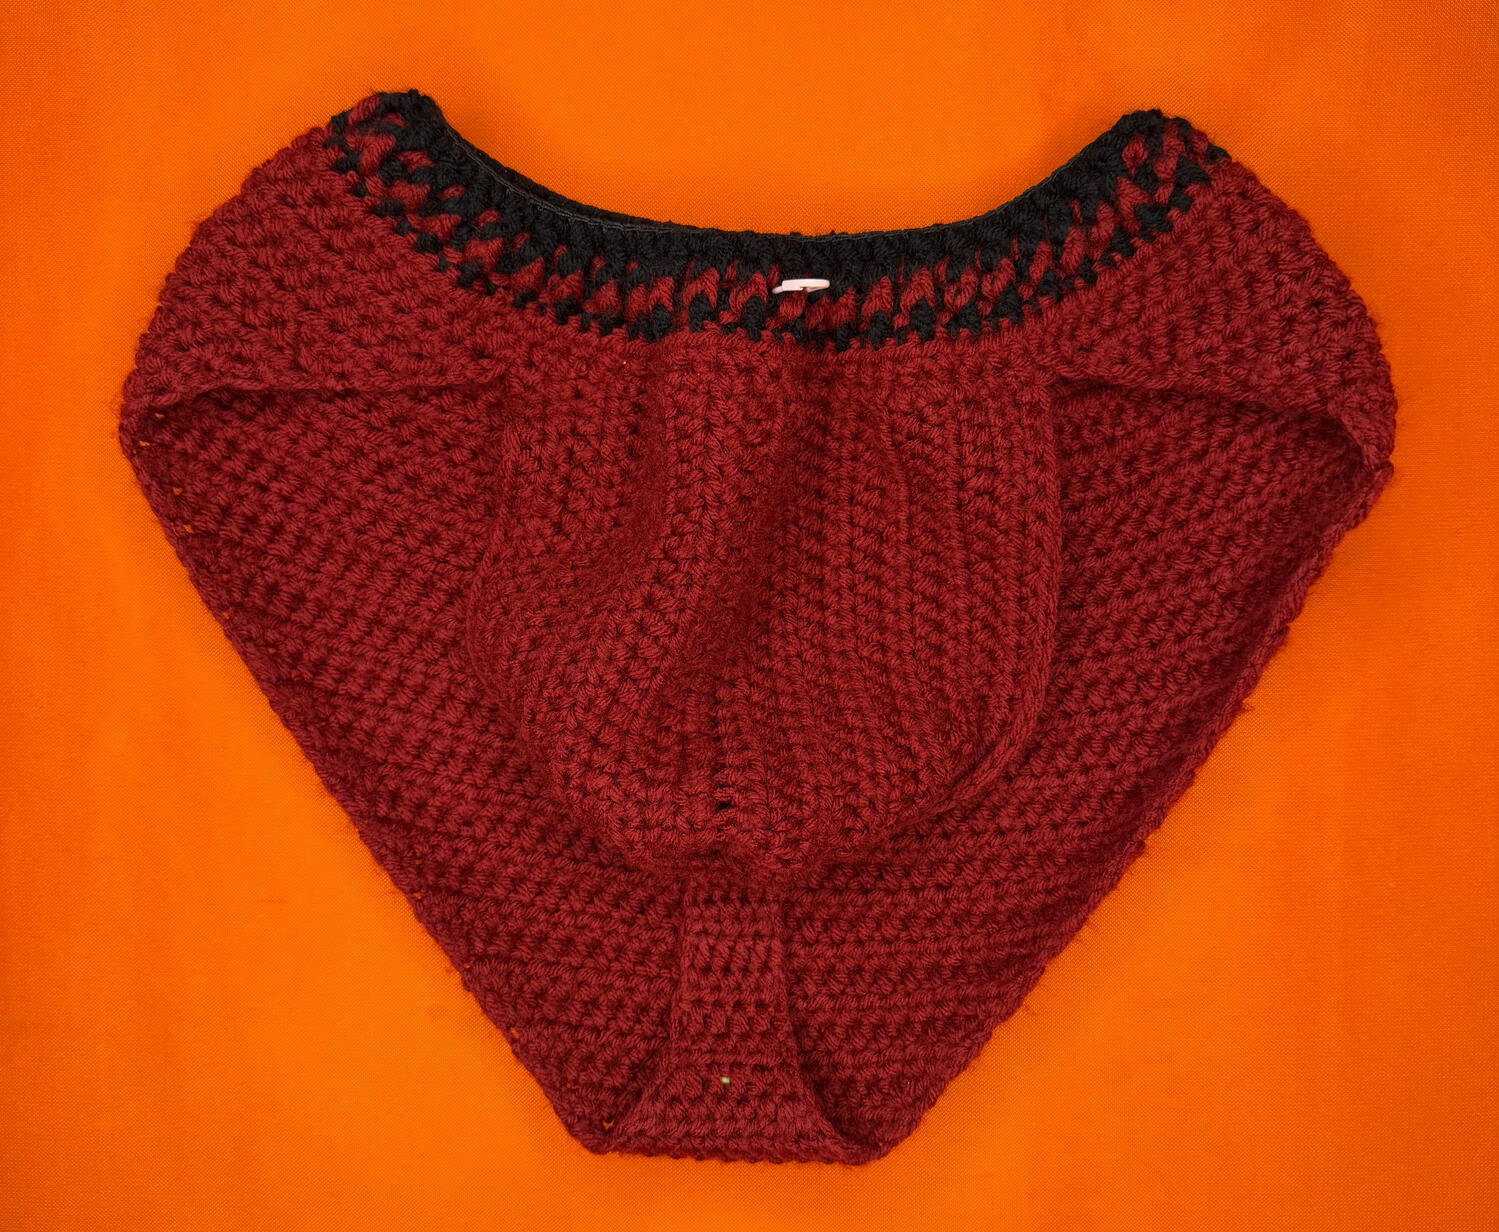
Waistband is done, now tie in the ends.
Leg holes
Elastic yarn and black yarn.Row 1
Around the leg hole, using elastic yarn. In the back, attach yarn, SC around the leg. Then SL ST into the first ST once at the end. Chain 1 and cut a tail to weave in and pull through.
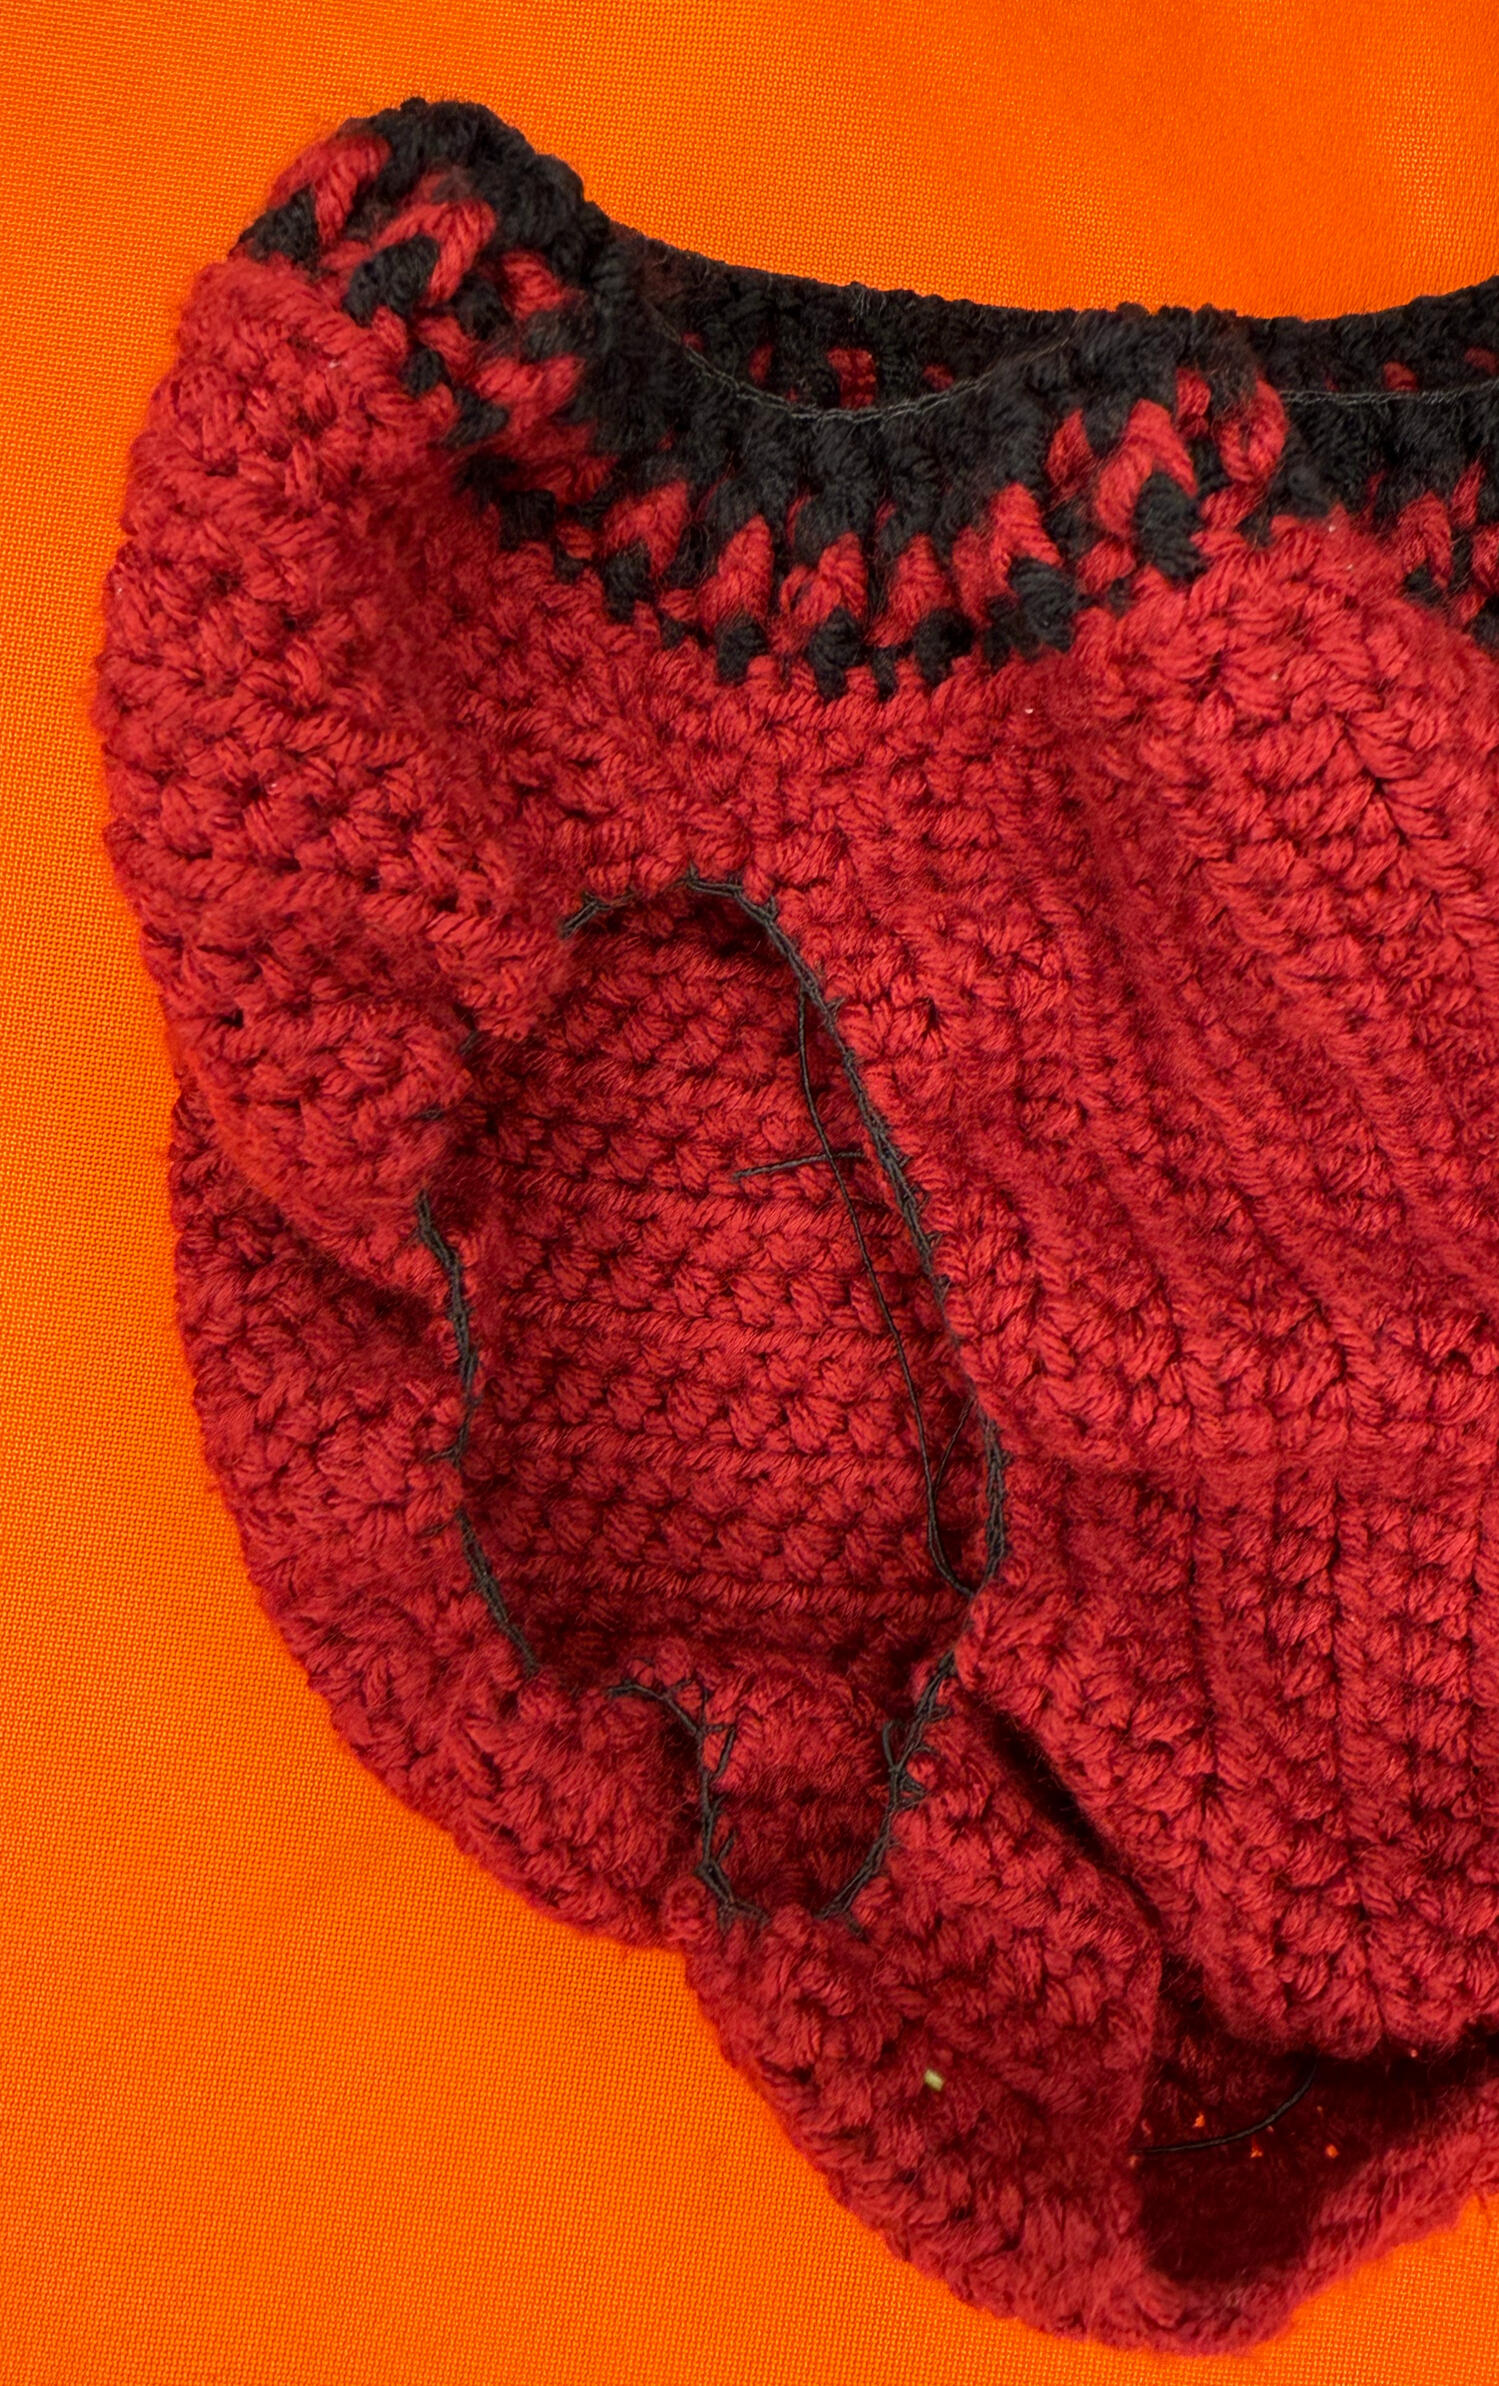
Row 2
Taking the blank yarn, In the back, attach yarn, SC around the leg. Then SL ST into the first ST once at the end. Chain 1 and cut a tail to weave in and pull through.
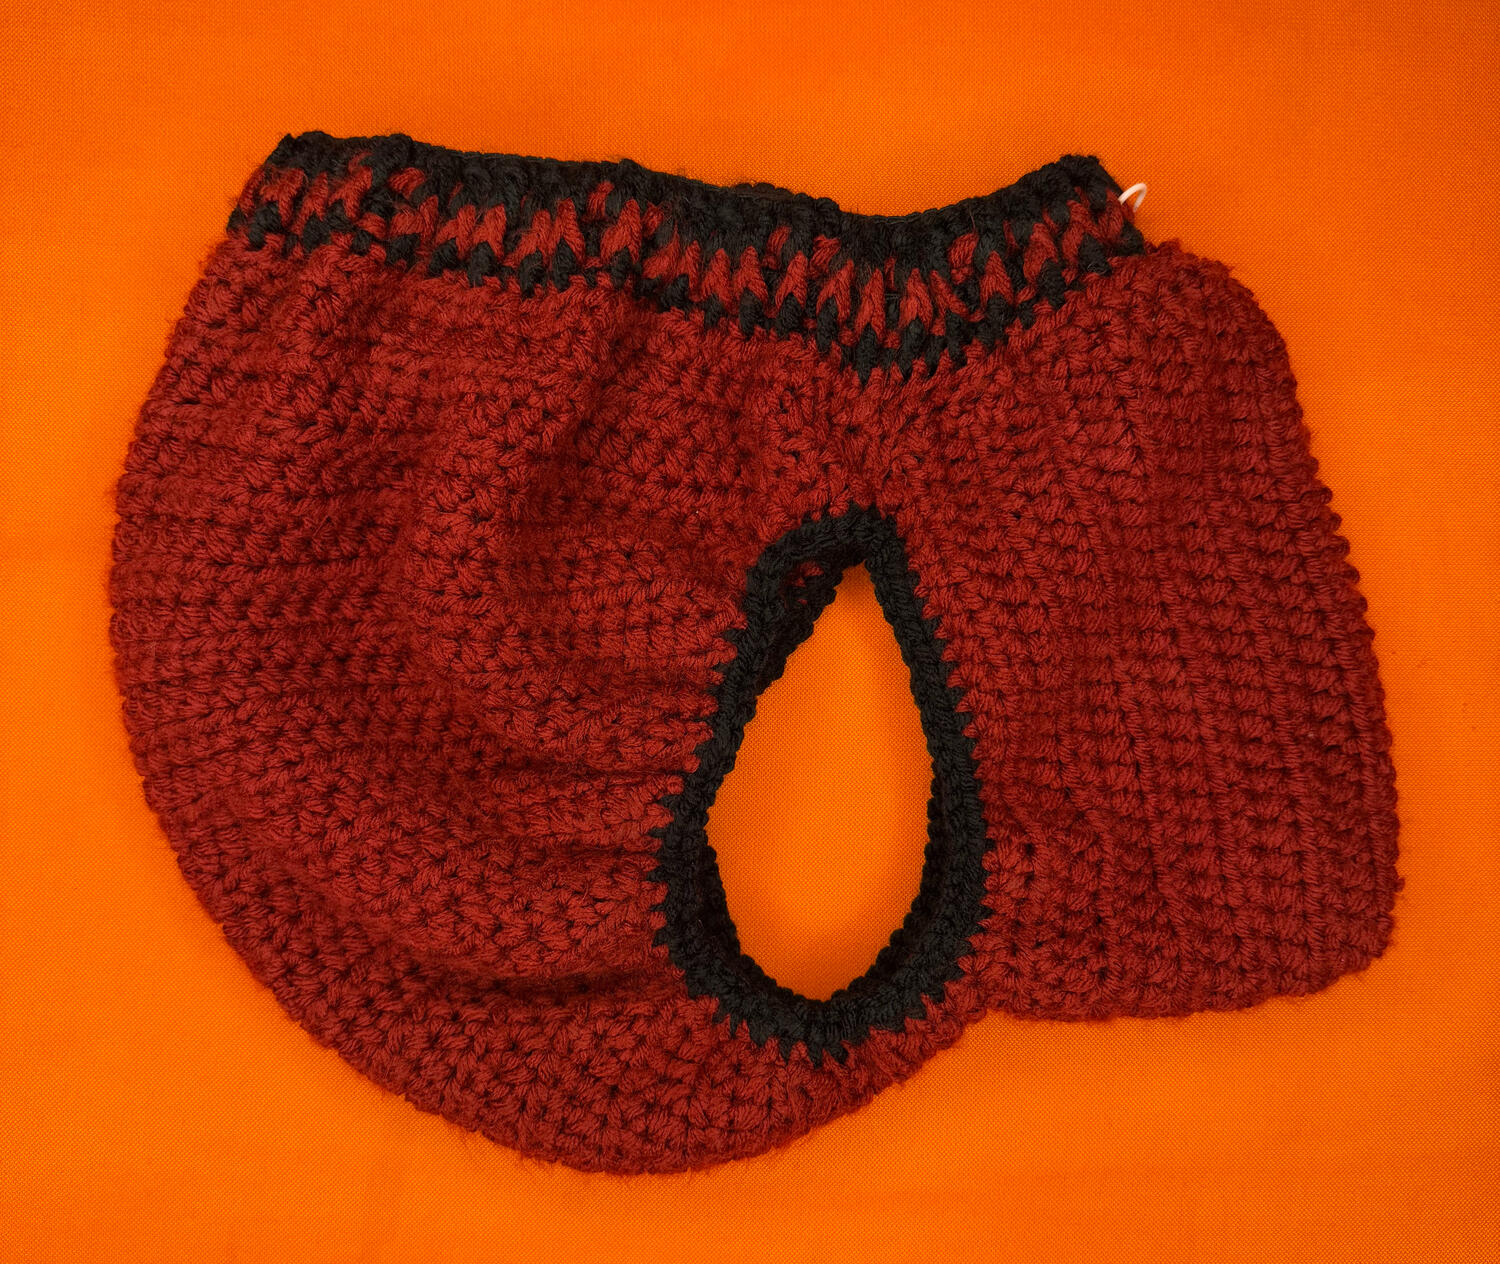
Repeat for both leg holes.
Tie in all ends.
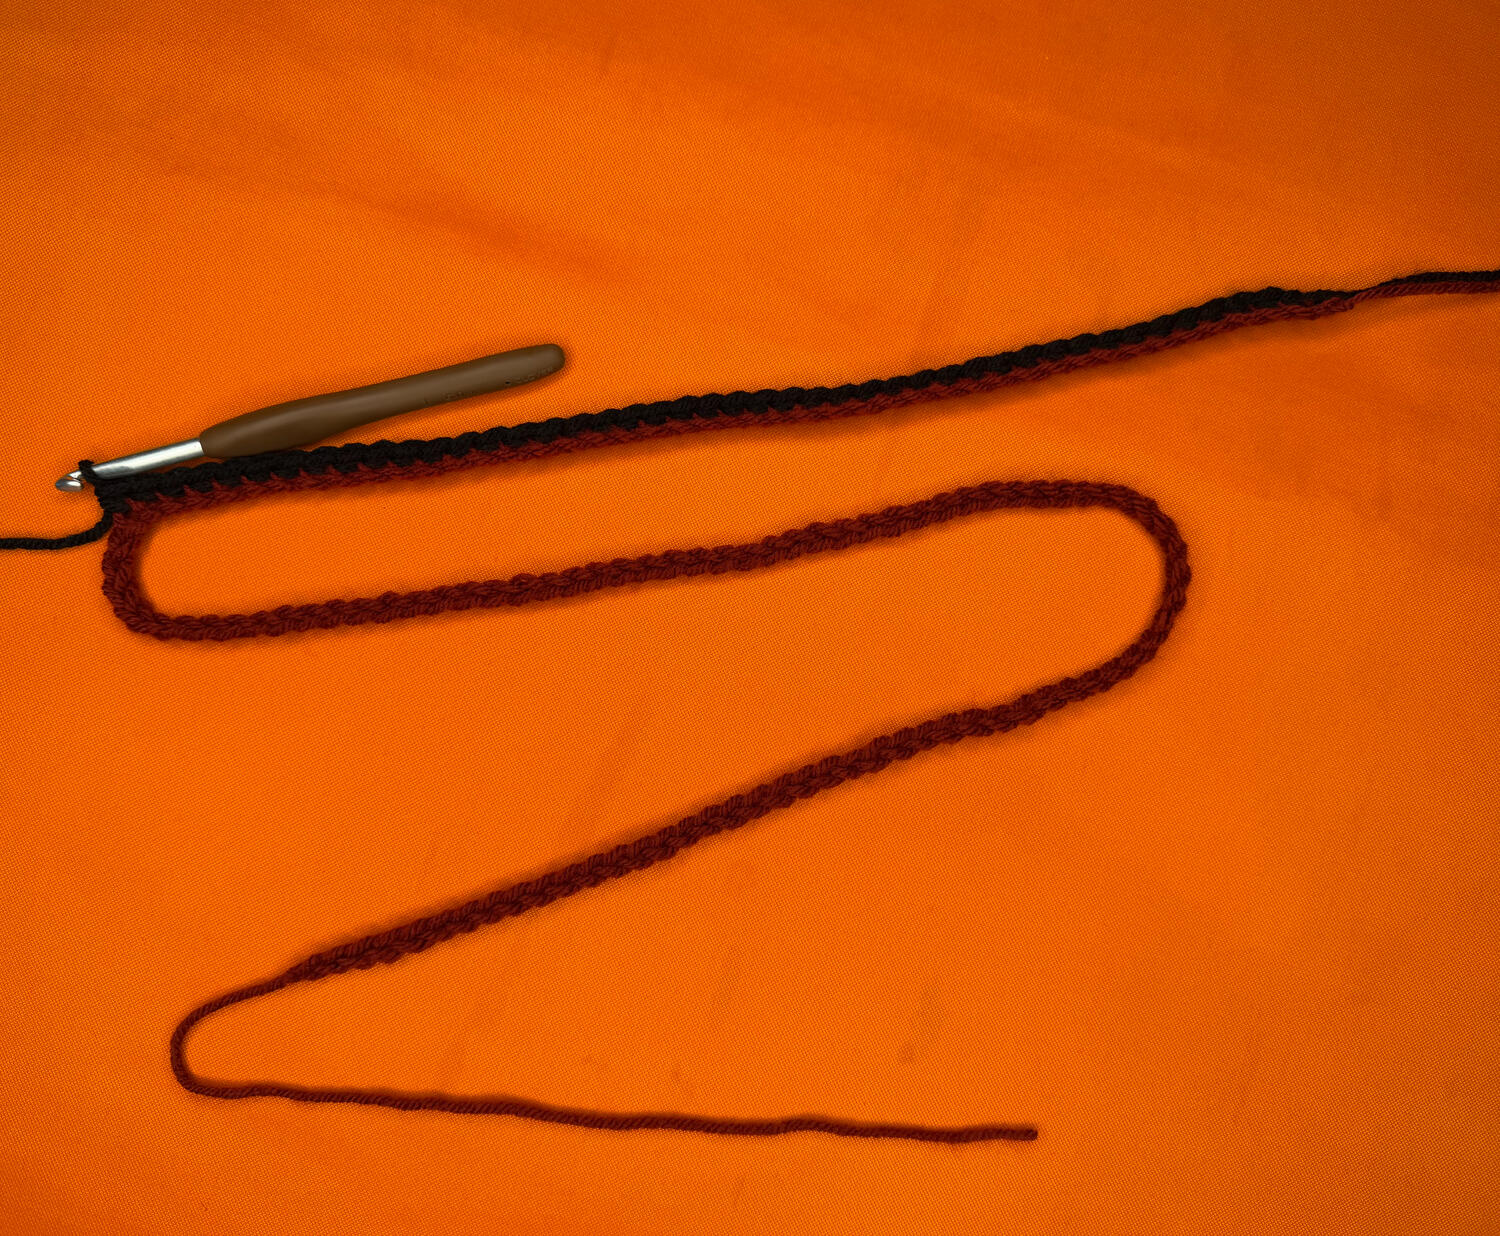
Draw string -
Using red yarn Chain 130. Chain 1 more, cut end and pull through.
Taking the black yarn, SC down the chain. Leaving a red and black tail on each end.
Wave through the red row on the waistband.
AND YOU'RE DONE!Also, if you do make this, please let me see it tag me on Instagram @king_Norb. I would love to see if it works for others.